DC-DC Dual Battery Setup
Summary
How to choose and install a second battery in your car or 4WD for camping, or just running a fridge to keep the drinks cold on road trips and site work!
Having an auxiliary (second or dual) battery in a vehicle to run things that are not part of the vehicle is becoming increasingly necessary as we make more and more use of extra gear. This includes running car fridges or external LED lighting, down to power tools and even lots of smart devices. Whether you are taking the family on a road trip, or using the ute for site work, or even just have a need to move a lot of cold or frozen stuff around, then a second battery is for you.
We look at the process of installing a second battery, from choosing a battery, to how to charge it, to the physical installation process. We will cover battery types and why you need a DC-DC charger. We will also look at wire size, battery size, and other things you can add on like voltmeters and different plugs and sockets to make your second battery practical.
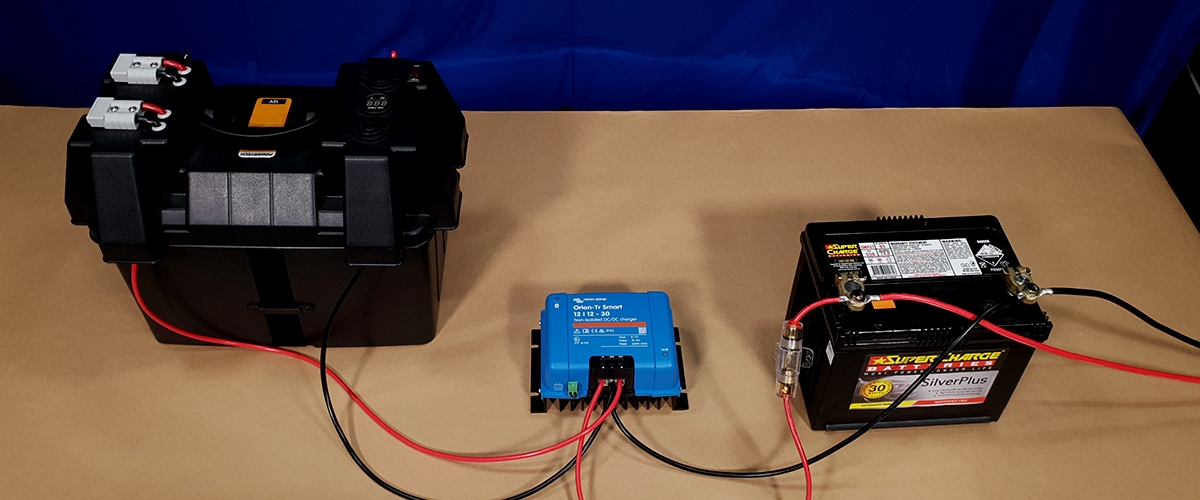
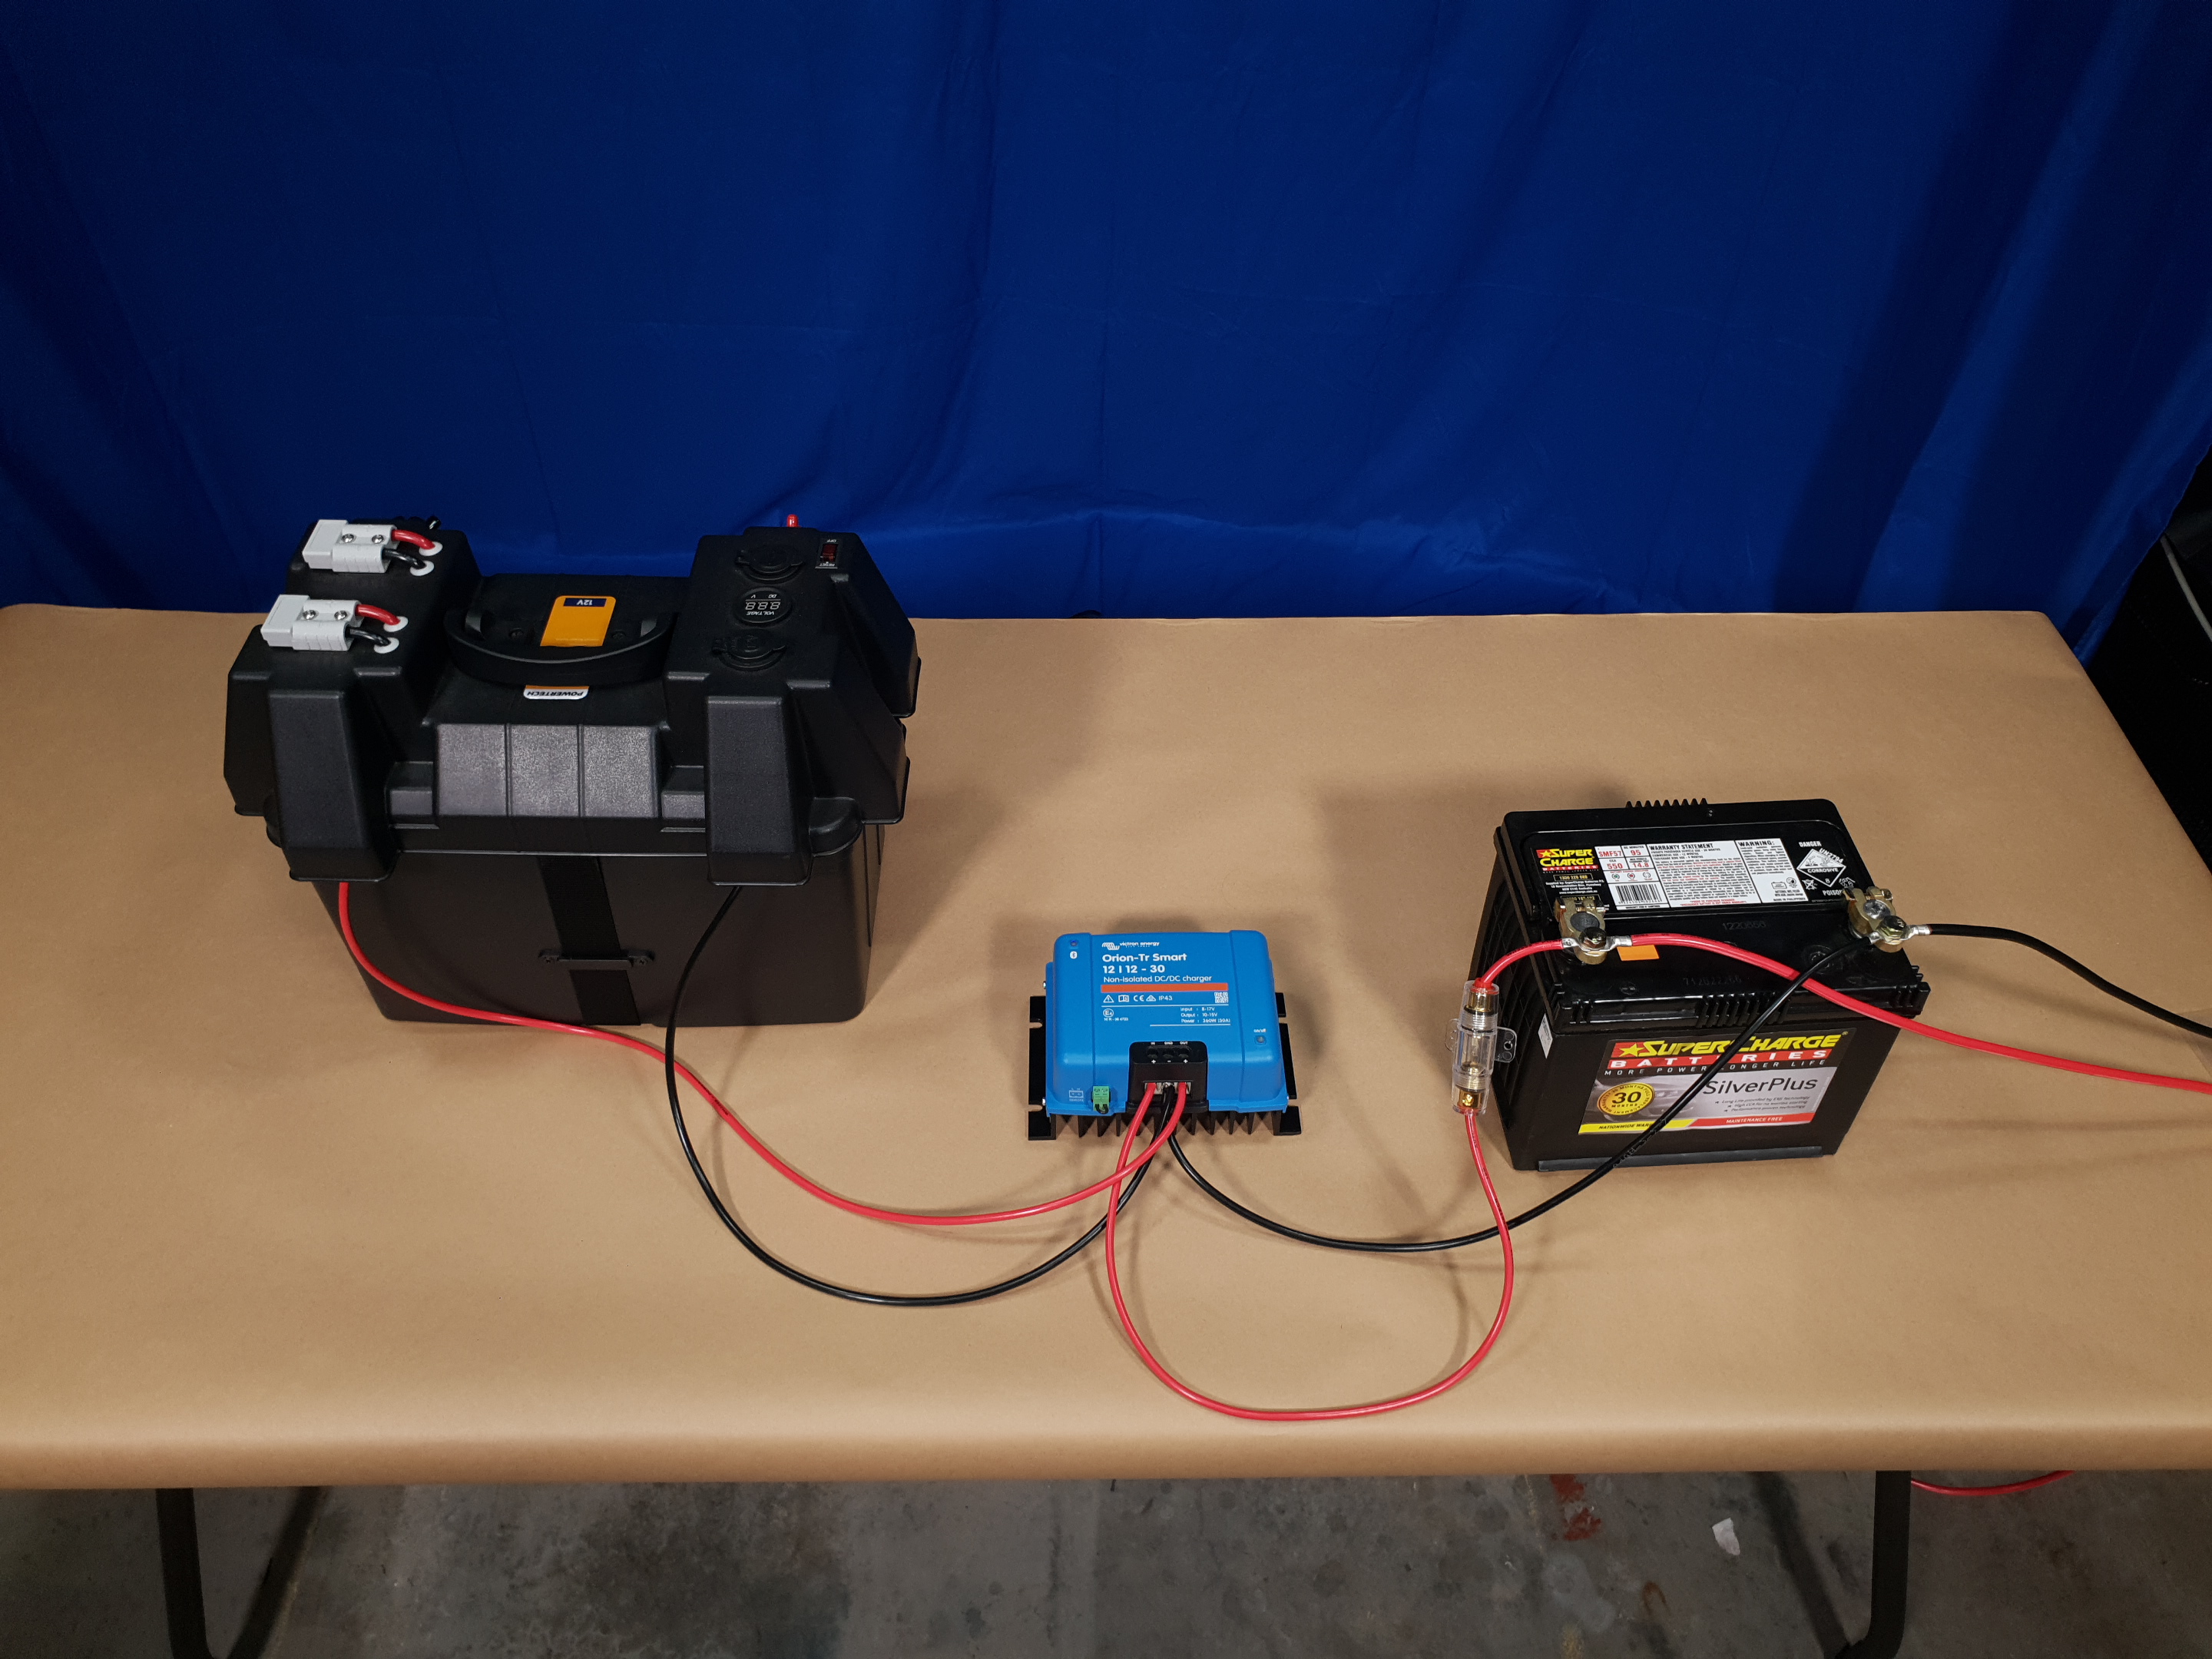
Last of all we are going to demonstrate the general procedure for installing an auxiliary battery, but for photographic reasons, we are doing this test on a workbench. We have a plain car battery to represent the one in a normal vehicle, with wires to simulate the existing vehicle wiring.
The process is the same, but the distances between some things and the length of wire will all change. This example has the auxiliary battery less than two metres away from the primary, which is rarely the case. Everything we do applies to a real install except the wire lengths and the distance between things.
Materials Required
| 1 | 12.8V 100Ah Lithium Deep Cycle Battery | SB2215 |
| 1 | Powertech Battery Box with Power Accessories | HB8504 |
| 1 | Gold Fuseholder With Mounting Bracket | SZ2060 |
| 1 | 5AG Gold Fuse 40 AMP | SF1974 |
| 1 | Victron Orion-Tr Smart 12/12-30A (360W) Non-isolated DC-DC charger | MB3942 |
| 10 | Red 10GA OFC High Current Power Cable - Per Meter - Sold per metre | WH3068 |
| 10 | Black 10GA OFC High Current Power Cable - Per Meter - Sold per metre | WH3069 |
| 1 | Universal Bolt Type Battery Terminals | HC4034 |
| 1 | 8mm Non-Insulated Eye Terminal 10mm2 8AWG Pack of 8 | PT4936 |
| 1 | Ratchet Crimping Tool for Non-Insulated Lugs | TH1847 |
Table of Contents
- Summary
- Why an Auxiliary Battery
- Terminology
- An Auxiliary Battery System Overview
- What is a DC-DC Charger and Why Use One?
- What Is a Deep Cycle Battery?
- Battery Options
- Lithium Versus Lead-Acid - Advantages and Disadvantages
- Battery Ratings
- Where to Put the Battery
- Mounting a Battery
- Battery Trays
- Enclosed Batteries
- Choosing Wire Size
- Chassis Negative Versus Negative Wire
- The Importance of Using Fuses
- Adding Power Management Hardware
- Wiring up your Auxiliary Battery
- STEP 1: Install the battery into battery box
- STEP 2: Wire up the DC-DC Charger
- STEP 3: WIRING DC-DC Charger to the Battery
- A Note on Crimp Connections
- Improve Wiring Connections with Heatshrink
- A Bit of Maths When Working With Power
Adding an auxiliary battery to your vehicle is simple enough. We will explain these steps in more detail but for those who want the express version:
Step 1. Choose a DC-DC charger.
Step 2. Choose a battery
Step 3. Choose a way to mount or hold the battery
Step 4. Choose your fuses or circuit protection
Step 5. Choose your distribution system for using the battery
Step 6. Choose your wire.
Step 7. Mount the battery
Step 8. Mount the DC-DC charger
Step 9. Make the connections.
Step 10. Turn it on!
An auxiliary battery is one installed in a vehicle to run things that normally, the vehicle's electrical system would not run. In particular, when the vehicle is stationary and not running, the auxiliary battery can run loads like fridges, or lighting, or devices, even cooking appliances, without draining the starter battery. In addition, not all batteries are created equal and the starter battery in the car is not meant for running loads like this. An auxiliary battery is almost always a 'deep cycle' type and, therefore, can run things for much longer than the car starter battery. On top of that, if the second battery goes flat, you can still start the car!
Having more battery life is not the only reason to install an auxiliary battery. In many cases, the vehicle's wiring was never designed to cope with more load than the things factory-fitted to the car. There might be a cigarette-lighter socket in the rear boot or even in the back of the centre console for the back seat area to use, but these are still only useful for when the car is running, or for very light loads for a short time after it is turned off. Most accessory outlets and circuits in most vehicles are switched off with the car. If you want to run things beyond that time window or that draw more power than the car electrics were meant for, you will need an auxiliary battery.
Throughout this article, you will read some terms that some people are not familiar with. It is difficult to give a meaningful explanation without them. So you can follow along, here is what they mean.
Voltage: Voltage is a measure of how much 'potential' an electrical charge has. If the charge was water in a pipe, the voltage would be the same as pressure in the pipe. We show it with the symbol 'V'. For example, a 12V battery has half the 'pressure' as a 24V battery if it were water in a pipe, no matter the physical size of the battery.
Current: Current is how much electricity is moving past a point. It is actually a measure of the number of electrons (the particles an electric charge is made up of) and so it changes. Current is measured in 'Amperes', which we shorten and pronounce as 'Amps' and show with the symbol 'A'. It is the current in a wire that generates heat and can 'overload' a wire that is too small.
Voltage Drop: Just like a really long hose, wire has 'resistance' to the flow of electricity. The longer the wire, the more voltage is lost along it. Bigger wire can solve the problem to a point but not completely, and there are practical and financial limits to how big you can make the wire. So, you might start with 14.4V at the battery, and only have 12.5V at the back of the car!
In the relevant sections, we will explain battery capacity, Amp Hours (Ah), and any other terms needed. At the end of the article, we have even shared a bit of maths. Don't be scared off by that, it's pretty basic but very useful electrical maths. We use the word 'power' in a pretty loose, general sense, but it has an electrical meaning that is very useful when figuring out what size battery to buy.
An auxiliary battery is usually (but not always) placed in the rear of a vehicle. Some are placed in the engine bay, particularly when they are for running winches and compressors, or when they are being used to power dedicated 'engine off' accessory circuits like in campers or even just cars where people want to run other gear like the sound system for hours after the engine is off. That kind of vehicle rewiring is well outside of the scope of this article, however.
The system consists of a battery, a charger for the battery, wiring to connect it, and some sort of outlets to make use of the power in the auxiliary battery. The exception here is those second batteries fitted just for running winches or compressors: These are generally hard-wired in, or at least use battery clips directly on the battery when needed. Battery mounting also forms part of the system, and can be a battery box or a battery tray. In the case of the battery box, some have outlets built in and some do not.
The battery has to be charged from the vehicle's charging circuit, which involves the alternator attached to the engine, which produces electricity. This is fed to the regulator, which is designed to keep the electrical output at a maximum level (14.4V) and also charge the battery. In many cars, this is one and the same function. In more modern vehicles, sometimes the charger is a separate unit, with the rest of the vehicle's electrical power demands being met by a regulator alone.
Either way, the auxiliary battery needs to be charged off this circuit. There are four main problems with this. The first is that the regulator is designed to charge flooded or wet lead-acid batteries. These cope with quite a rough and unsophisticated charge, which is rarely suitable for deep-cycle batteries. In addition, the sensing circuit which determines when a battery is charged was never designed to have another battery loading it up. They cannot figure out when two batteries are charged, especially because they charge at different rates.
The third problem is that the vehicle battery should always be charged first, so it can always start the car. The auxiliary battery should be charged after. The vehicle's inbuilt charger has no way to do this. The fourth problem is voltage drop. The voltage will fall across the length of wire that runs to the back of the vehicle, even if reasonably large wire is used. This can also affect charging and prevent the auxiliary battery from being charged fully. As part of this, many batteries will take quite a lot of current when charging, if the current is not regulated, and this causes further voltage drop. Having some way to limit the current is essential.
Some of these problems can be dealt with using a voltage-sensitive relay (VSR). This device is fitted between the primary (starter) battery and the auxiliary battery. It senses when the primary is charged, then diverts the charge to the auxiliary. While they do solve the problem of the starter battery needing to be charged first, and of having two batteries connected to the car's inbuilt charger sensing circuit at once, they do nothing to fix voltage drop or change the way the battery is charged. To do things properly, you need a DC-DC charger.
A DC-DC charger is designed to charge deep-cycle batteries from a car circuit. On the input side, it can take a voltage that is both higher or lower than the charge voltage needs to be. Many work from voltages below 10V, to voltages as high as 20V! This means they can cope with voltage drop along a cable, or a solar panel input. Internally, they change this voltage to what it needs to be to charge the battery. In addition to voltage regulation, they limit the current as well, to help avoid battery or wiring damage. Some have a dedicated solar input as well as the input from the vehicle's electrical circuit, but some do not.
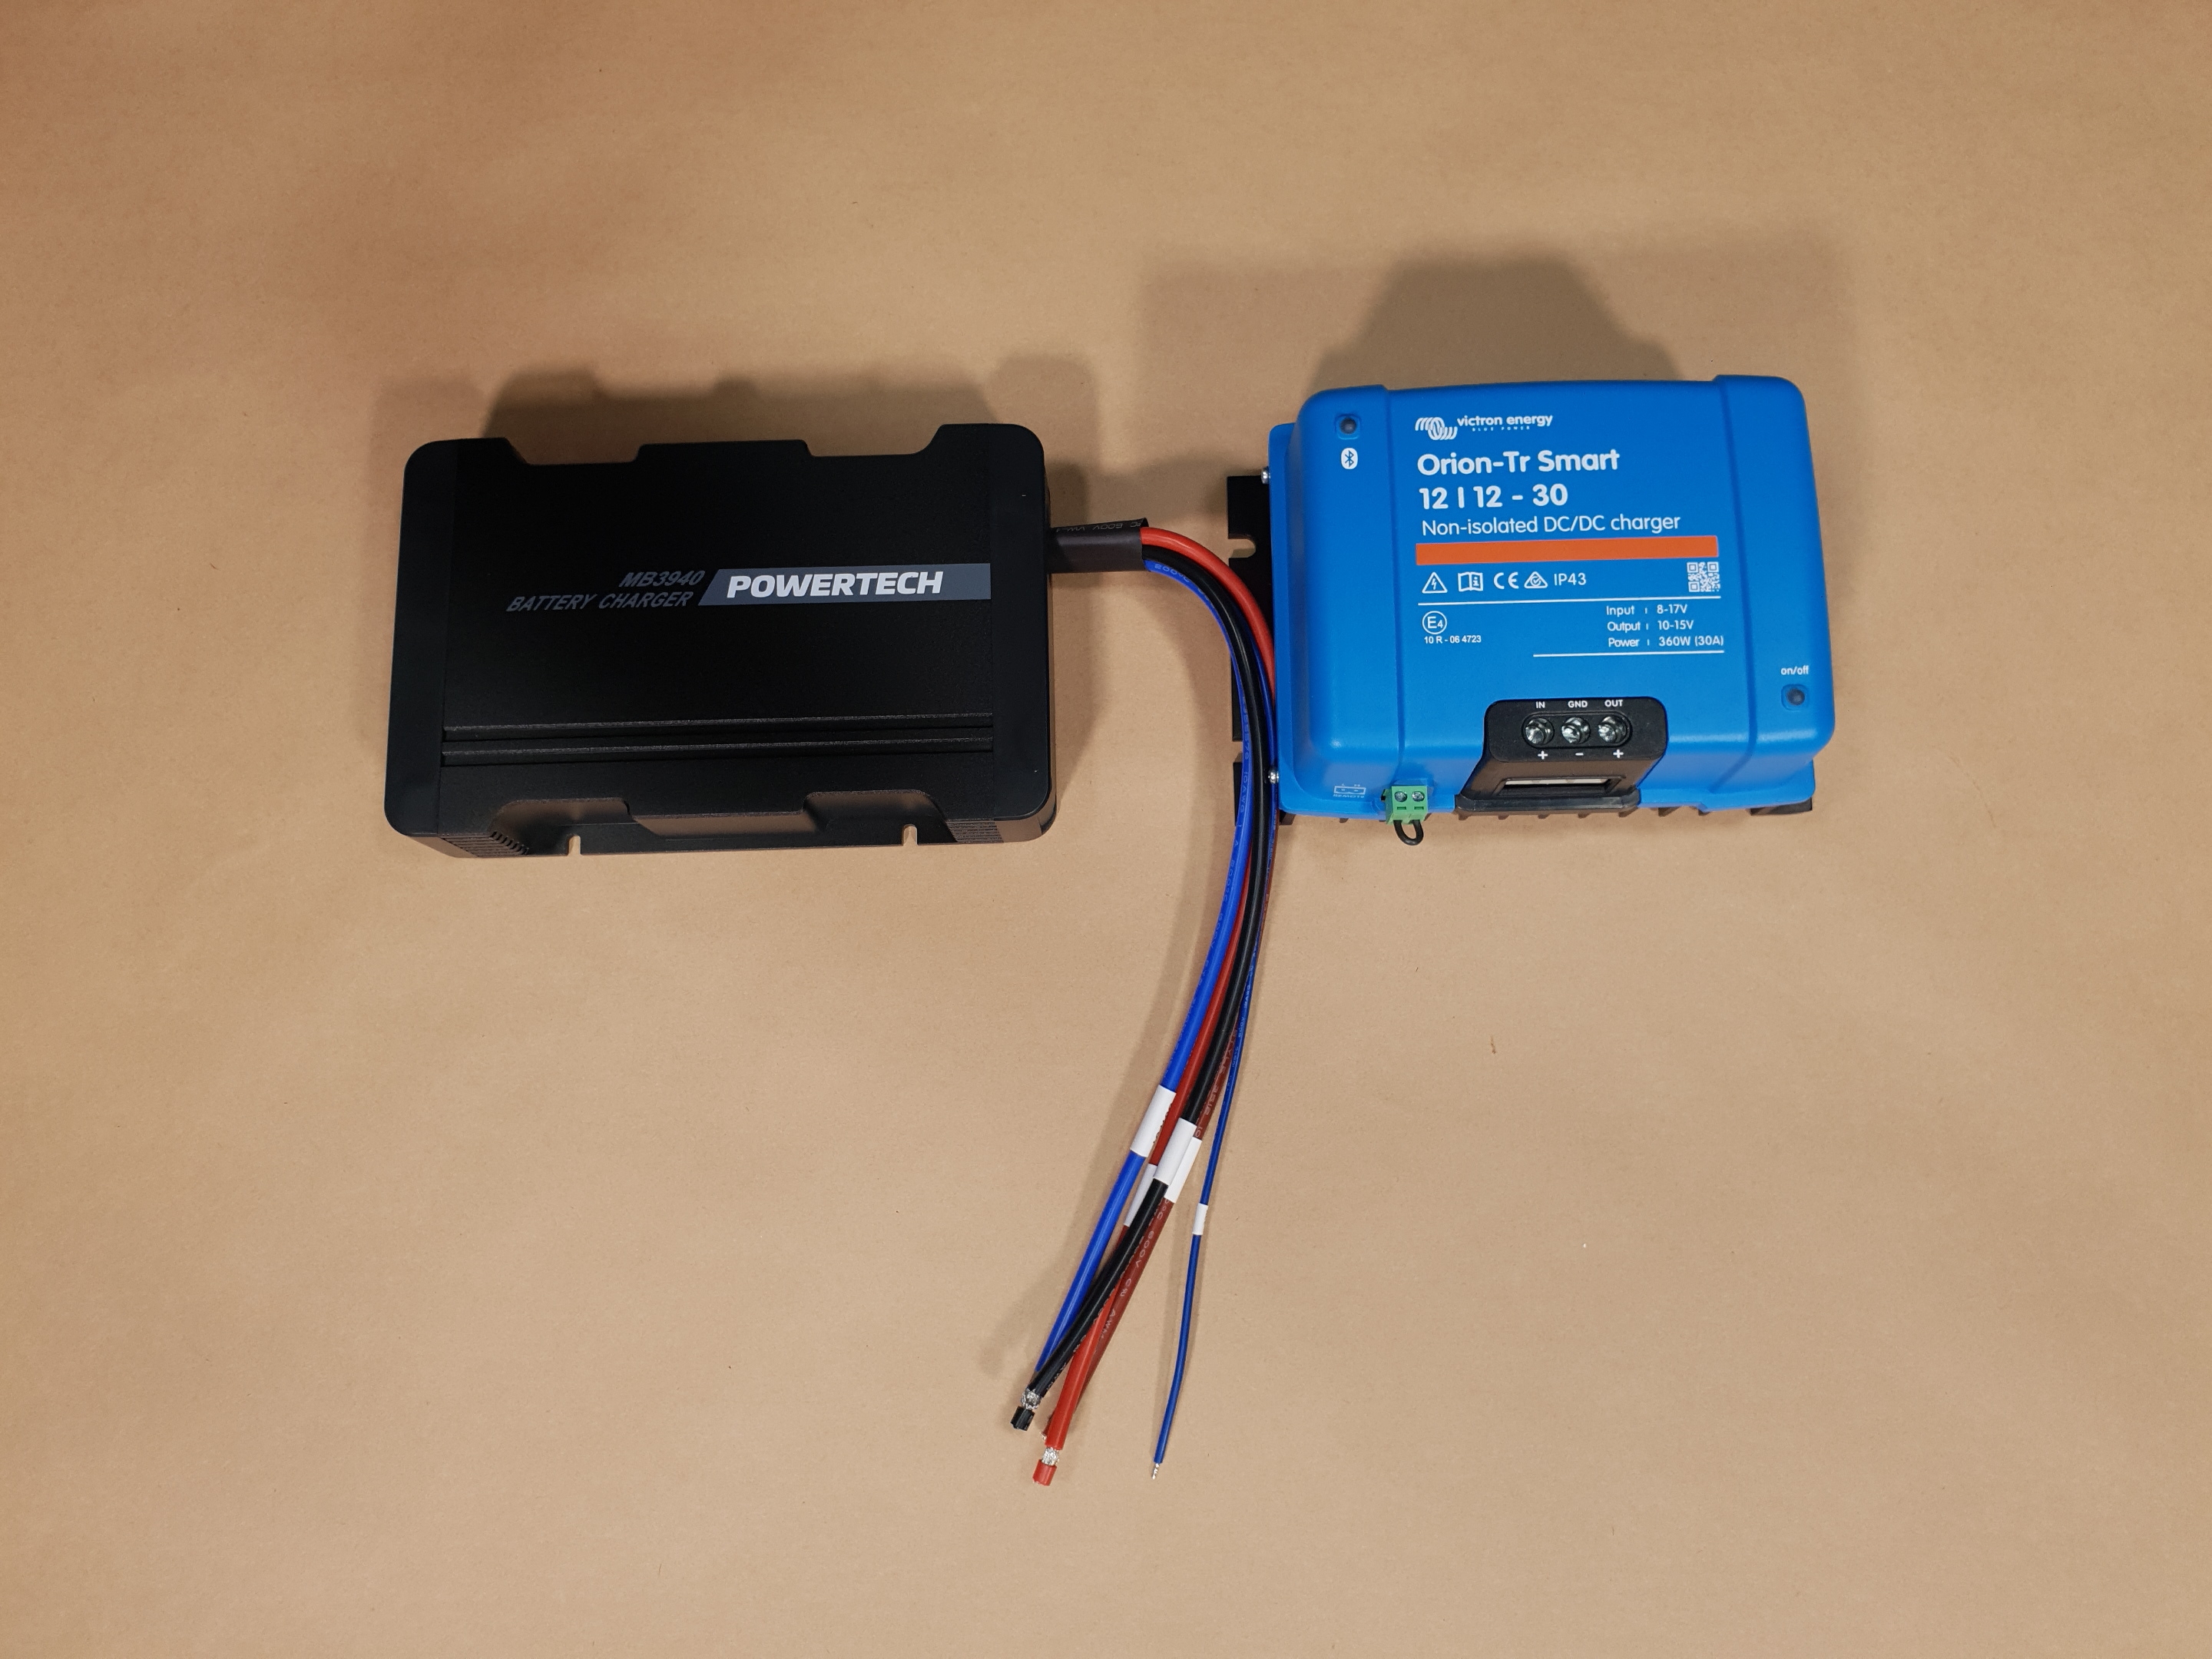
On the output side, a DC-DC charger has a much more sophisticated charging system than the one in a vehicle to charge the starter battery. This is far better for looking after deep-cycle batteries of all sorts. DC-DC chargers generally have a carefully pulsed charging output to the battery to get maximum charge into it, as well as staged charging to reduce the charge as the battery gets close to full. This is good for battery health and lifespan. Most DC-DC chargers also have different modes or settings for different deep-cycle battery types, because different battery chemistries (Lithium, Lead-Acid, AGM, and so on) have different ideal ways to charge.
In short, DC-DC chargers are a proper battery charger, while the car's inbuilt circuit is a very rough one. Because of this, they are the best option even if you are mounting your auxiliary battery right next to the starter battery in the engine bay.
As a general rule, mount the DC-DC charger as close as possible to the battery that it is charging.
SOME OPTIONS:
The current range of DC-DC chargers and VSRs includes but is not limited to:
- MB3685 VSR
MB3940 Powertech 20A DC-DC Charger
MB3942 Victron 30A DC-DC Charger
Deep cycle refers to how much of the energy stored in a battery can be taken out without damaging it, and also without making the battery unusable. When any battery is used, and stored energy taken out, the voltage of the battery falls. Some batteries can only have a small amount of their energy taken out before the voltage falls to unusable levels. Others can have most of it taken. The basic Lead-acid flooded or wet car battery can only have about 10% of its capacity drawn off before the voltage falls below around 10V, and starts damaging the cells inside.
On the other hand, many Lithium batteries can have 60% or more of their capacity drawn before the voltage falls below a usable level, and even more before the cells are damaged. Some specifically-designed deep cycle Lithium batteries can even be drawn down to 15% of their rated capacity! Lead-acid deep cycle batteries are somewhere in the middle.
The other thing that defines a deep cycle battery is that the voltage stays more level and consistent across the rated amount of discharge, before falling after that, when compared to a regular battery which has a drop in voltage, even slightly, almost immediately.
The numbers vary between batteries, even in the same category. So, when shopping, ask the expert staff about the lowest voltage the battery can be discharged to without being damaged; the amount of the rated capacity that can be used (usually a percentage: No battery can be discharged to 100% of its capacity); and the maximum discharge current, which also varies. While you cannot discharge a wet or flooded Lead-acid battery very far, you can draw a lot of current at once, which is why they are used as starter batteries. You cannot do this with deep-cycle batteries. It is important to know the maximum if you are planning to, say, run a winch off this kind of battery.
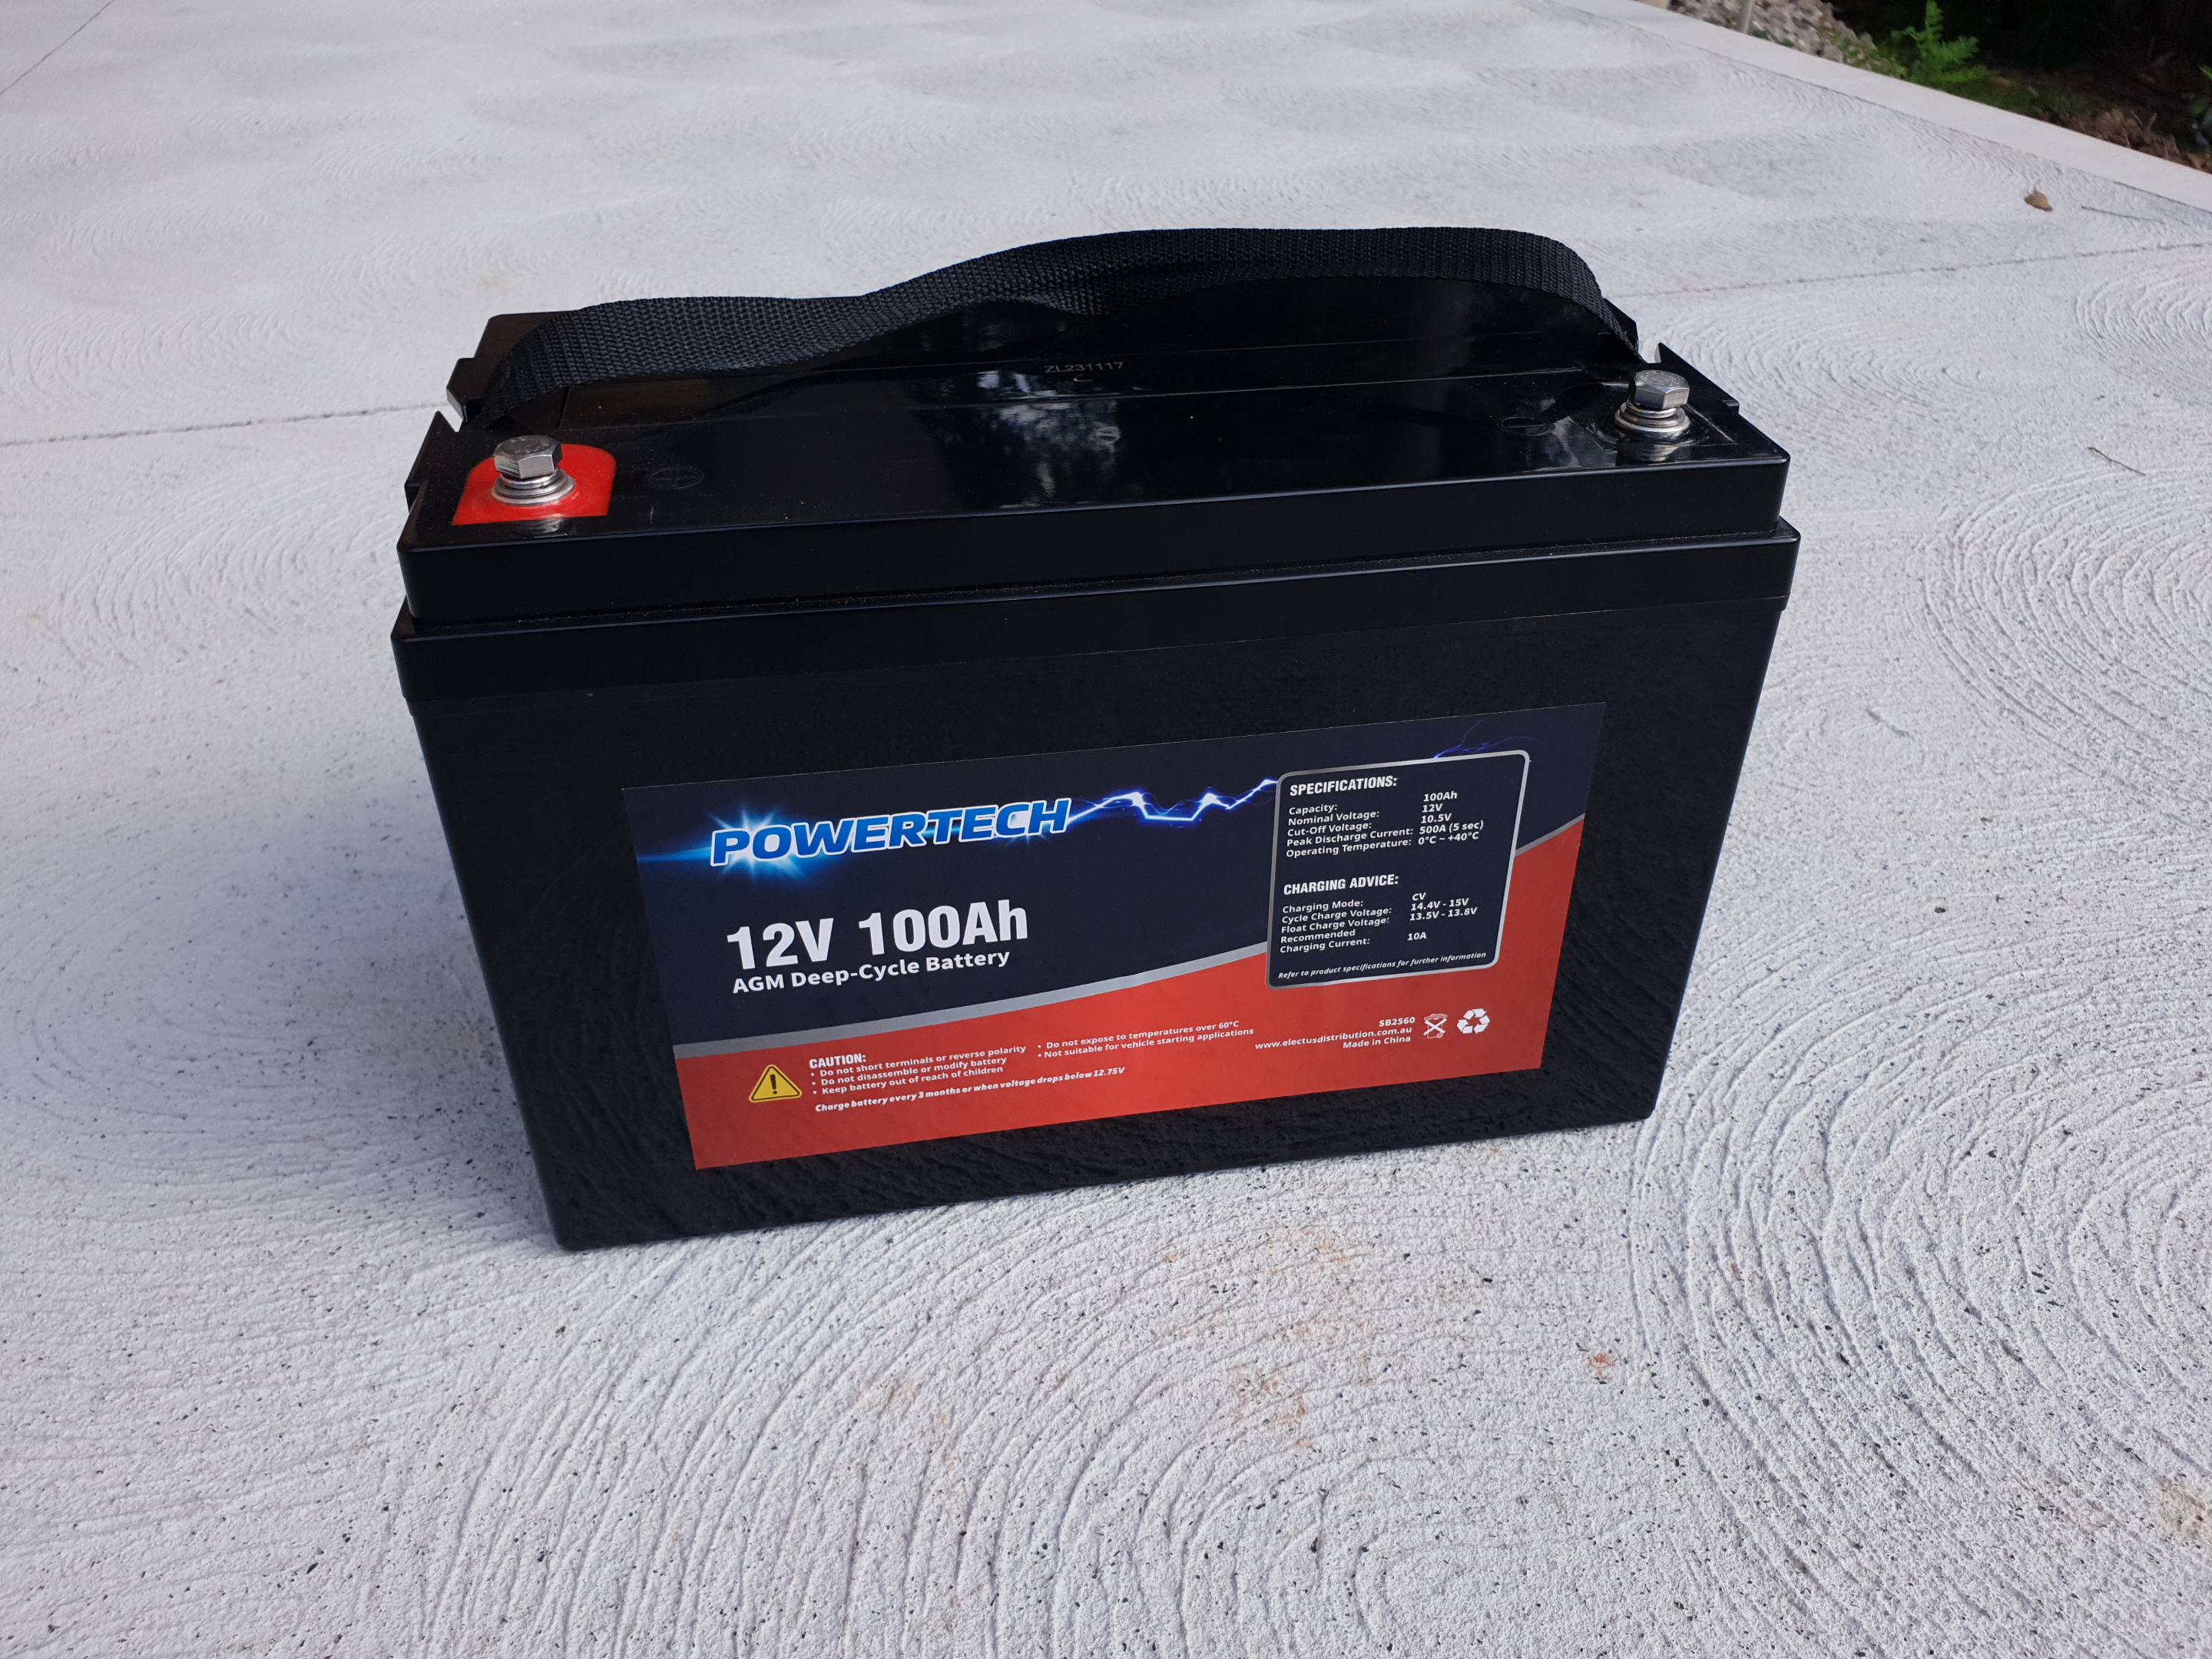
The main choices for storing the electricity your solar panel produces is between a Lead-acid battery, and a Lithium battery. There are subtypes for each, but Lead-acid has the greatest number of variants. The most basic is wet or flooded, where the plates of Lead are bathed in a liquid sulphuric acid. These are regular car batteries and should NEVER be used for camping. They are not deep-cycle, do not actually hold a real lot of capacity, and most importantly, they are dangerous. They can leak easily, and they vent explosive hydrogen when charging. Even the 'sealed' or 'maintenance-free' types used in modern cars vent hydrogen.
The second variety is gel Lead-acid, or Sealed Lead Acid (SLA) batteries. These have a gelled acid, and so cannot spill. They vent less hydrogen, too, but still some. They are still not really suitable for camping, as they are not usually deep-cycle, and those that are are not usually very big. Without going into a big chemistry and physics lesson, there are other reasons gelled batteries are not a great camping option. This is why they are generally found in sizes of 50Ah and under.
Next in line is the Absorbed Glass Mat (AGM) battery. This is a Lead-acid battery where the acid is absorbed into a fibreglass matting between the battery plates. They are spill-proof and vent the least hydrogen, as the fibre structure absorbs most of it. They are almost always deep-cycle, and that is reflected in the battery capacities available: It is rare to find a 7Ah AGM, for example, but quite common to find them in 100Ah and above.
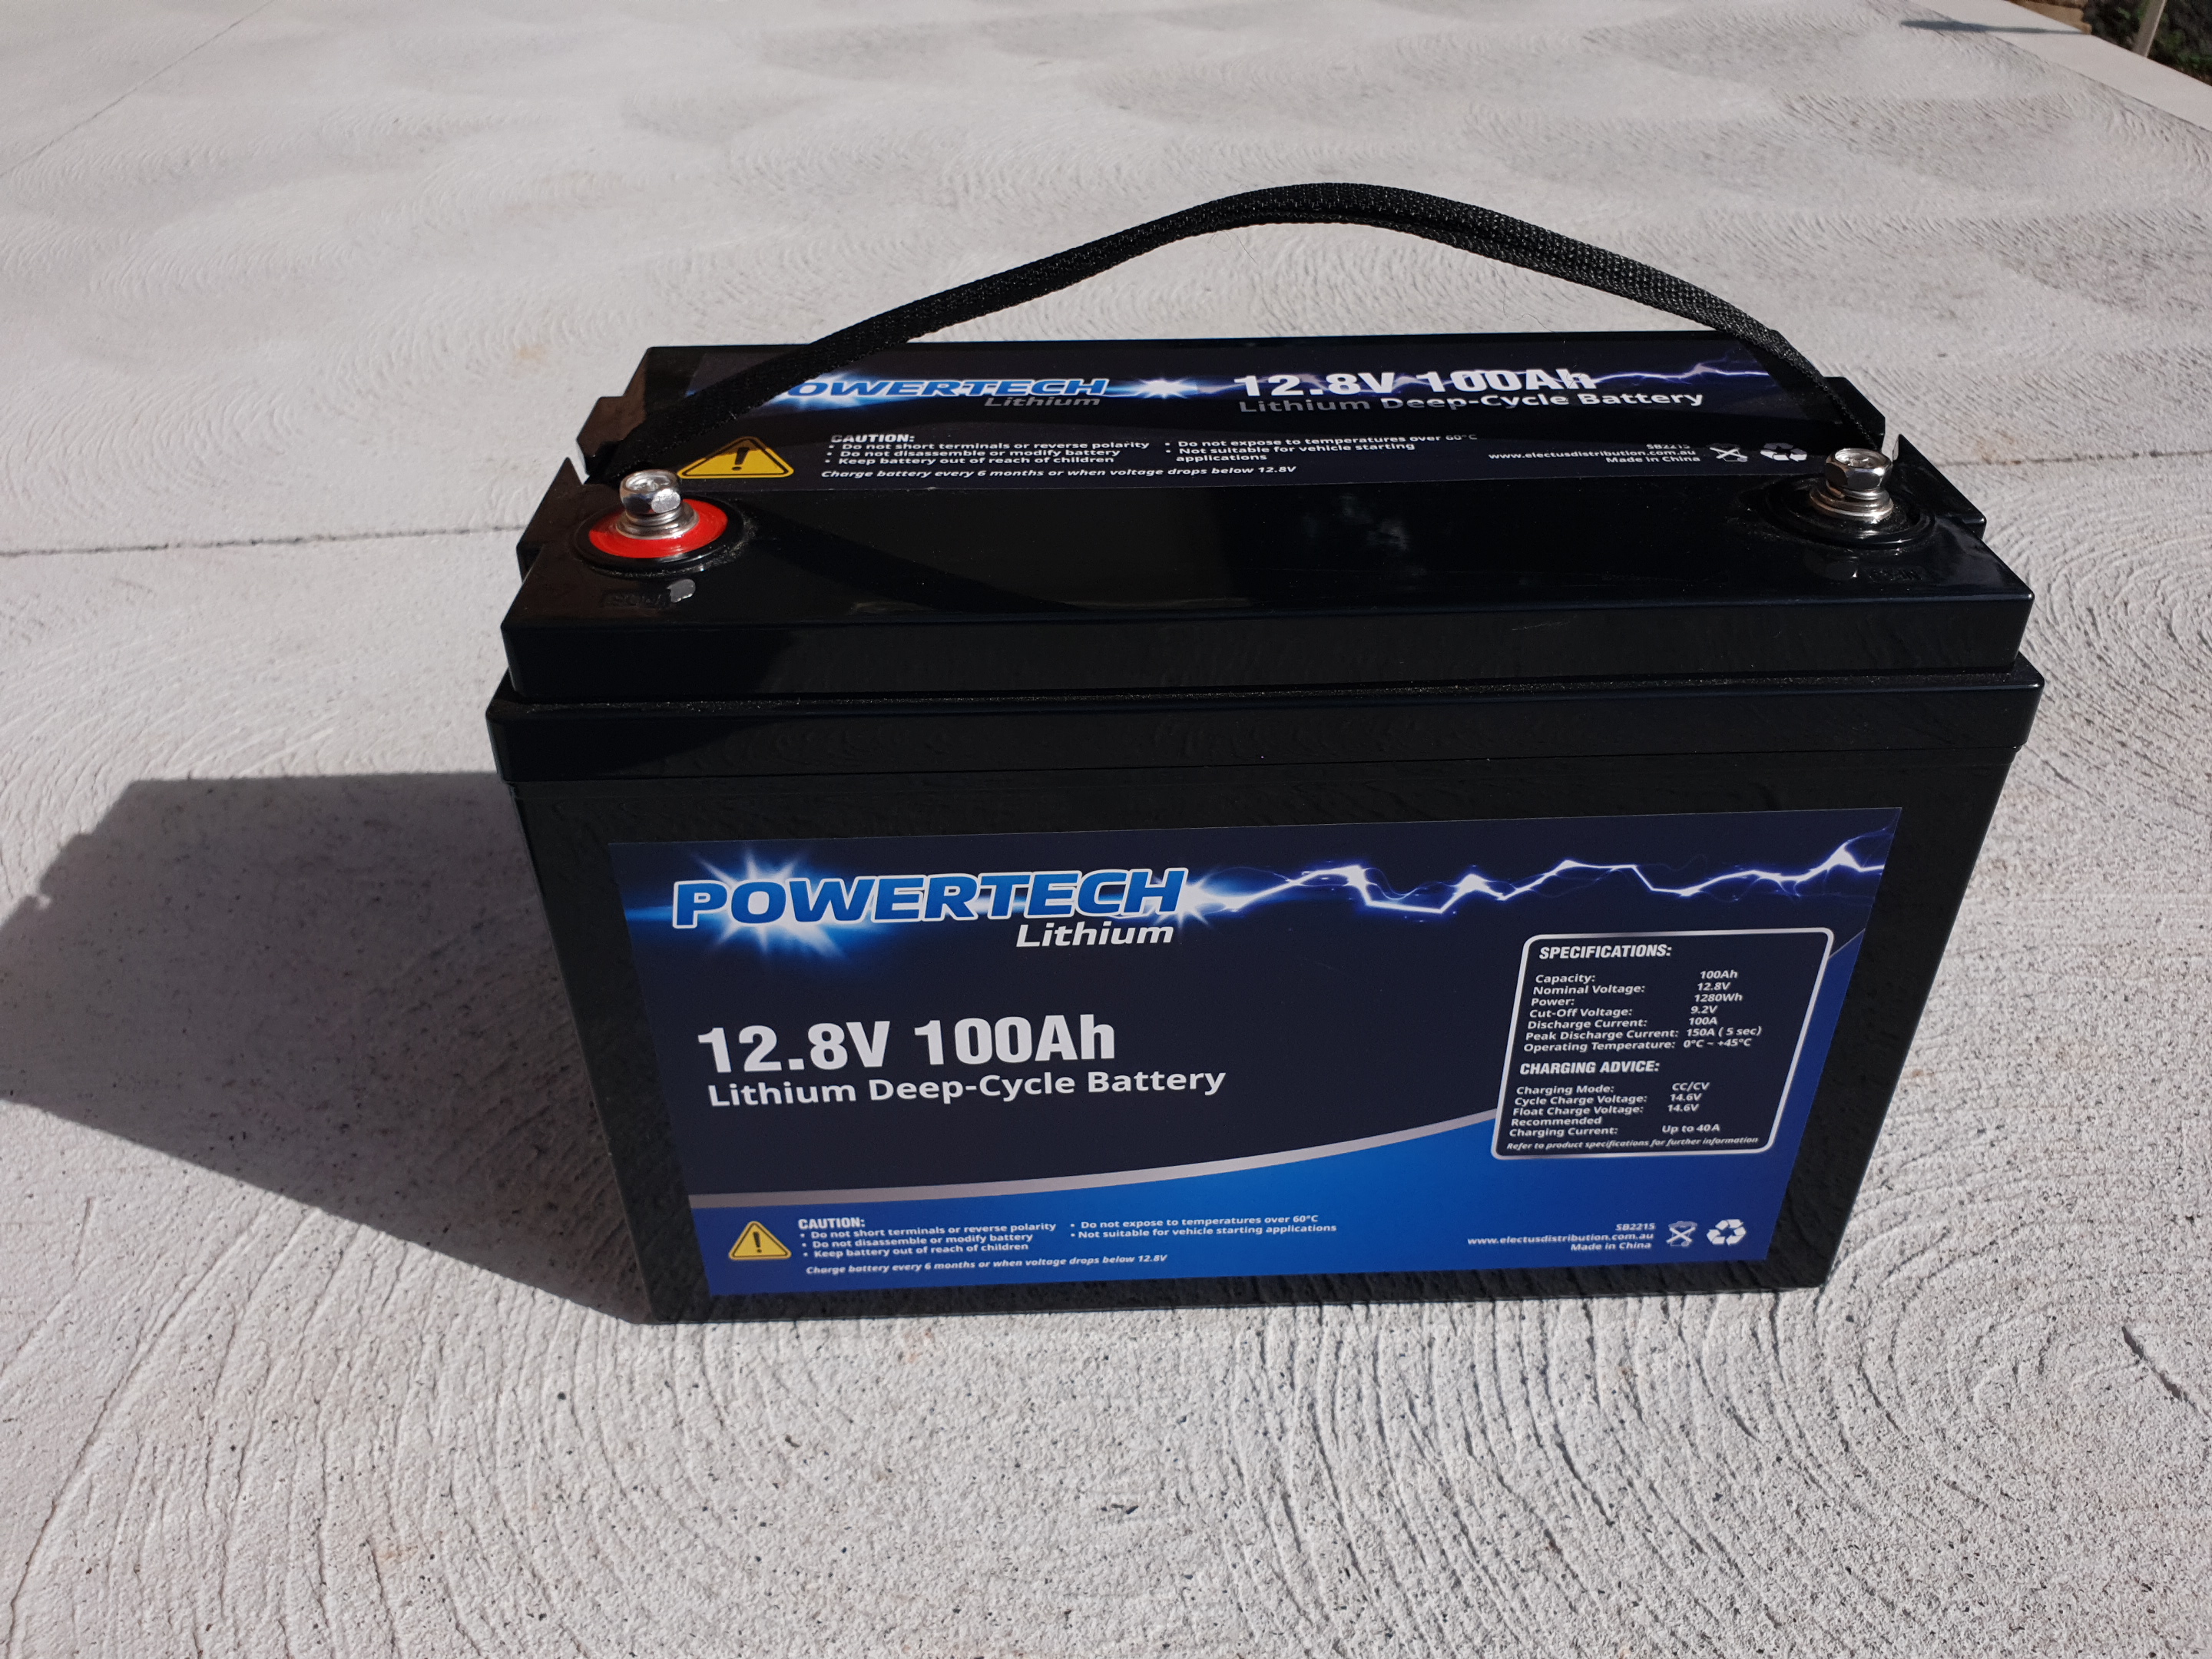
The other main battery type is the Lithium battery. These work on completely different chemistries to Lead-acid batteries, with no acid or liquids involved. While electrically they are similar, the different chemistries do have an impact.
The most common Lithium battery chemistry is Lithium Cobalt. If the battery does not specify its chemistry, it most likely is a Lithium Cobalt version. The major advantage of these is energy density. All Lithium chemistries are much, much lighter than the equivalent Lead-acid chemistry and Lithium Cobalt is the densest of all. That means the amount of energy that a given amount of the material holds. That said, Lithium batteries intended to perform the same roles as Lead-acid batteries are usually made in the same case sizes. That way, they can use the same boxes, brackets, and shelves. So, a 100Ah Lithium battery will be the same size as a 100Ah Lead-acid battery, just much lighter. Inside the plastic box are some foam packers, and space for the battery management circuit.
However, Lithium Cobalt has one major disadvantage: It is very flammable. Even slight impurities in the chemistry can result in fires while charging. The alternative is Lithium-Iron-Phosphate, or Lithium-Ferro Phosphate (Ferro being the scientific word for iron-bearing or iron-based), with the chemical designation LiFePO4. These hold a little less energy for a given mass, but that is less important in a Lead-acid replacement battery than in, say, a mobile phone. For slightly increased weight, you get the very big advantage that LiFeO4 does not burn. You won't even notice the size increase because there is still space to spare in the plastic case!
Lithium batteries are lighter than Lead-acid batteries, and they do not vent hydrogen gas during charging. Almost all Lithium deep-cycle batteries have an internal Battery Management System, which is a circuit that balances the charge between the cells. Lithium 12V batteries have four 3.2V cells in series for a total of 12.8V, and as many groups of four in parallel as is needed. The charging of this requires a sophisticated built-in circuit. So, while it's there, most manufacturers also built in over-discharge protection which cuts off the battery when it is getting flat enough to be damaged, and they also protect against drawing too much current out, too. That means they are virtually short-circuit proof as well. They can be discharged more deeply than Lead-acid batteries, and maintain a more stable voltage across the discharge.
Lead-acid batteries, on the other hand, are raw, meaning the cells inside are connected directly to the terminals you see on the outside. If they are short-circuited, they will discharge enough current to damage themselves and even become a welder: There is no current-limiting. There is nothing to stop them being discharged far enough to be damaged, either, below their safe voltage. They are heavier and even the fully sealed types vent a little bit of hydrogen. You cannot discharge them as far as Lithium batteries, and they are more prone to damage on an internal chemical level.
So then, why would anyone buy one? The simple answer is, they are much more affordable. While Lithium is great and the prices are coming down, Lead-acid is still much cheaper and for many people, it is good enough. This is even more true if you combine it with a battery box or power distributor that has under-voltage, over-discharge, and short-circuit protection built in. You can also add inline plug-in protection units which monitor battery voltage and prevent short-circuits, over-discharge, and over-current, giving you much of the benefit of a Lithium battery's battery management system.
We have mentioned battery capacity ratings a fair bit, in Ah, or Amp-Hours. This is a very misunderstood rating, even among 'experts' like some car battery retailers. It is a standardised way of comparing batteries but it is not a measure of how much energy you can use. It is an industry standard of how much current can be drawn from a battery, measured over twenty hours, and is the same standard for all sorts of batteries, not just deep-cycle camping and car batteries. However, it does not include any criteria for the battery voltage to stay above a usable level. It is calculated until the battery is dead flat, which will kill most batteries, and batteries stop being usable well before they are dead flat. Dead flat is 0V, while most things that plug into an auxiliary battery need the voltage to be above 11V or so.
In addition, the faster you draw current out of a battery, the less real capacity it actually has because of a whole bunch of internal physics and chemistry reasons. So, if you draw 50A out of a 100Ah battery, it will last quite a bit less than two hours! This is both because of the internal battery stuff, and because you cannot use the battery down to 0V like in the testing that gives the Ah numbers. So, even if a 100Ah battery could supply 100A without all that internal science stuff reducing how much it can give at 100A draw, the battery voltage would fall below a usable voltage (around 11V for a 12V battery) well before that one hour was up.
While batteries vary, as a general rule, AGM batteries can be discharged to around 50% of their rated capacity, while Lithium deep cycles can discharge to around 85%. There is serious debate on this topic, but much of it centres around household systems which have a complicated circuit to keep a constant voltage output no matter the battery voltage. The percentages we quoted are for a battery on its own to not fall below around 11V, not the absolute, true 'Depth of Discharge' as it is known.
The best way is to check the data sheet for your specific battery and see at what point the voltage falls too low, or ask our expert staff.
SOME OPTIONS:
The current range of deep-cycle batteries includes but is not limited to:
- SB1680 75Ah AGM
SB1682 100Ah AGM
SB1684 150Ah AGM
SB2215 100Ah LiFePO4
SB2217 200Ah LiFePO4
The two main places you can install an auxiliary battery are in the engine bay, or in the rear of the rear of the vehicle, somewhere in the boot or tray, as relevant. With vans, the options are generally underfloor, engine bay, or anywhere in the cargo area that you can fit it! Where to put your battery is a matter of end-use as much as it is about where the space is.
If you need to connect lots of different temporary things, like camping lights, chargers, smart devices, and so on, then the rear of the vehicle makes the most sense. This way, all of the outlet sockets can be wired with short runs to the battery, or you can buy a battery box that has them on it already.
If the battery is to be used for winches and compressors, then under the engine bay may be the better option. These are often mounted in the engine bay too, and often in a fixed wiring arrangement. Mounting the battery here means shorter wiring runs, and added convenience.
You can mount a secondary battery in the engine bay and run things in the rear of the vehicle, but it means a lot more wiring. Our old friend, voltage drop, comes into play again, too. It can be done, but you will have to choose big enough wire to handle all the expected current without significant loss, and run it up the length of the vehicle. This is no easy task! Mounting it in the rear of the vehicle means the wire that runs from the front only needs to carry the charging current.
Of course, if all you want to do is run a 5A fridge, then this may be the better option!
Once you have chosen a battery, you will need something to put it in. Unless it is secured in an enclosed area of a vehicle, you will likely need a battery box. Not only does this help protect the battery from damage and make it much easier to move, it protects the exposed terminals from contact with anything else. There are two main types of battery box. The vanilla version is a plain plastic box, sometimes with two terminals on it. The box has an internal strap to secure the battery, and usually an external point to strap the box down, along with a handle.
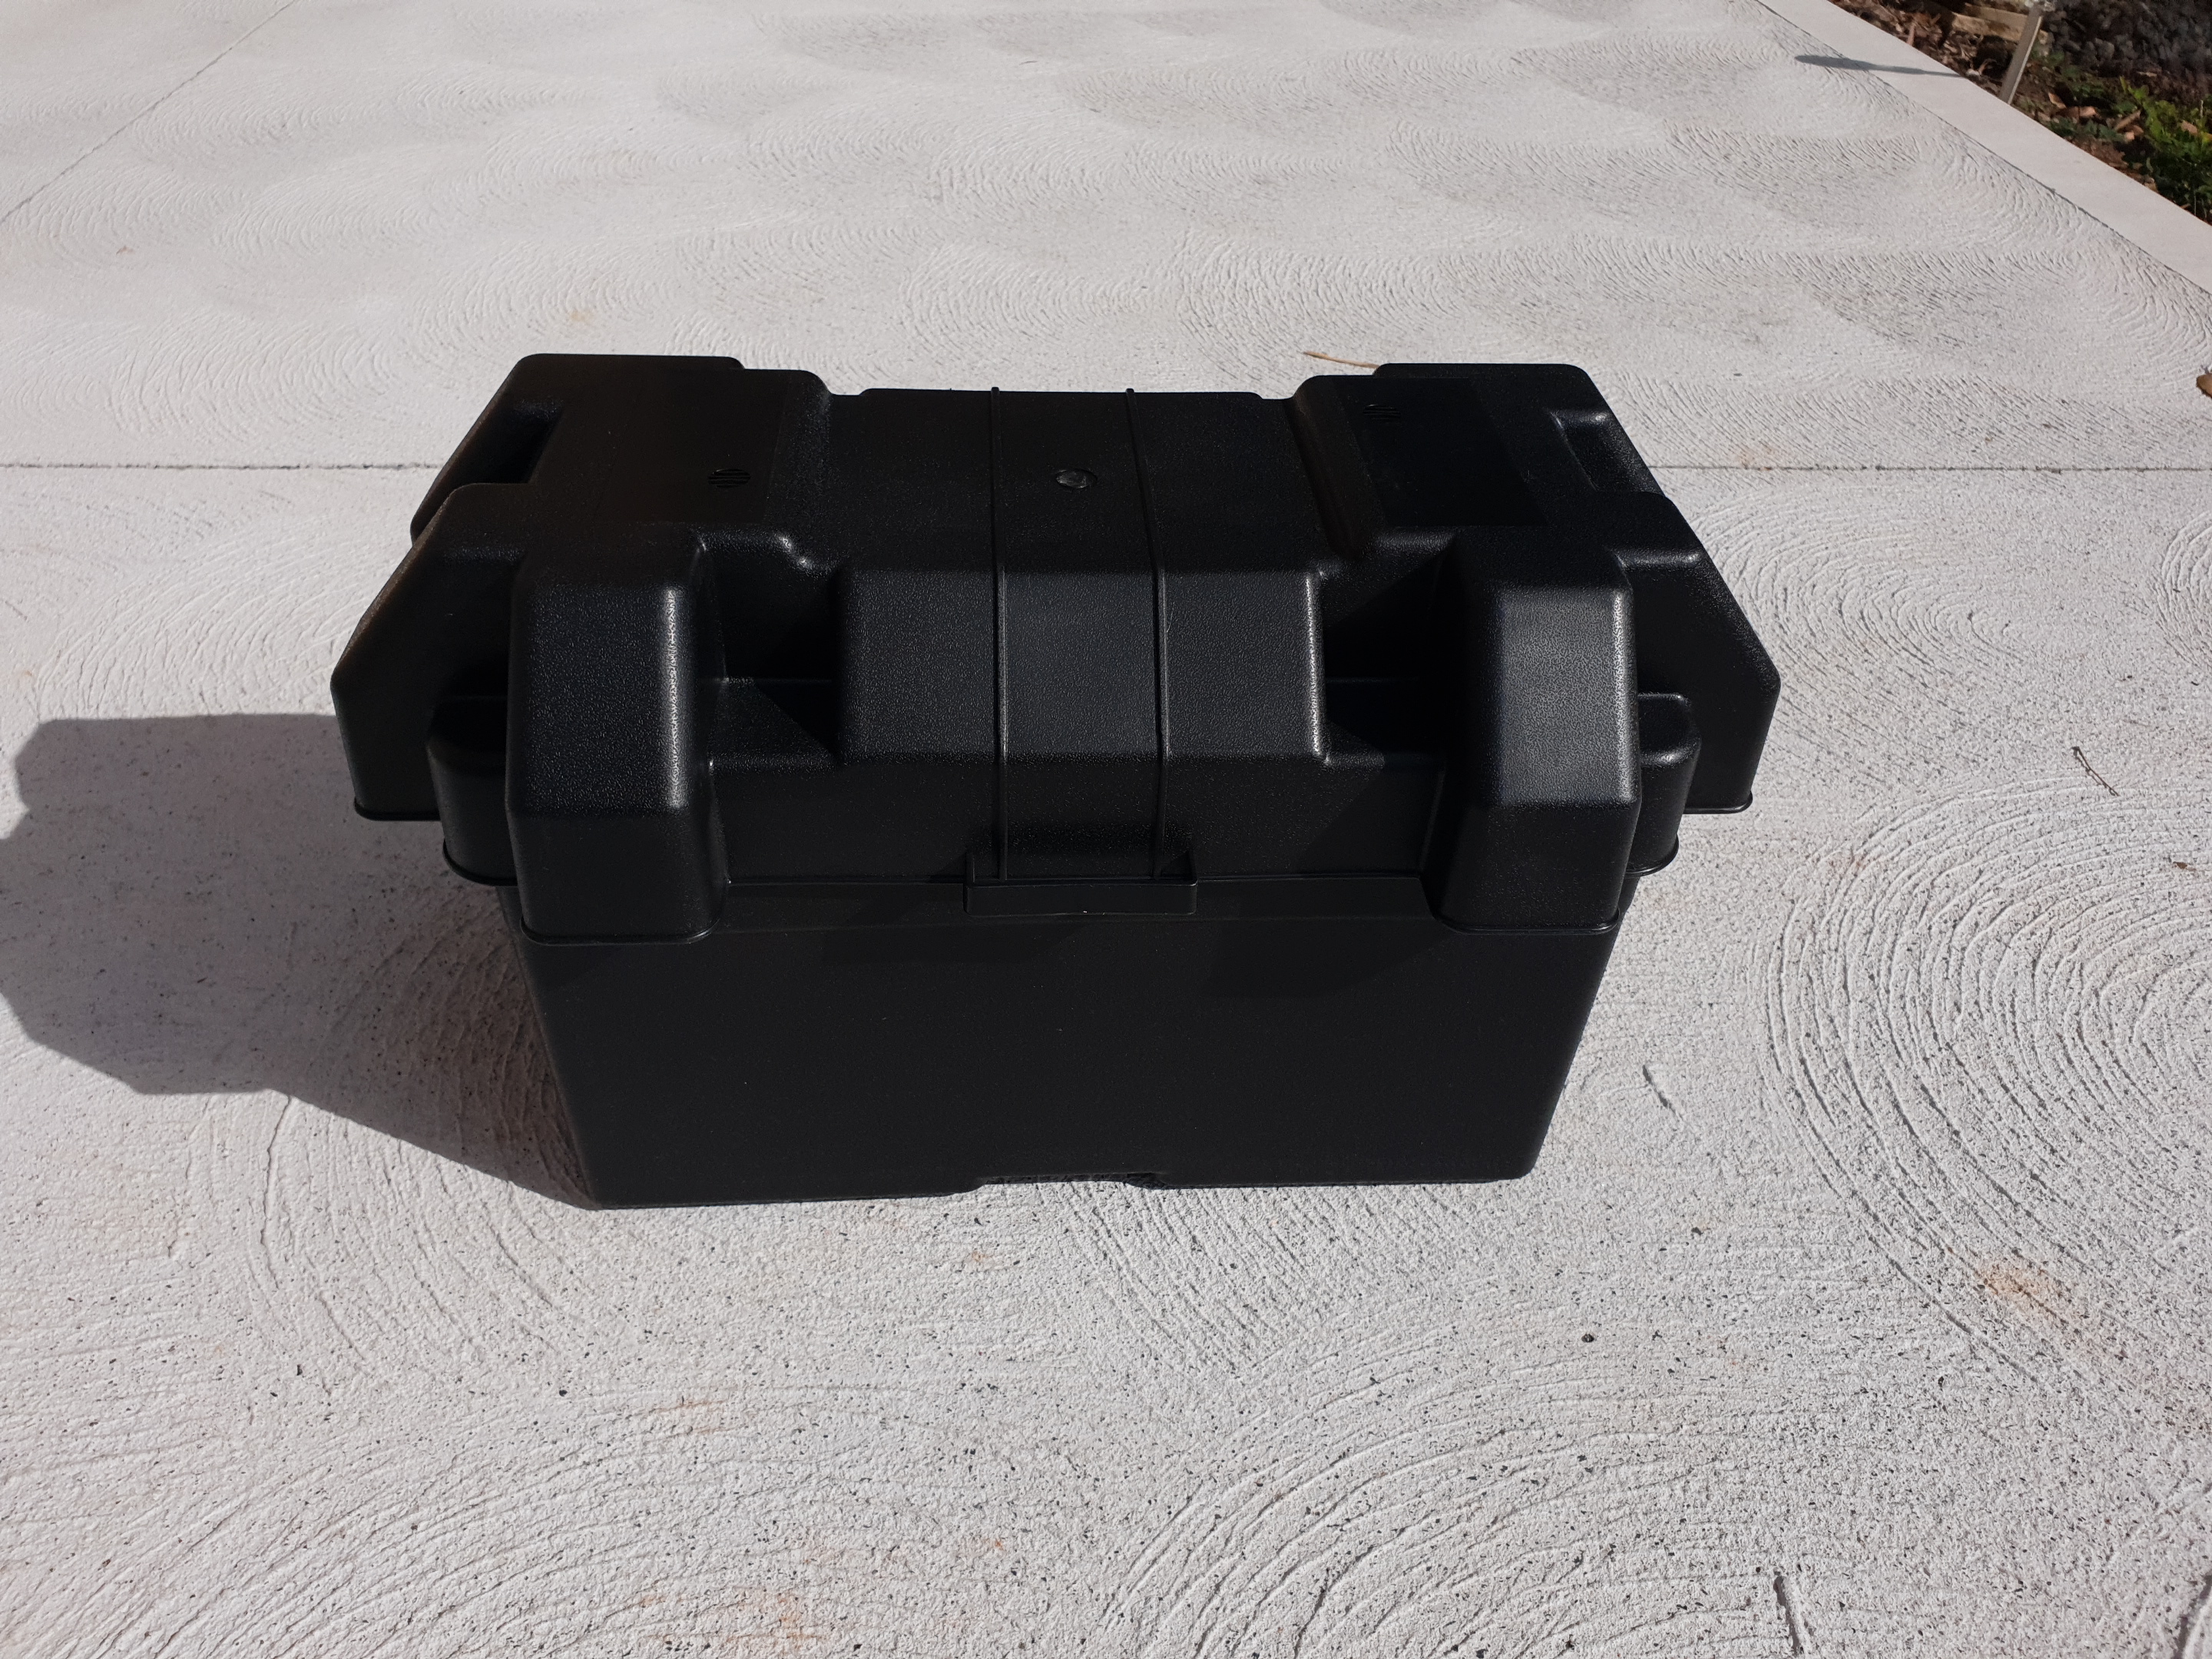
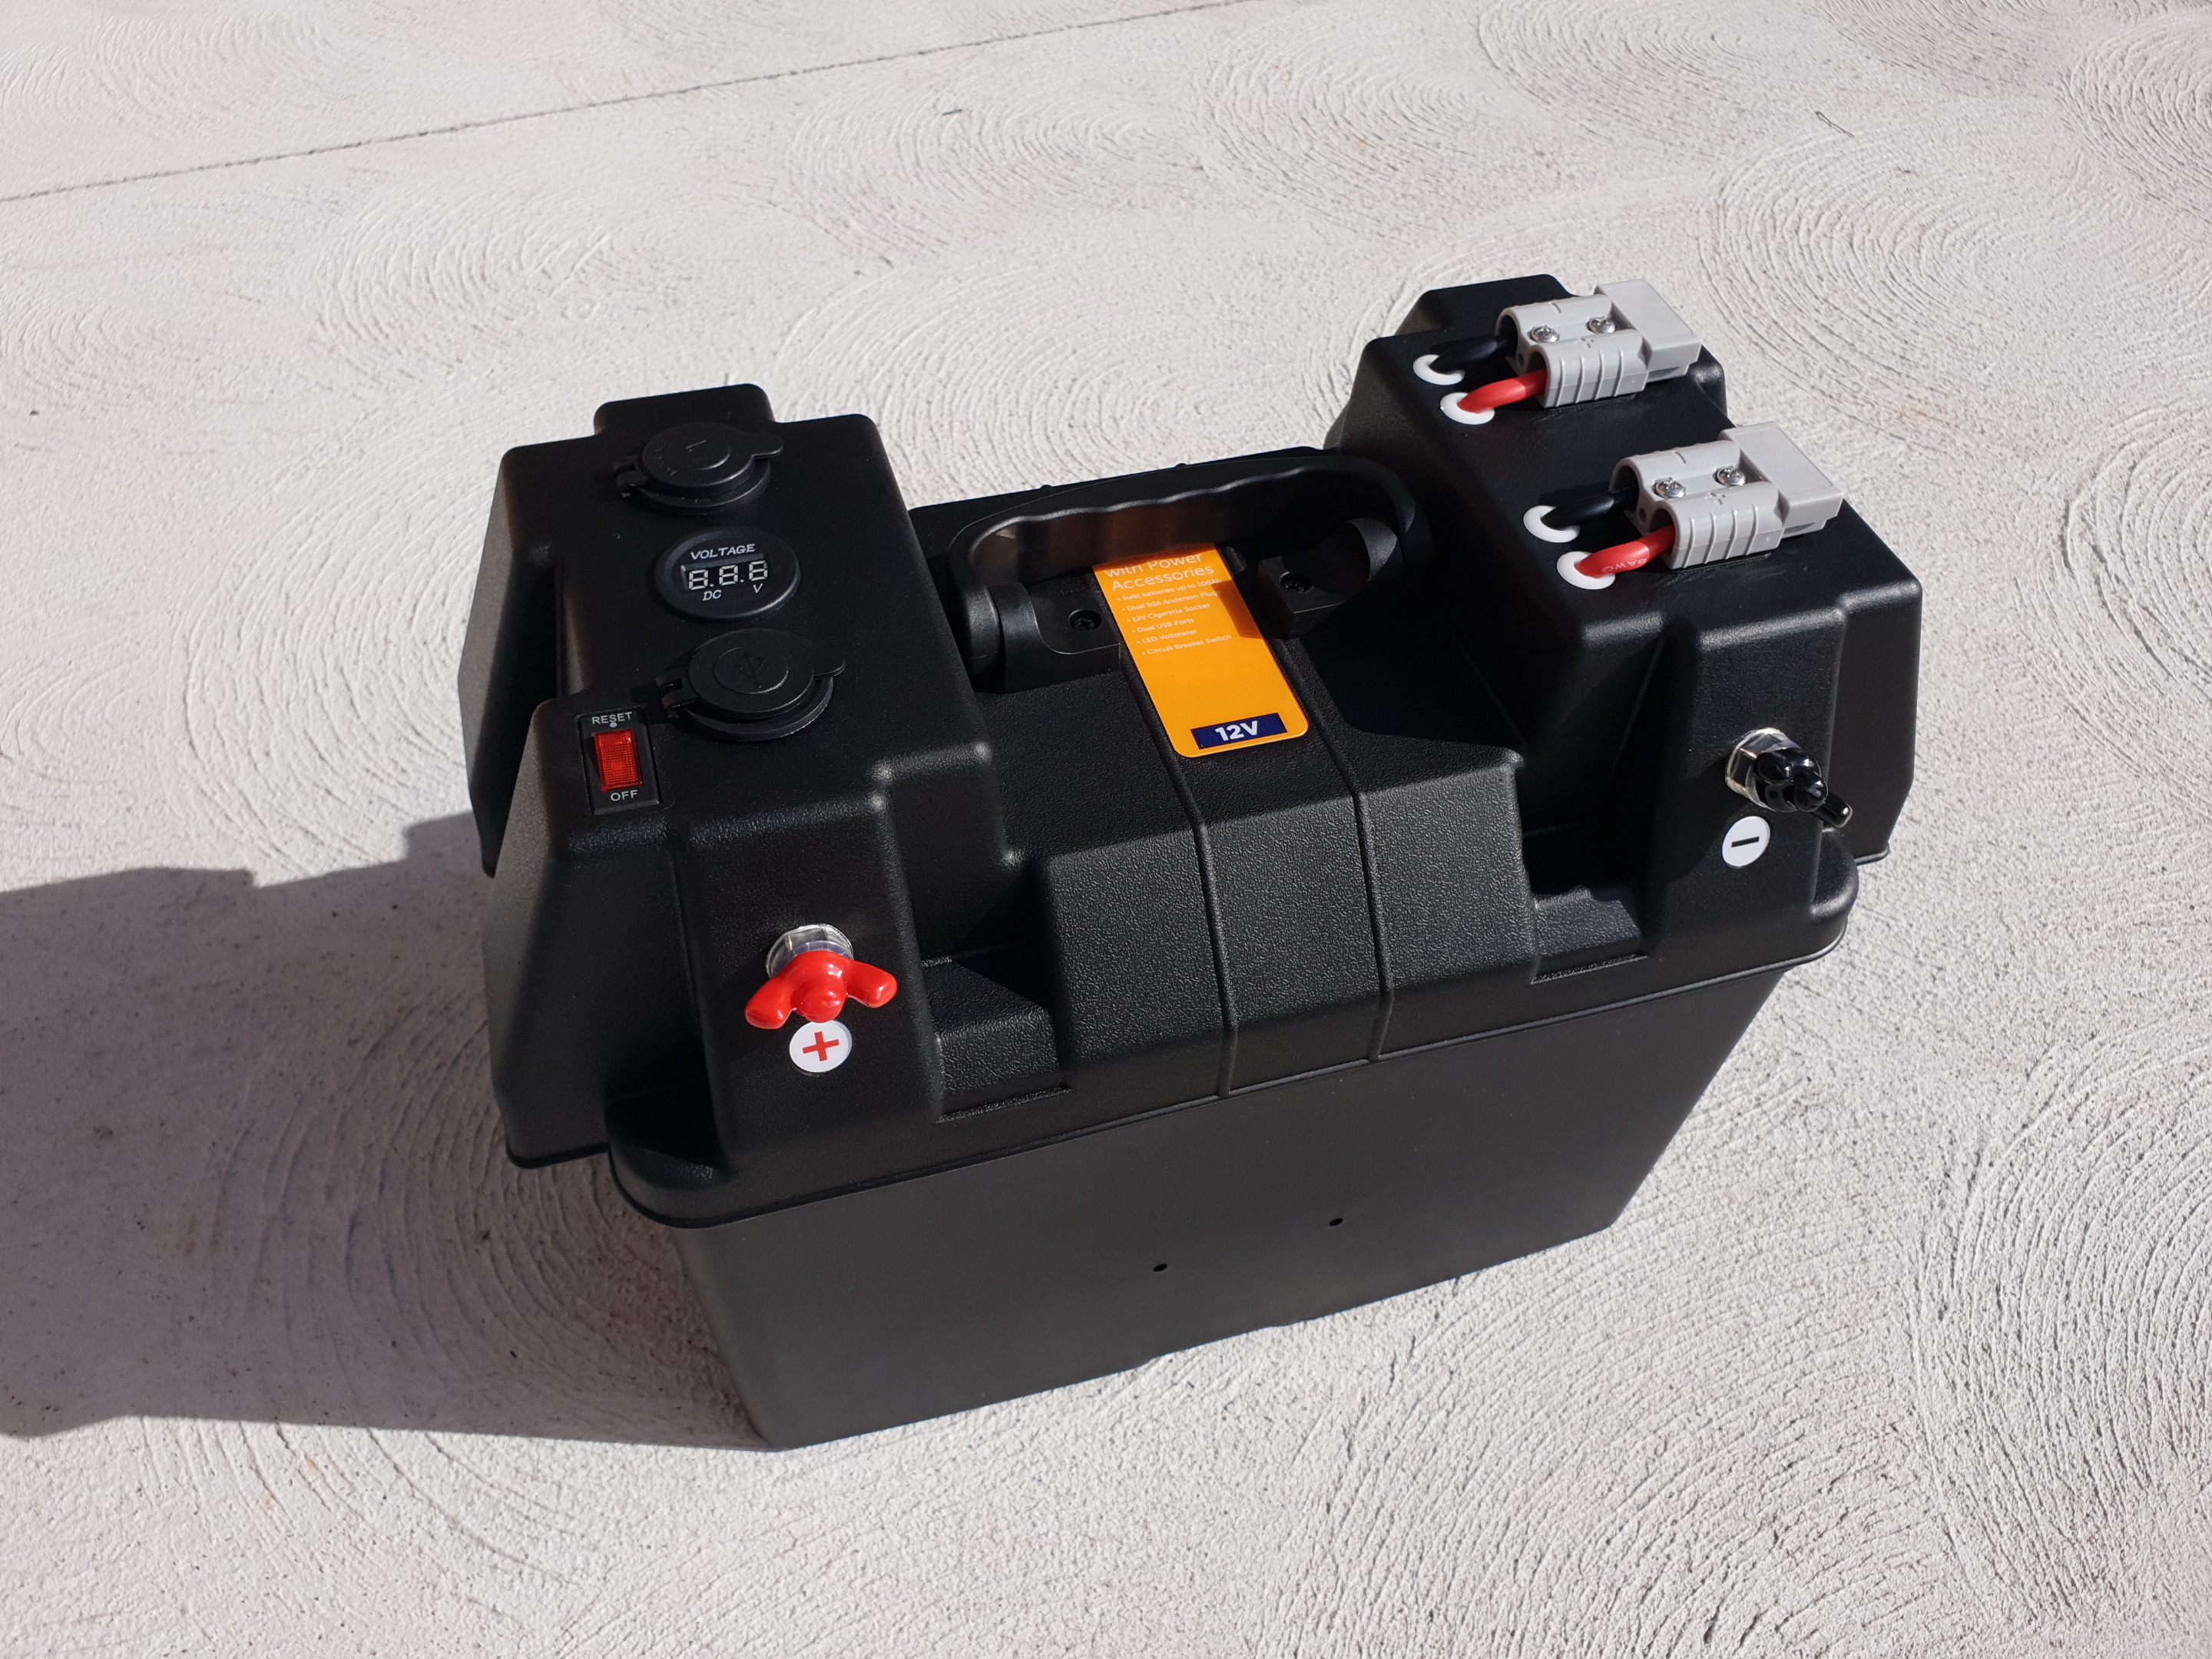
The spiced version has extras. In addition to the features of the vanilla flavour, this one has terminals on the outside, along with various connections. At a minimum, most have a cigarette-lighter socket or two, and one or more high-current (Anderson®-compatible) connectors. All of these are wired to leads with eyelets to connect to the battery terminals. This type enables you to connect devices directly to the enclosed battery. The high-current connectors are great for adding a solar panel, and for running fridges and similar things. The 12V cigarette-lighter sockets can run any in-car devices like LED strips, radio chargers, or small inverters, while many boxes feature USB outputs to directly charge phones and tablets.
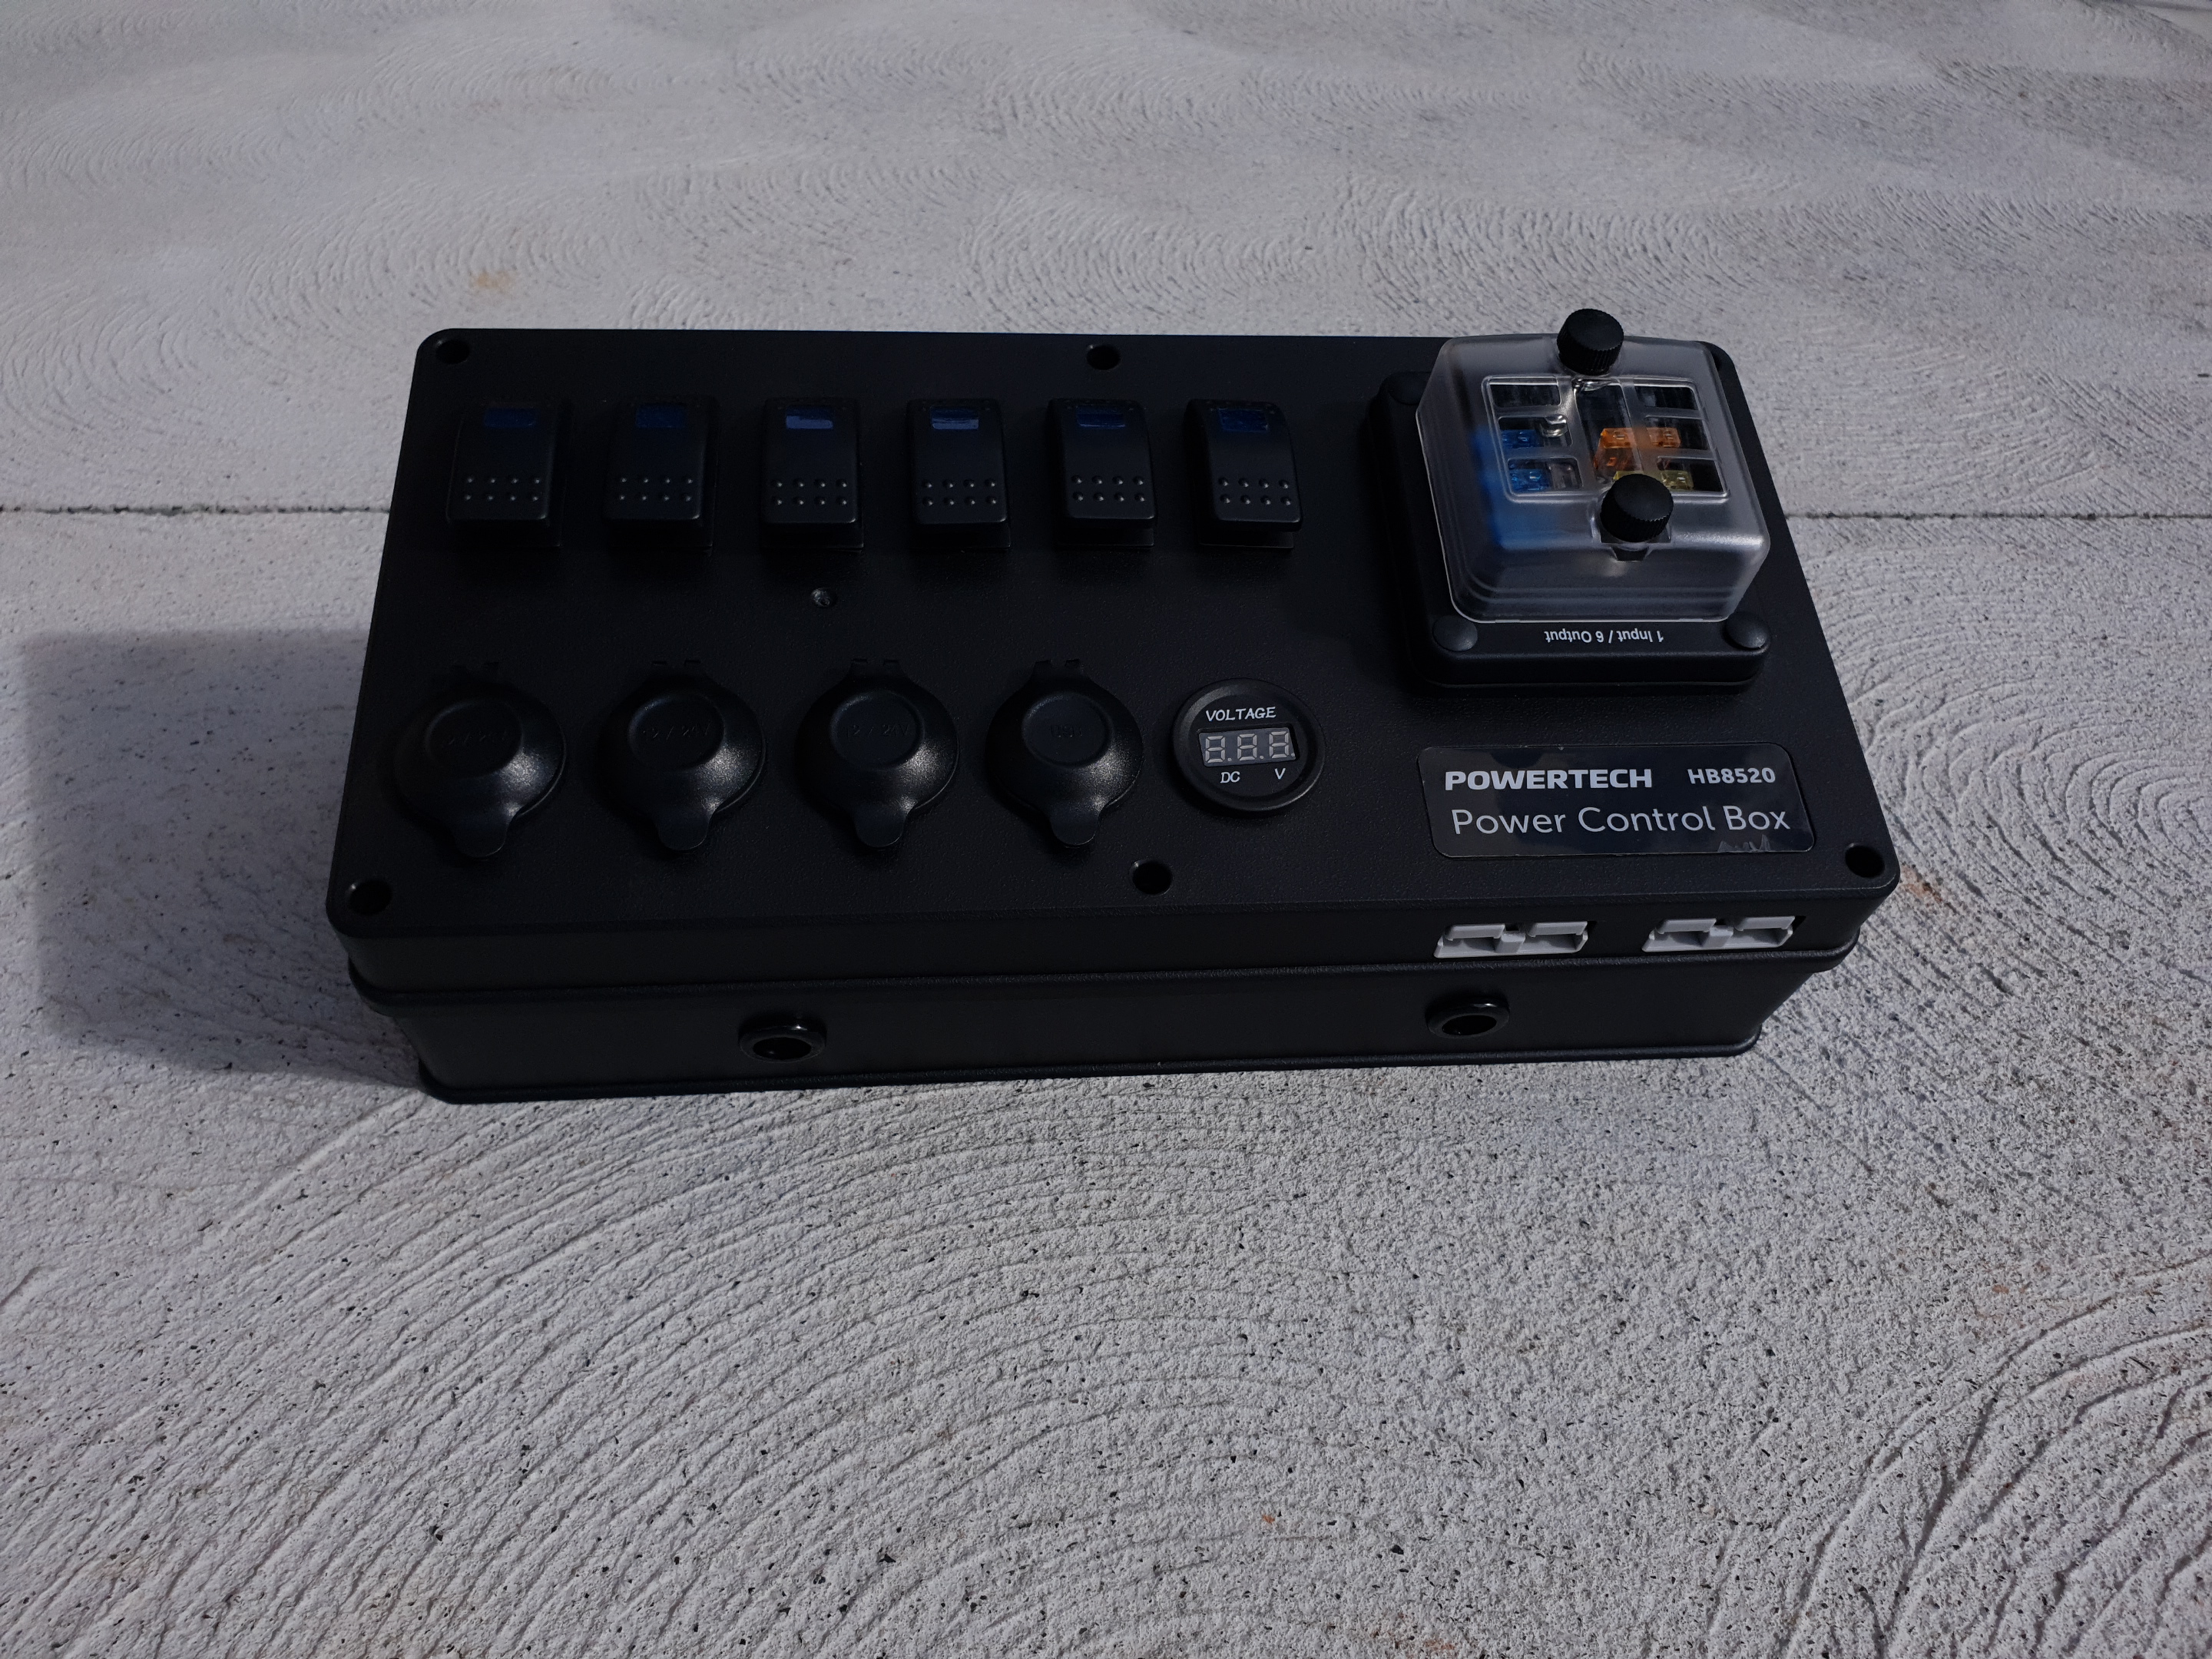
Sometimes you need more outputs than even the advanced battery boxes have. In this case, you can use a plain battery box and one of these external distributors. They have even more outlets than the all-in-one battery boxes do, with the addition of individual switching and sometimes, protection circuitry as discussed above. These are wired directly to the battery terminals through the fuse box included, or to the terminals on some battery boxes. The one pictured has fused cigarette lighter sockets, as well as switches which you can wire to your own outputs, along with two fused high-current connectors and two USB outputs.
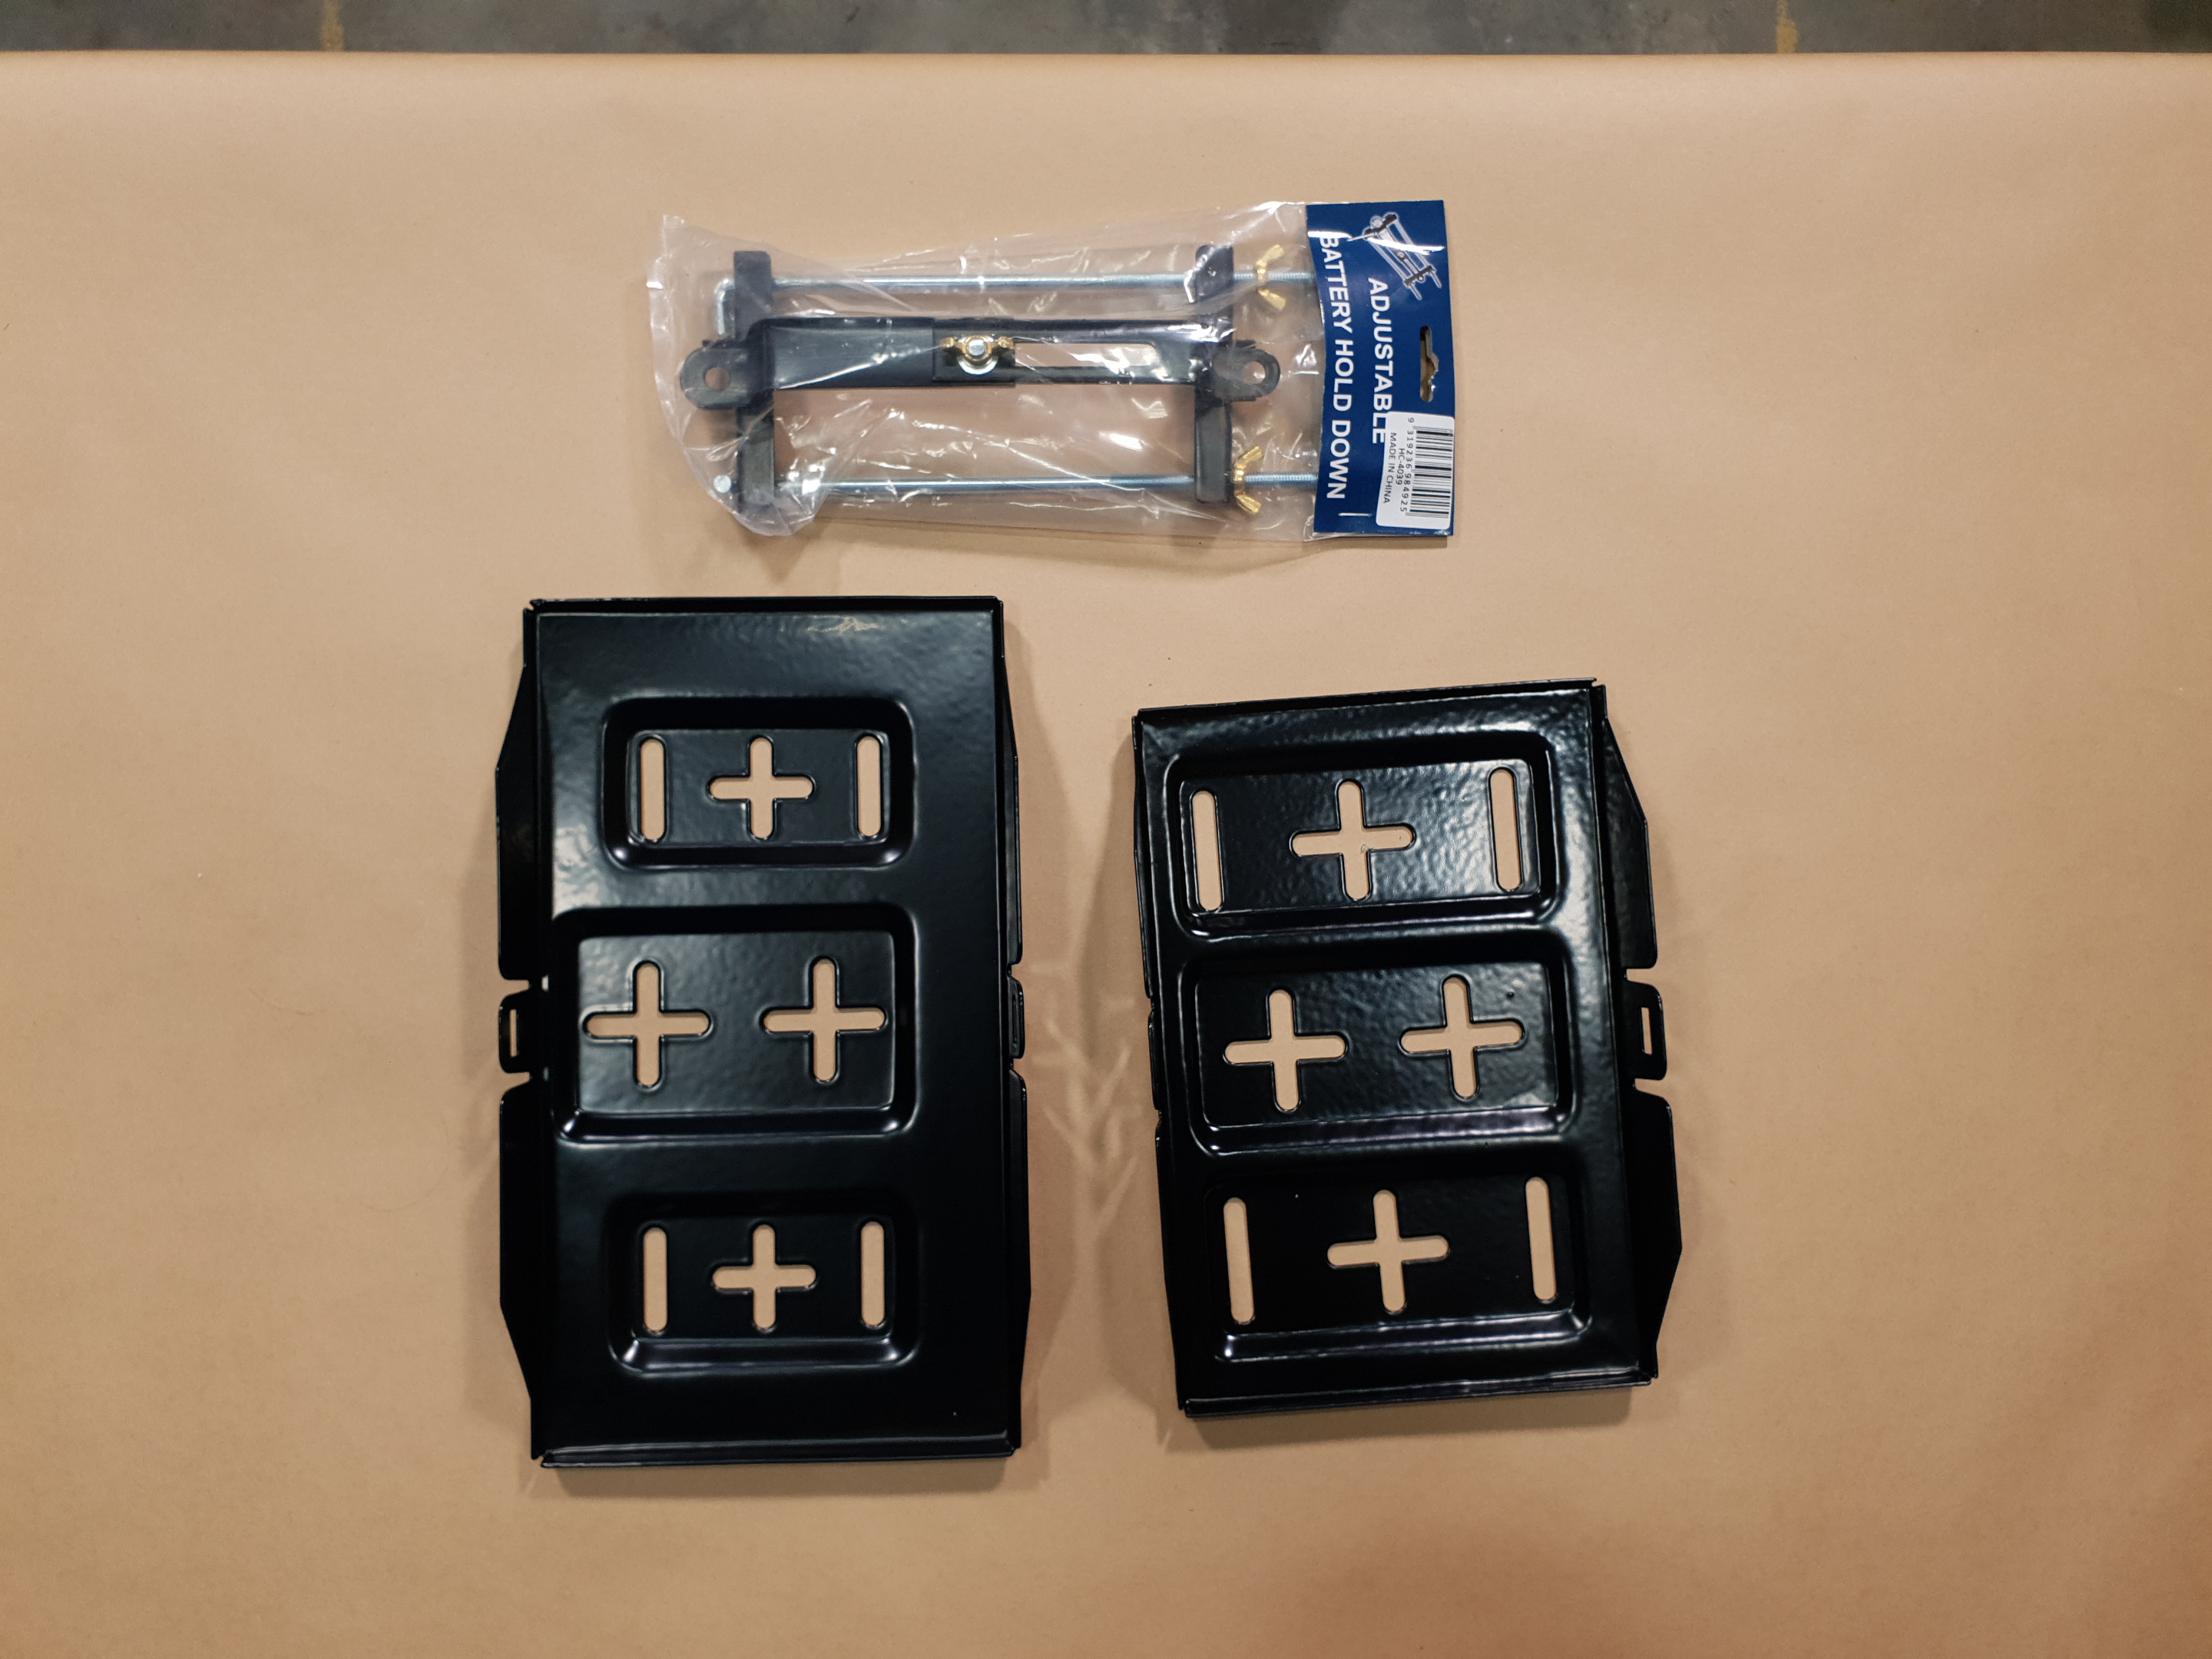
If you have space in the back of your vehicle to put a battery out of the way, or if you are mounting yours in the engine bay, then a battery tray is for you. Also known as a battery shelf, these are a bracket that mounts to the structural parts of the vehicle and have a clamping system over the top of the battery to secure it. They are available in a range of sizes to suit different batteries, so don't just grab the first one you see! These are used where the battery will be protected from impact and objects touching the terminals, so if that is the back of the vehicle, make sure it is inside a cabinet or inside the interior trim of the vehicle, Some 4WDs and other similar vehicles have space for this purpose inside the rear interior trim, while the back corner of a ute's tray boxes might also do the job.
All of these options can be used with any battery, Lithium or Lead-acid, that you can fit into them.
SOME OPTIONS:
The current range of battery mounting systems includes but is not limited to:
- HB8100 Battery Box
HB8102 Battery Box
HB8504 Battery Box with circuit breaker, voltmeter, and outlets
HB8104 Battery Tray
HB8106 Battery Tray
HC4039 Battery Tray hold down clamp
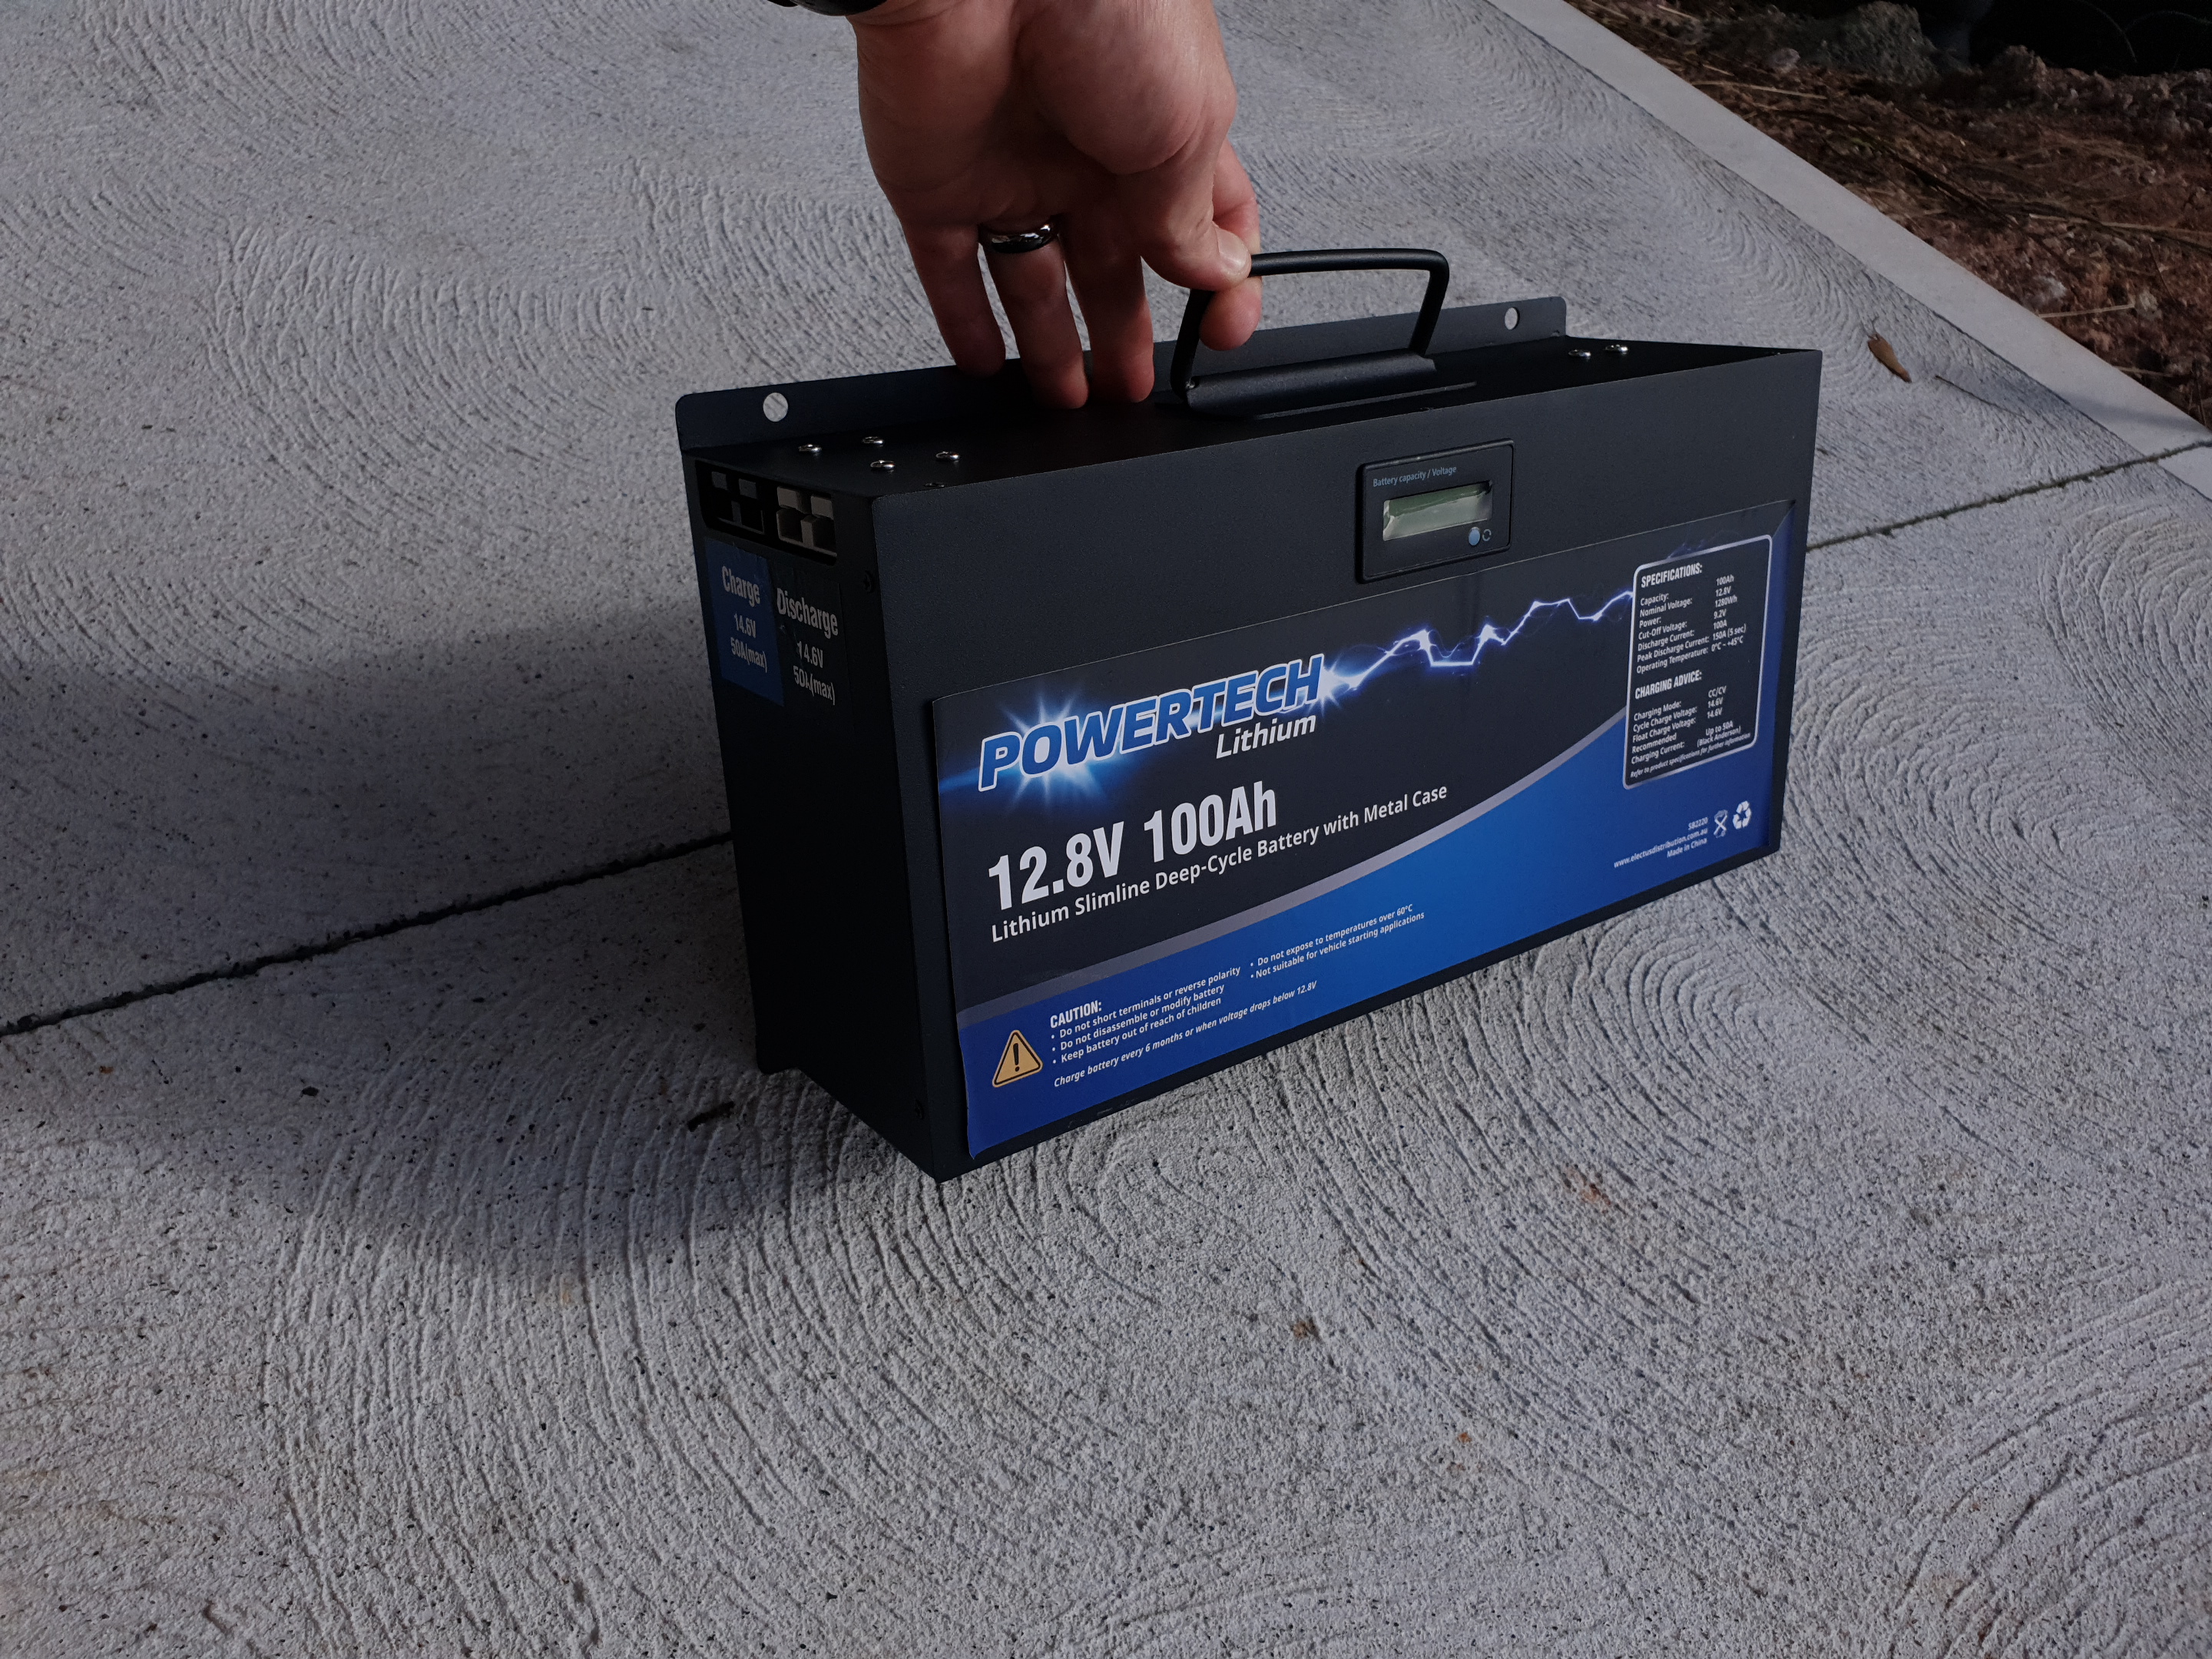
On the Lithium battery front, there is one more option. This SB2220 100Ah version is in its own metal box. It is a different shape because it is not trying to be a Lead-acid replacement, and as such, does not have any vacant space inside. It has an input for charging, two outputs, and an internal charge controller as part of the battery management system. A solar panel with a 50A high-current connector can plug straight into the side, and there is a small display to monitor battery state. This kind of battery is even more portable and rugged than the battery box version, but it does need to be used with a distributor system like the one featured above if you are using it as a campsite battery.
Like the water in a pipe likeness from above, the size of a wire determines how much current it can carry. However, distance also plays a role. All metal resists the flow of electricity slightly, so over a long distance, and this reduces the voltage for a given current. That is why we introduced voltage drop earlier. So, if you draw 50A through a 50A rated cable, but over 20m or so, the voltage at the end will be lower than at the start.
While there is no easy guide without lots of maths for us to suggest a wire size for a given length and current, just know that if you are going long distances, more than 5m or so sometimes, then you may or may not need a bigger wire size than for a short run. The best way to know for sure if you are going to be getting close to a given wire size's current limit is to ask your expert Jaycar staff for help.
So, if you are going to mount your battery in the engine bay and run a full distribution box in the rear with high-current (Anderson style) connectors, cigarette lighter sockets, and a fridge, then you will probably need 8 AWG 50A cable. However, if you are mounting your battery in the boot and the DC-DC charger draws 20A, then 25A cable is probably fine.
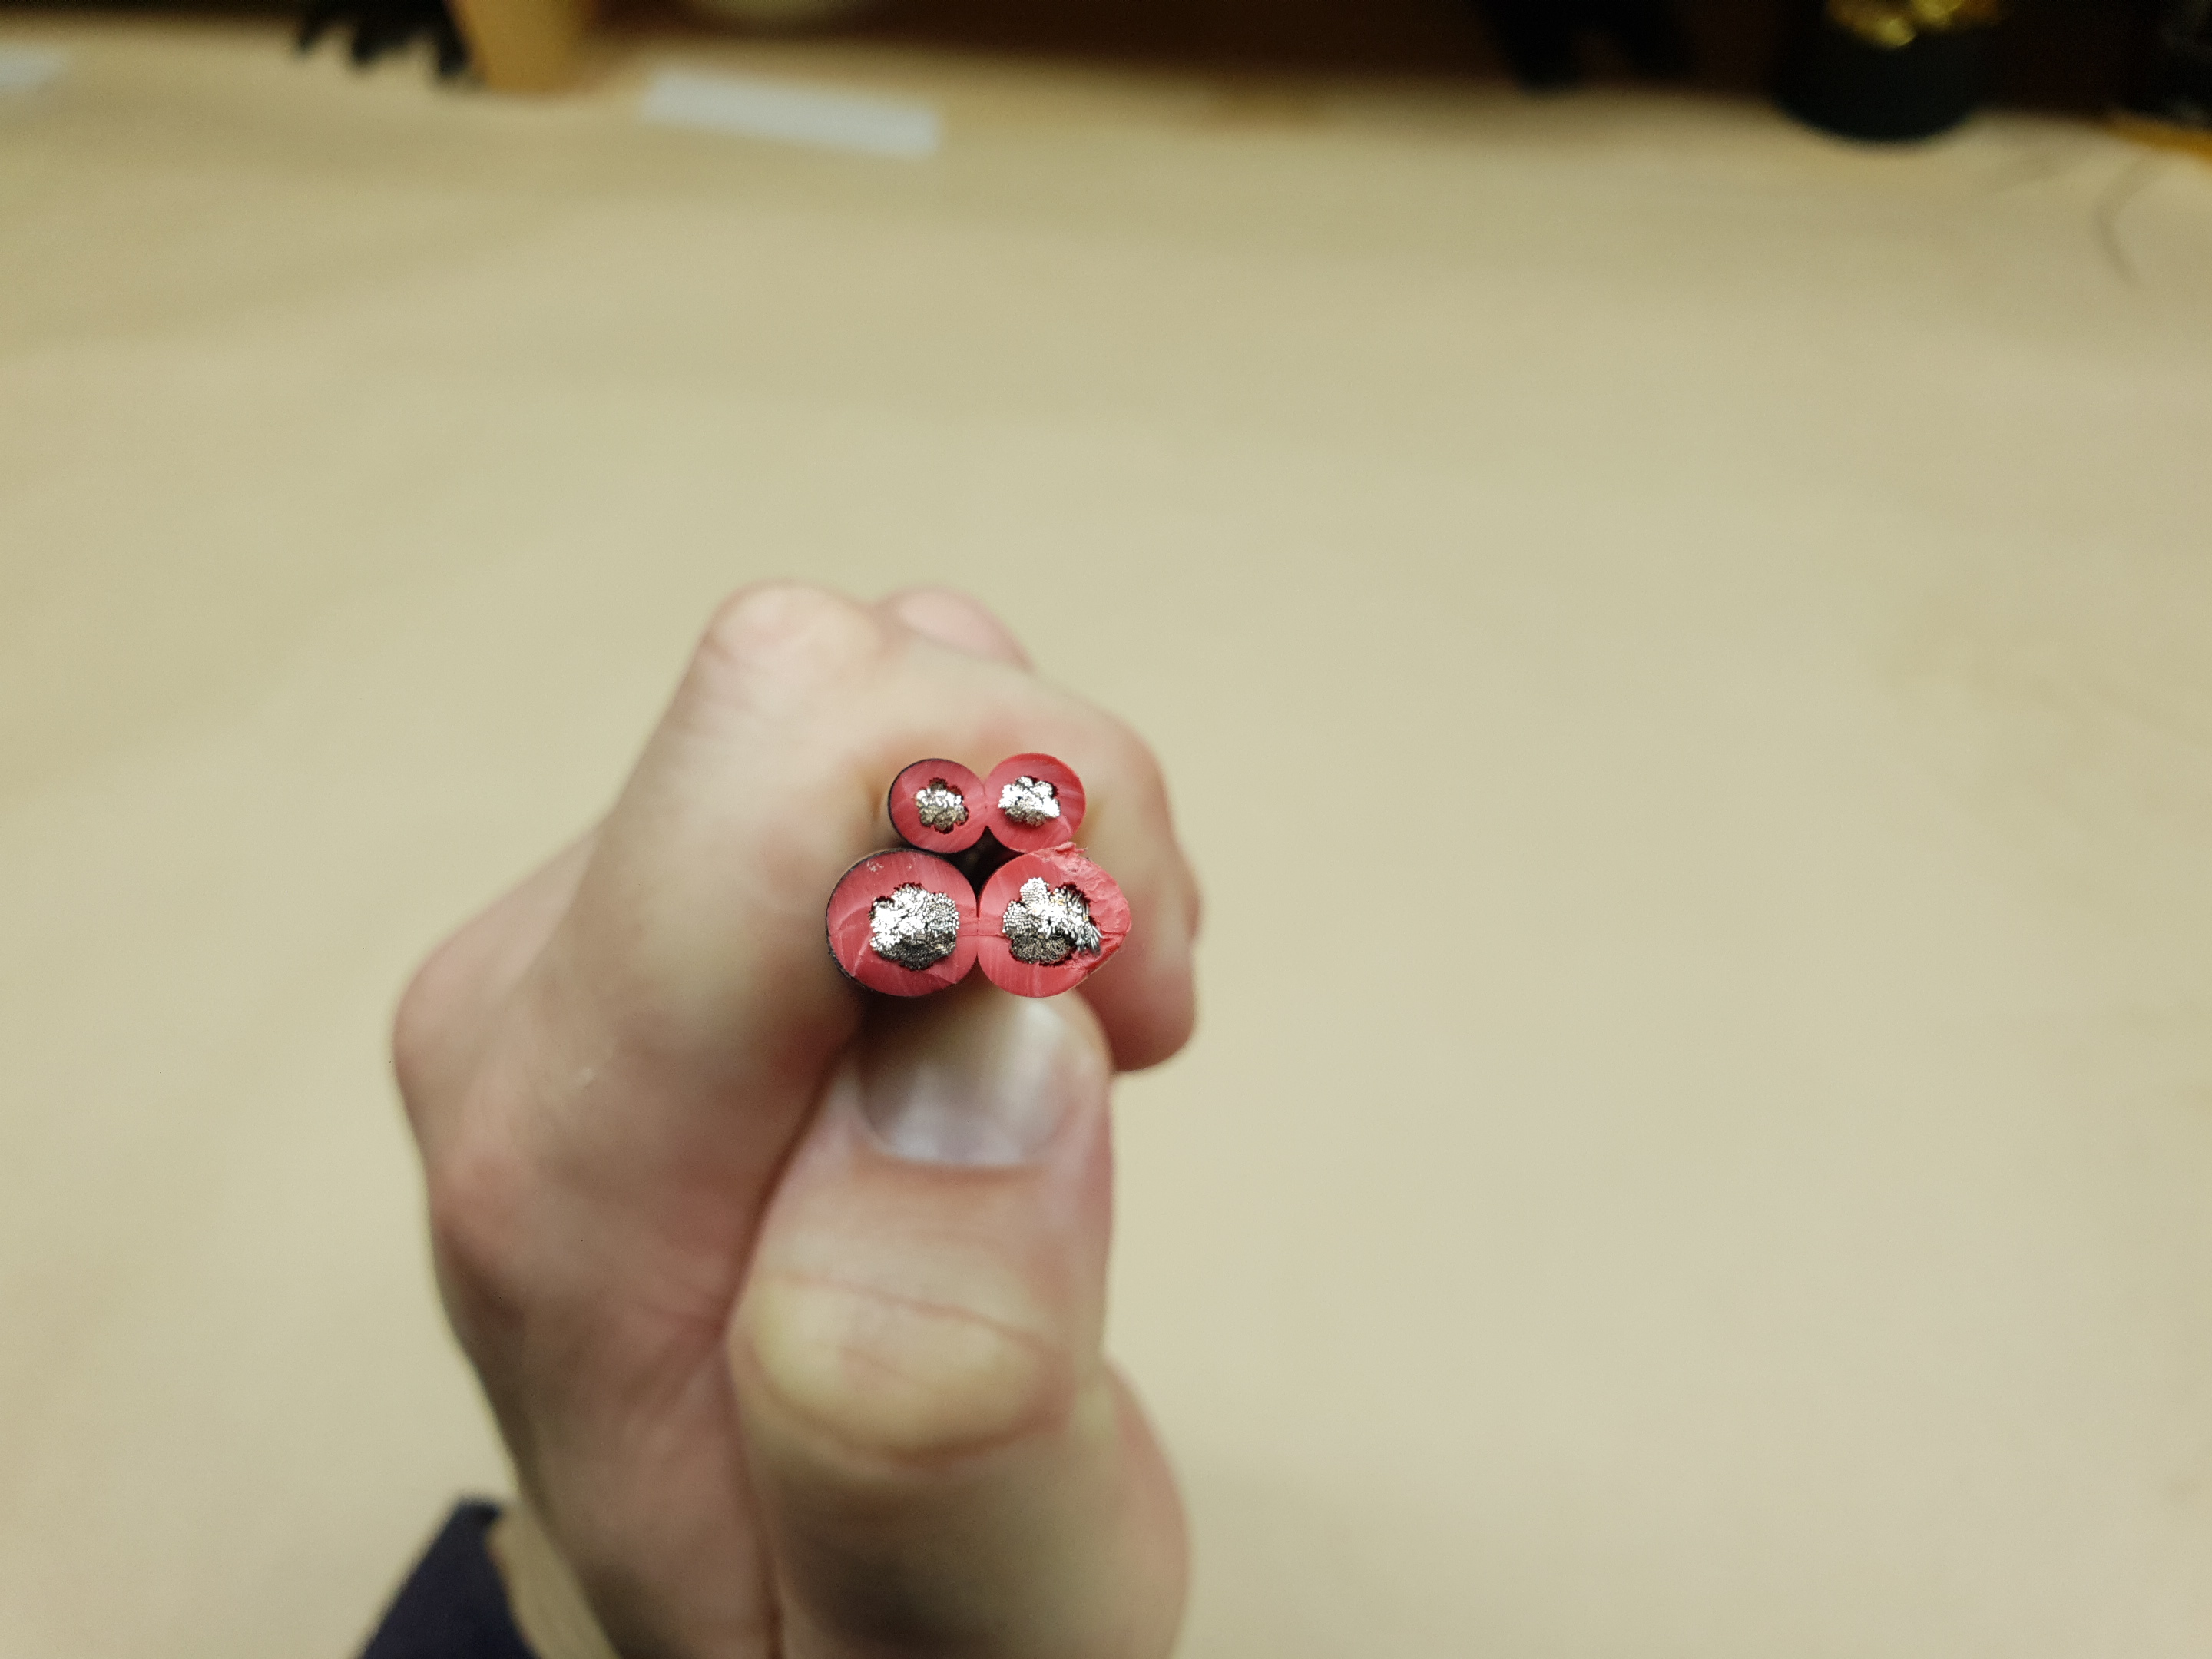
While no damage can be done by using a big wire on a small current, it can be a waste of money. There is no use running 50A wire across the length of your 4WD to run a fridge if the fridge draws 7A! In addition, the space available to route cable through the chassis or interior is often limited. The image shows 25A 12 AWG cable next to 50A 8 AWG cable.
In most vehicles, the metal body of the car is electrically connected to the main battery and the electrical system's negative side. This is sometimes referred to as 'earth' rather than negative, but this is a misuse of the term. 'Earth' comes from household electrical systems where the neutral is actually connected to a rod driven into the ground. In a car, no such thing happens.
Throughout much of the vehicle, the chassis is used as the negative wire. Most of the dash instruments, for example, have power applied with a positive wire but connect to the chassis to return to the battery.
In some car installations, people like to use the chassis as the negative, and auxiliary batteries are a common candidate. However, there can be a problem. Vehicle manufacturers make sure that parts of the car they want to be electrically connected have a good conductive path. This may not be the case in parts that are not intended to be electrically connected. Many metal parts are coated in primer, anticorrosion coatings, or paint. Just because there are bolts or welds does not necessarily mean that the part has a good quality connection, particularly when significant current is involved. In addition, a part may show conductivity on a continuity tester or multimeter, but these use tiny currents and the electrical connection present may not handle the current an auxiliary battery system will apply.
The alternative is to add a negative wire, and take it all the way back to the main battery. This ensures that a good negative path is present, and it also bypasses another possible problem. Sometimes, there can be a small voltage difference between a chassis connection at the rear of the vehicle, and the battery connection at the front. This is due to an accumulation of small resistances like where metal sections join. As noted above, they are not always designed to carry lots of current. This voltage difference creates a false negative which can affect the sensing of battery charge, and even the voltage present.
So, while many people will tell you just to connect to the chassis, we prefer to use a negative wire as well. It is more reliable, more consistent, and safer.
SOME OPTIONS:
The current range of wire includes but is not limited to:
- WH3057 7.5A Twin core with jacket
WH3079 15A Twin core with jacket
WH3087 12 AWG 25A Red and Black twin core
WH3063 8 AWG 50A Red and Black twin core
WH3073 15A Red single core
WH3075 15A Black single core
WH3080 Red 25A single core
WH3082 Black 25A single core
WH3060 Red 8 AWG 56A single core
WH3062 Black 8 AWG 56A single core
Fuses are a critical part of an auxiliary battery setup, and there are some important misconceptions about them. First and foremost is the myth that they protect devices plugged into the circuit. They do not, ever. Fuses are there to protect the wiring. If there is a fuse in, say, a fridge, then that fuse protects the device, not the inline fuse in the wiring.
Fuses are current-sensitive devices. They are rated for a given current, and at a certain percentage over that, they fail. This cuts off the electrical flow, preventing further damage. This is also why a fuse at the battery will never protect a fridge (or anything else plugged into it). The fuse will be sized for the wire, not the fridge. The other reason is that normally, the only thing that would cause too much current to be drawn is a faulty appliance, so the fuse won't really help if the appliance or device is already faulty! What it does do is stop a faulty appliance drawing so much current that the wire overheats and causes a fire.
So, if you are running 25A wire up the vehicle to a DC-DC converter, then you will install a 30A fuse. The reason goes beyond faulty appliances, too, so do not think you can skip the fuse just because the things at the other end are good quality and probably won't fail. The other problem with vehicle wiring is damaged wiring, through either crushing or chaffing. Vehicles shake, bump and vibrate a lot. If wiring is next to or over a metal part that may not even feel sharp to the human hand, it can wear through the insulation of the wire over time. If this happens on the positive wire, it can short to the chassis (which is connected to the electrical negative) and allow a much bigger current to flow than the wire will cope with. The same can happen if both wires get exposed and come together (like being crushed by a heavy dropped object or a vehicle accident) even if they are not near an electrically connected piece of metal work. Overloaded wiring is a prime cause of vehicle fires and the main reason we fit fuses to wiring.
The other misconception about fuses is that they create excessive voltage drop. This is not true of a properly designed and chosen fuse and fuse holder. It used to be true in some high-power audio setups when people used to (and still do to a lesser extent) fit much bigger systems than what came with the vehicle. Then, the sudden high-power surges on loud notes and such caused brief overloads where the fuse did not have time to fail, but where voltage drop could become a problem.
When choosing a fuse and fuse holder, look for lots of contact area between the fuse and the holder contacts. This minimises voltage drop, because it is the small contact points which account for much of it when it happens.
In terms of where to put fuses, each length of wire needs protecting. So, there needs to be one at the main battery where you take off the positive connection to the DC-DC charger. There will not need to be one between the DC-DC charger and the battery, unless the wire is long enough for damage to occur. Often, this wire is too short to worry about. The output of the auxiliary battery also needs a fuse. It should be sized for the wire connecting it to the distribution system, whether that be a set of sockets, or a switch panel, or whatever. From there, you should have a fuse on each output, sized for that output. So, USB sockets with their own power supply should have a 5A or so fuse, as generally there are two sockets in each one. Cigarette lighter sockets should be 10A or 15A depending on the product rating, and wire chosen to suit. Other things follow a similar rationale, where the wire size and connection type dictates the fuse.
NOTE: If you are using a Lithium battery that has an internal Battery Management System, then battery short-circuit protection is taken care of. For example, the one we install later has an output limit of 50A. However, still fuse the outputs if using smaller wire. 50A of short-circuited current will probably still set 10A wire on fire.
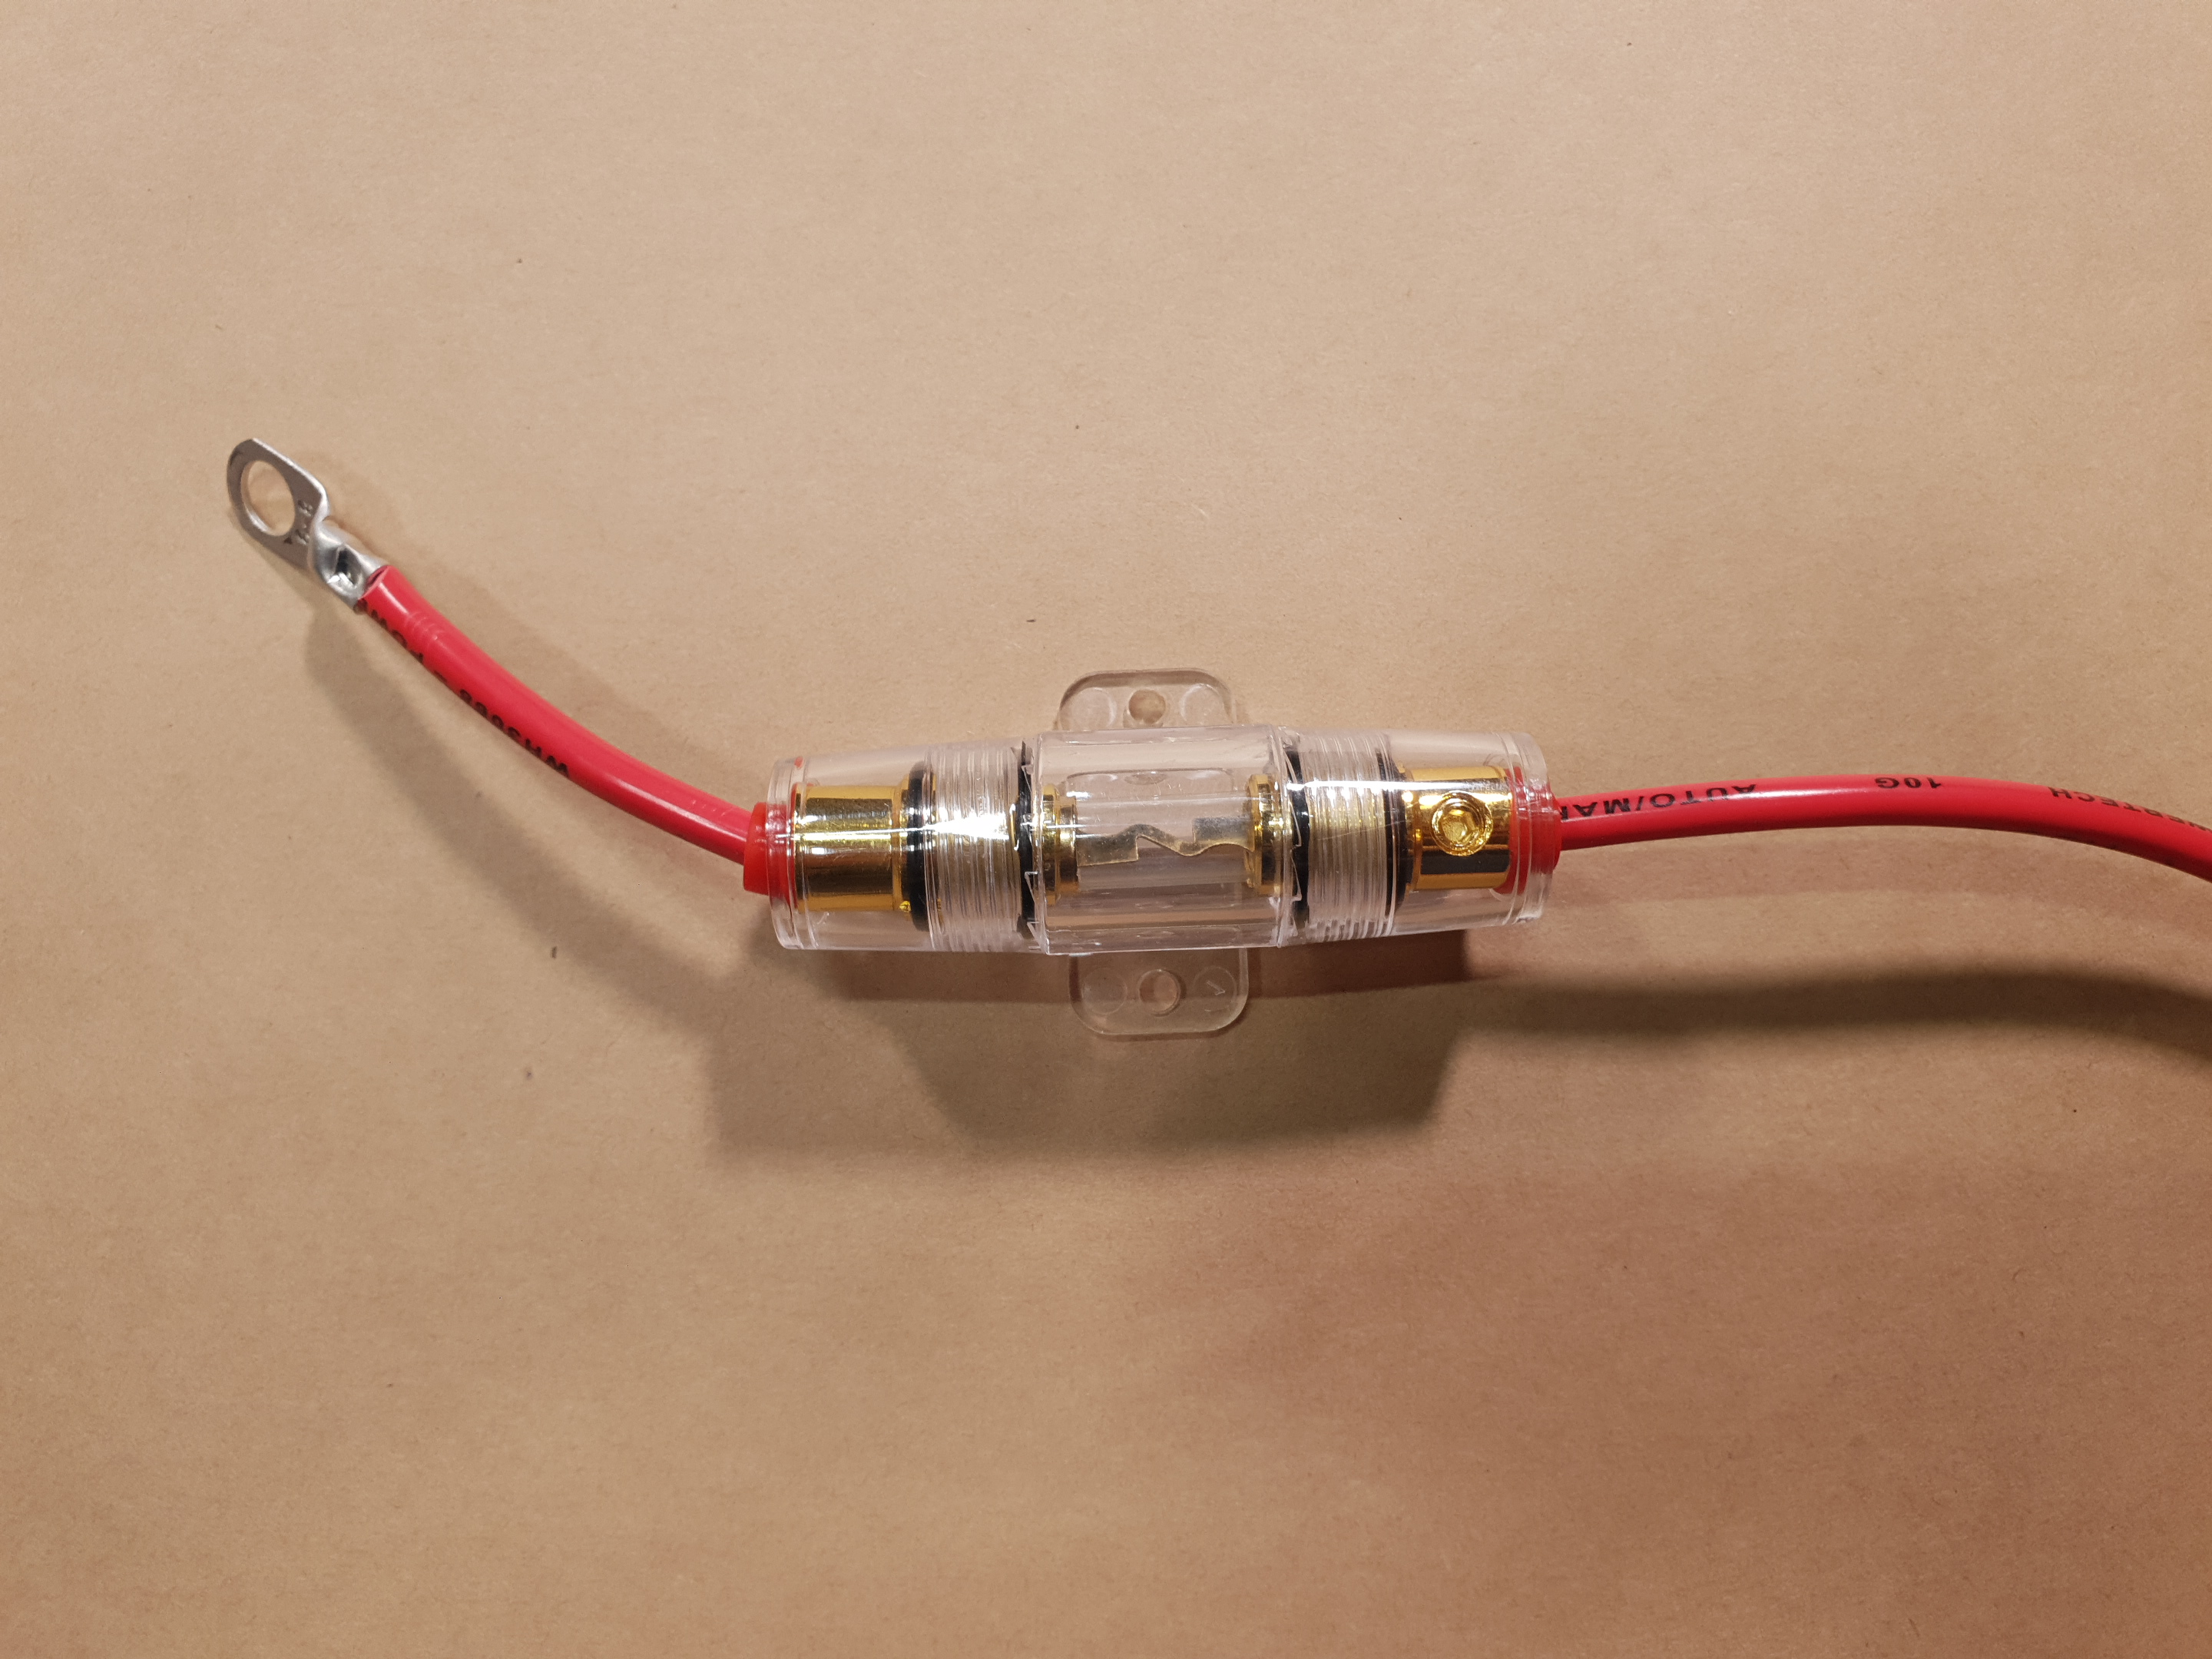
One of the best ways to do this is with a fuse block. You can mount this on top of the battery, very close to the positive terminal, eliminating the need for a fuse between the battery and the fuse block. You will need a fuse at the battery if the fuse block is mounted further away where wire damage could occur. The fuse block contains a positive rail, where you add the connection from the battery. The rail distributed the current to each fuse. The other side of the fuse has a terminal for that connection to be wired to the load. So, with a six-way fuse block, you can have two high-current connectors (Anderson style) fused at 25A (or more), two cigarette lighter sockets fused at 10A, a Merit connector fused at 15A, and a USB charger fused at 5A. Some fuse blocks have the negative rail as well, so all the loads can be easily connected to negative, and these are preferred for auxiliary battery setups.
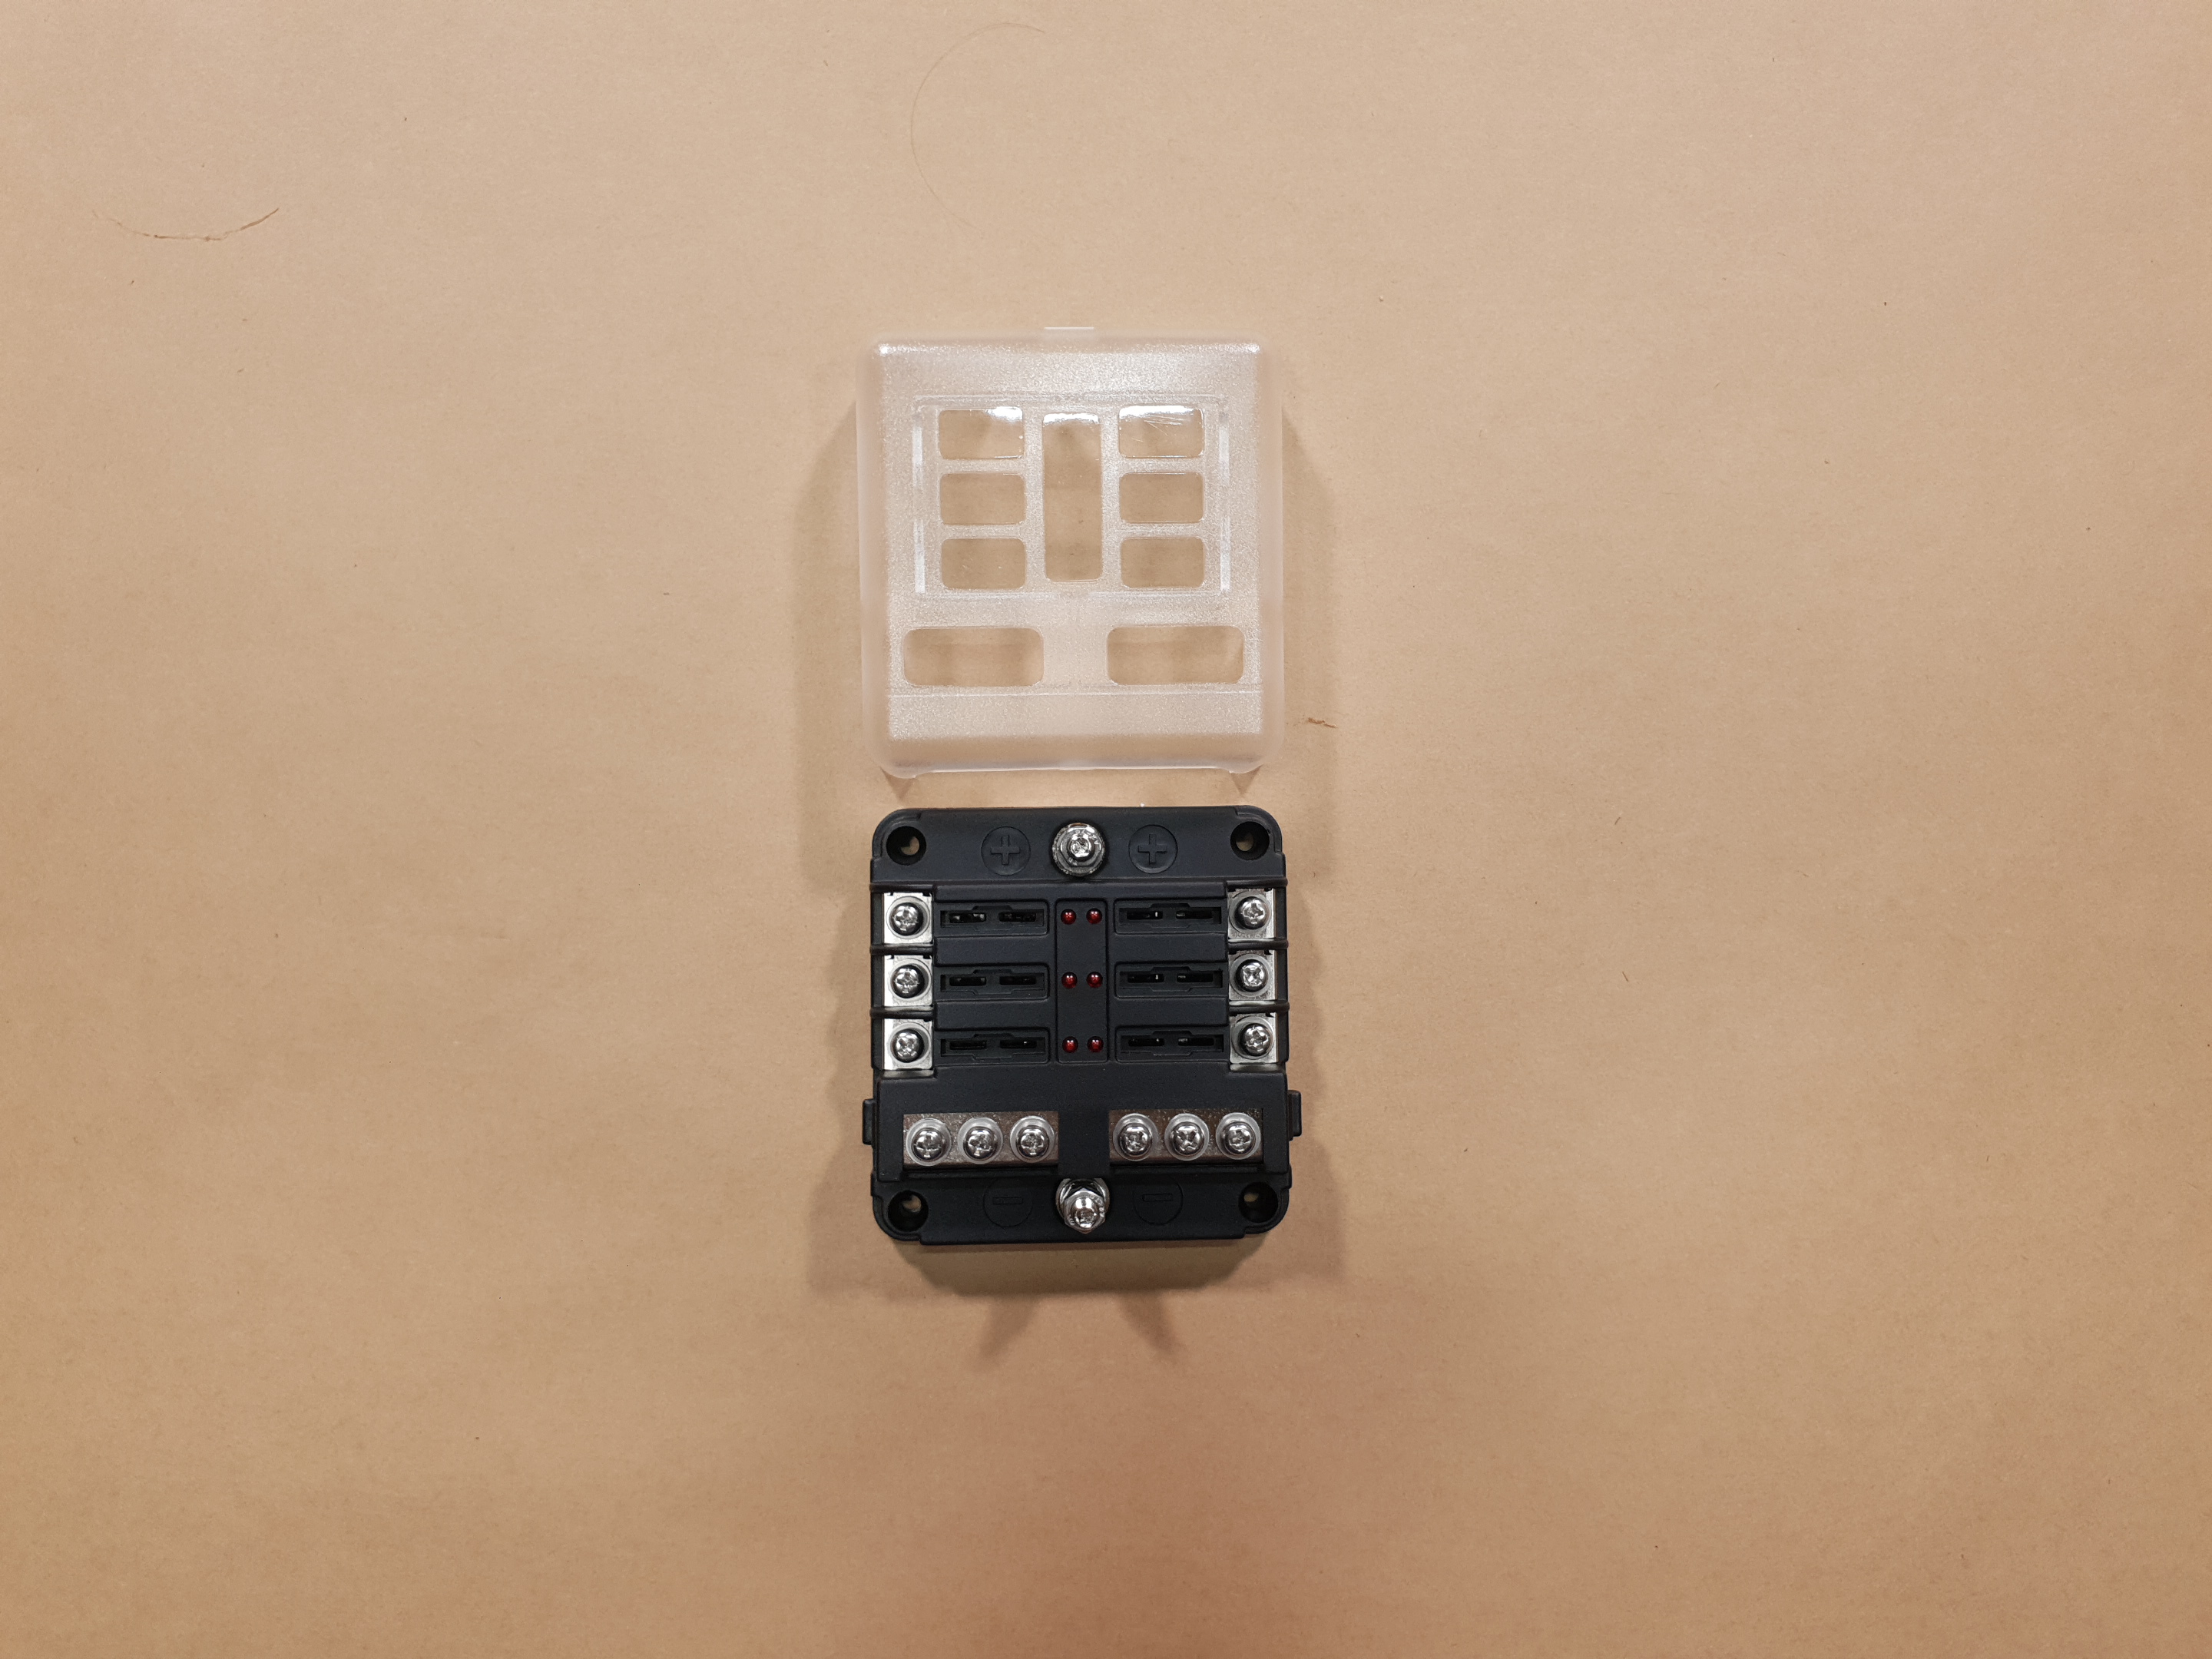
Before you install your auxiliary battery, it is important to consider how you will use it. Having a battery in the back of the car with a pair of terminals is no good if you have a fridge with a cigarette lighter plug on it, or a suite of phones and tablets which need USB sockets. There are a range of outlets available for you to install. Some battery boxes come with a selection installed, as noted above. Others are available individually, as a kit with the socket for in-panel mounting or a housing to mount it on the side of a panel.
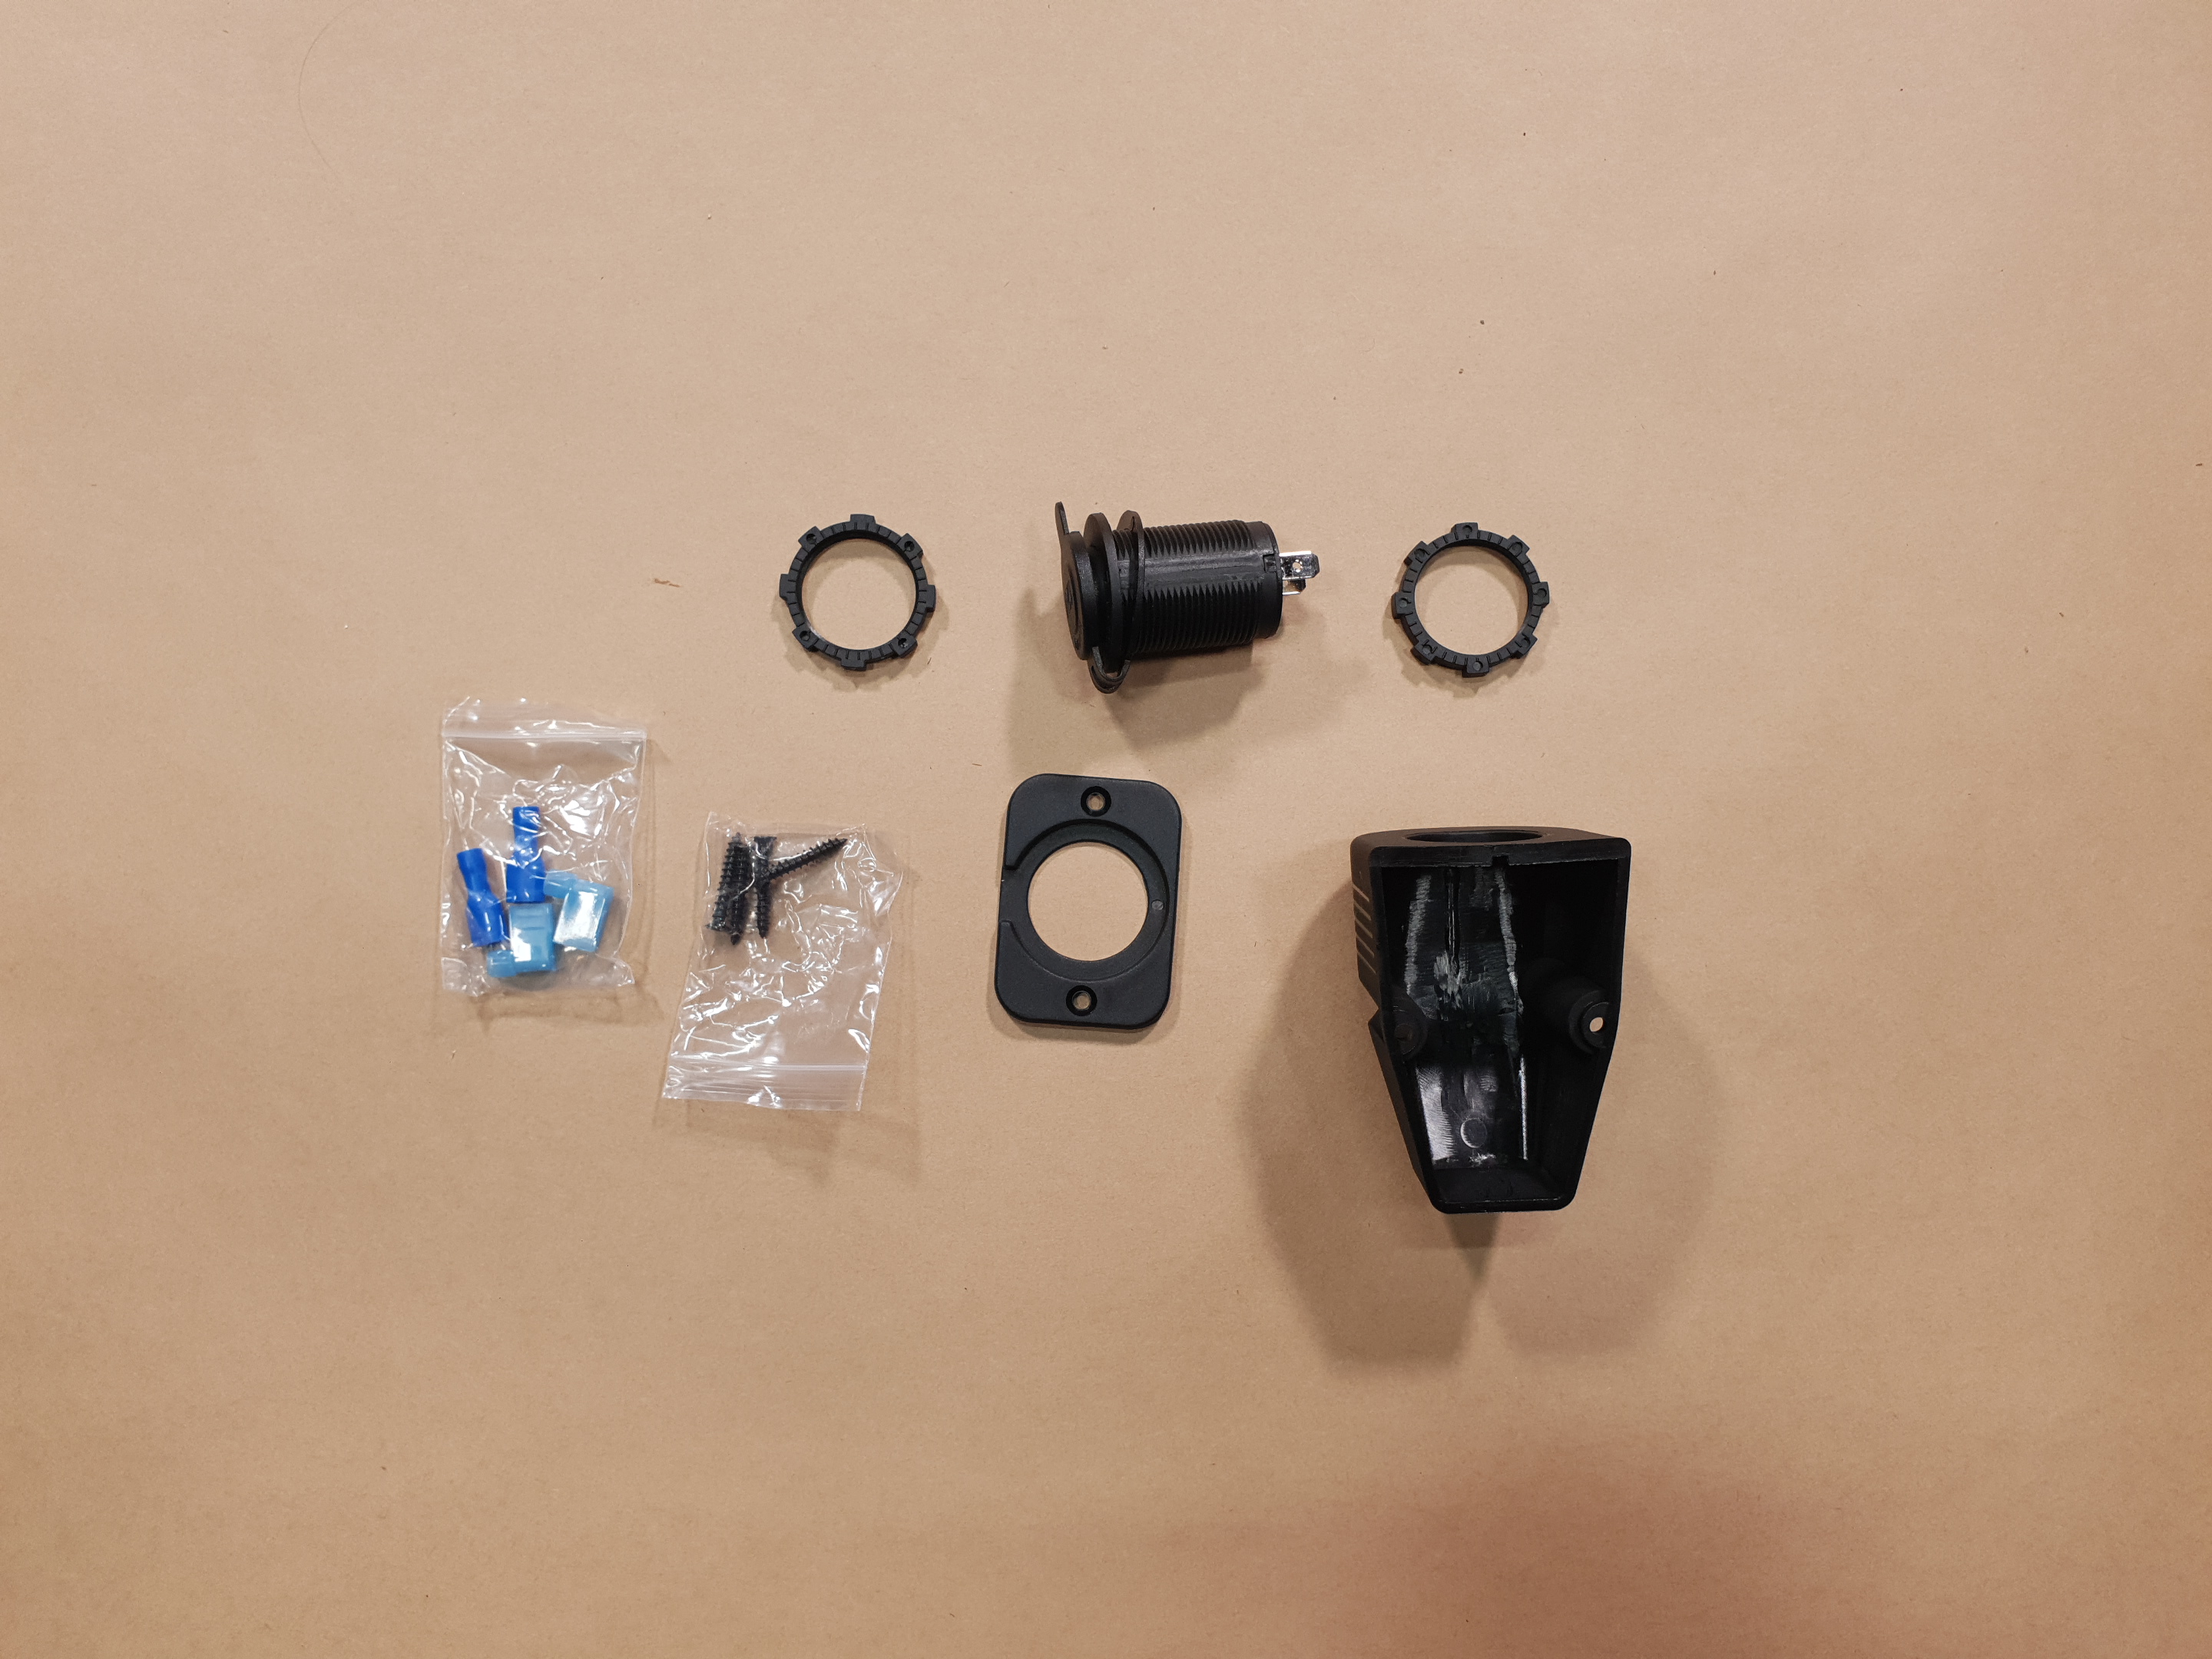
Other options are pre-made panels with sockets and switches in them. These just need an input from the battery and the rest is done for you. Designs vary. The one pictured has switches but they have their own outputs. The sockets on this one are wired through a fuse to the battery, unswitched.

You can also buy switch panels and combine them with the separate fuse box and socket kits if you like, or a switch panel which has fuse holders in it already. Either way, you will need a battery fuse for this, to protect the main supply wire.
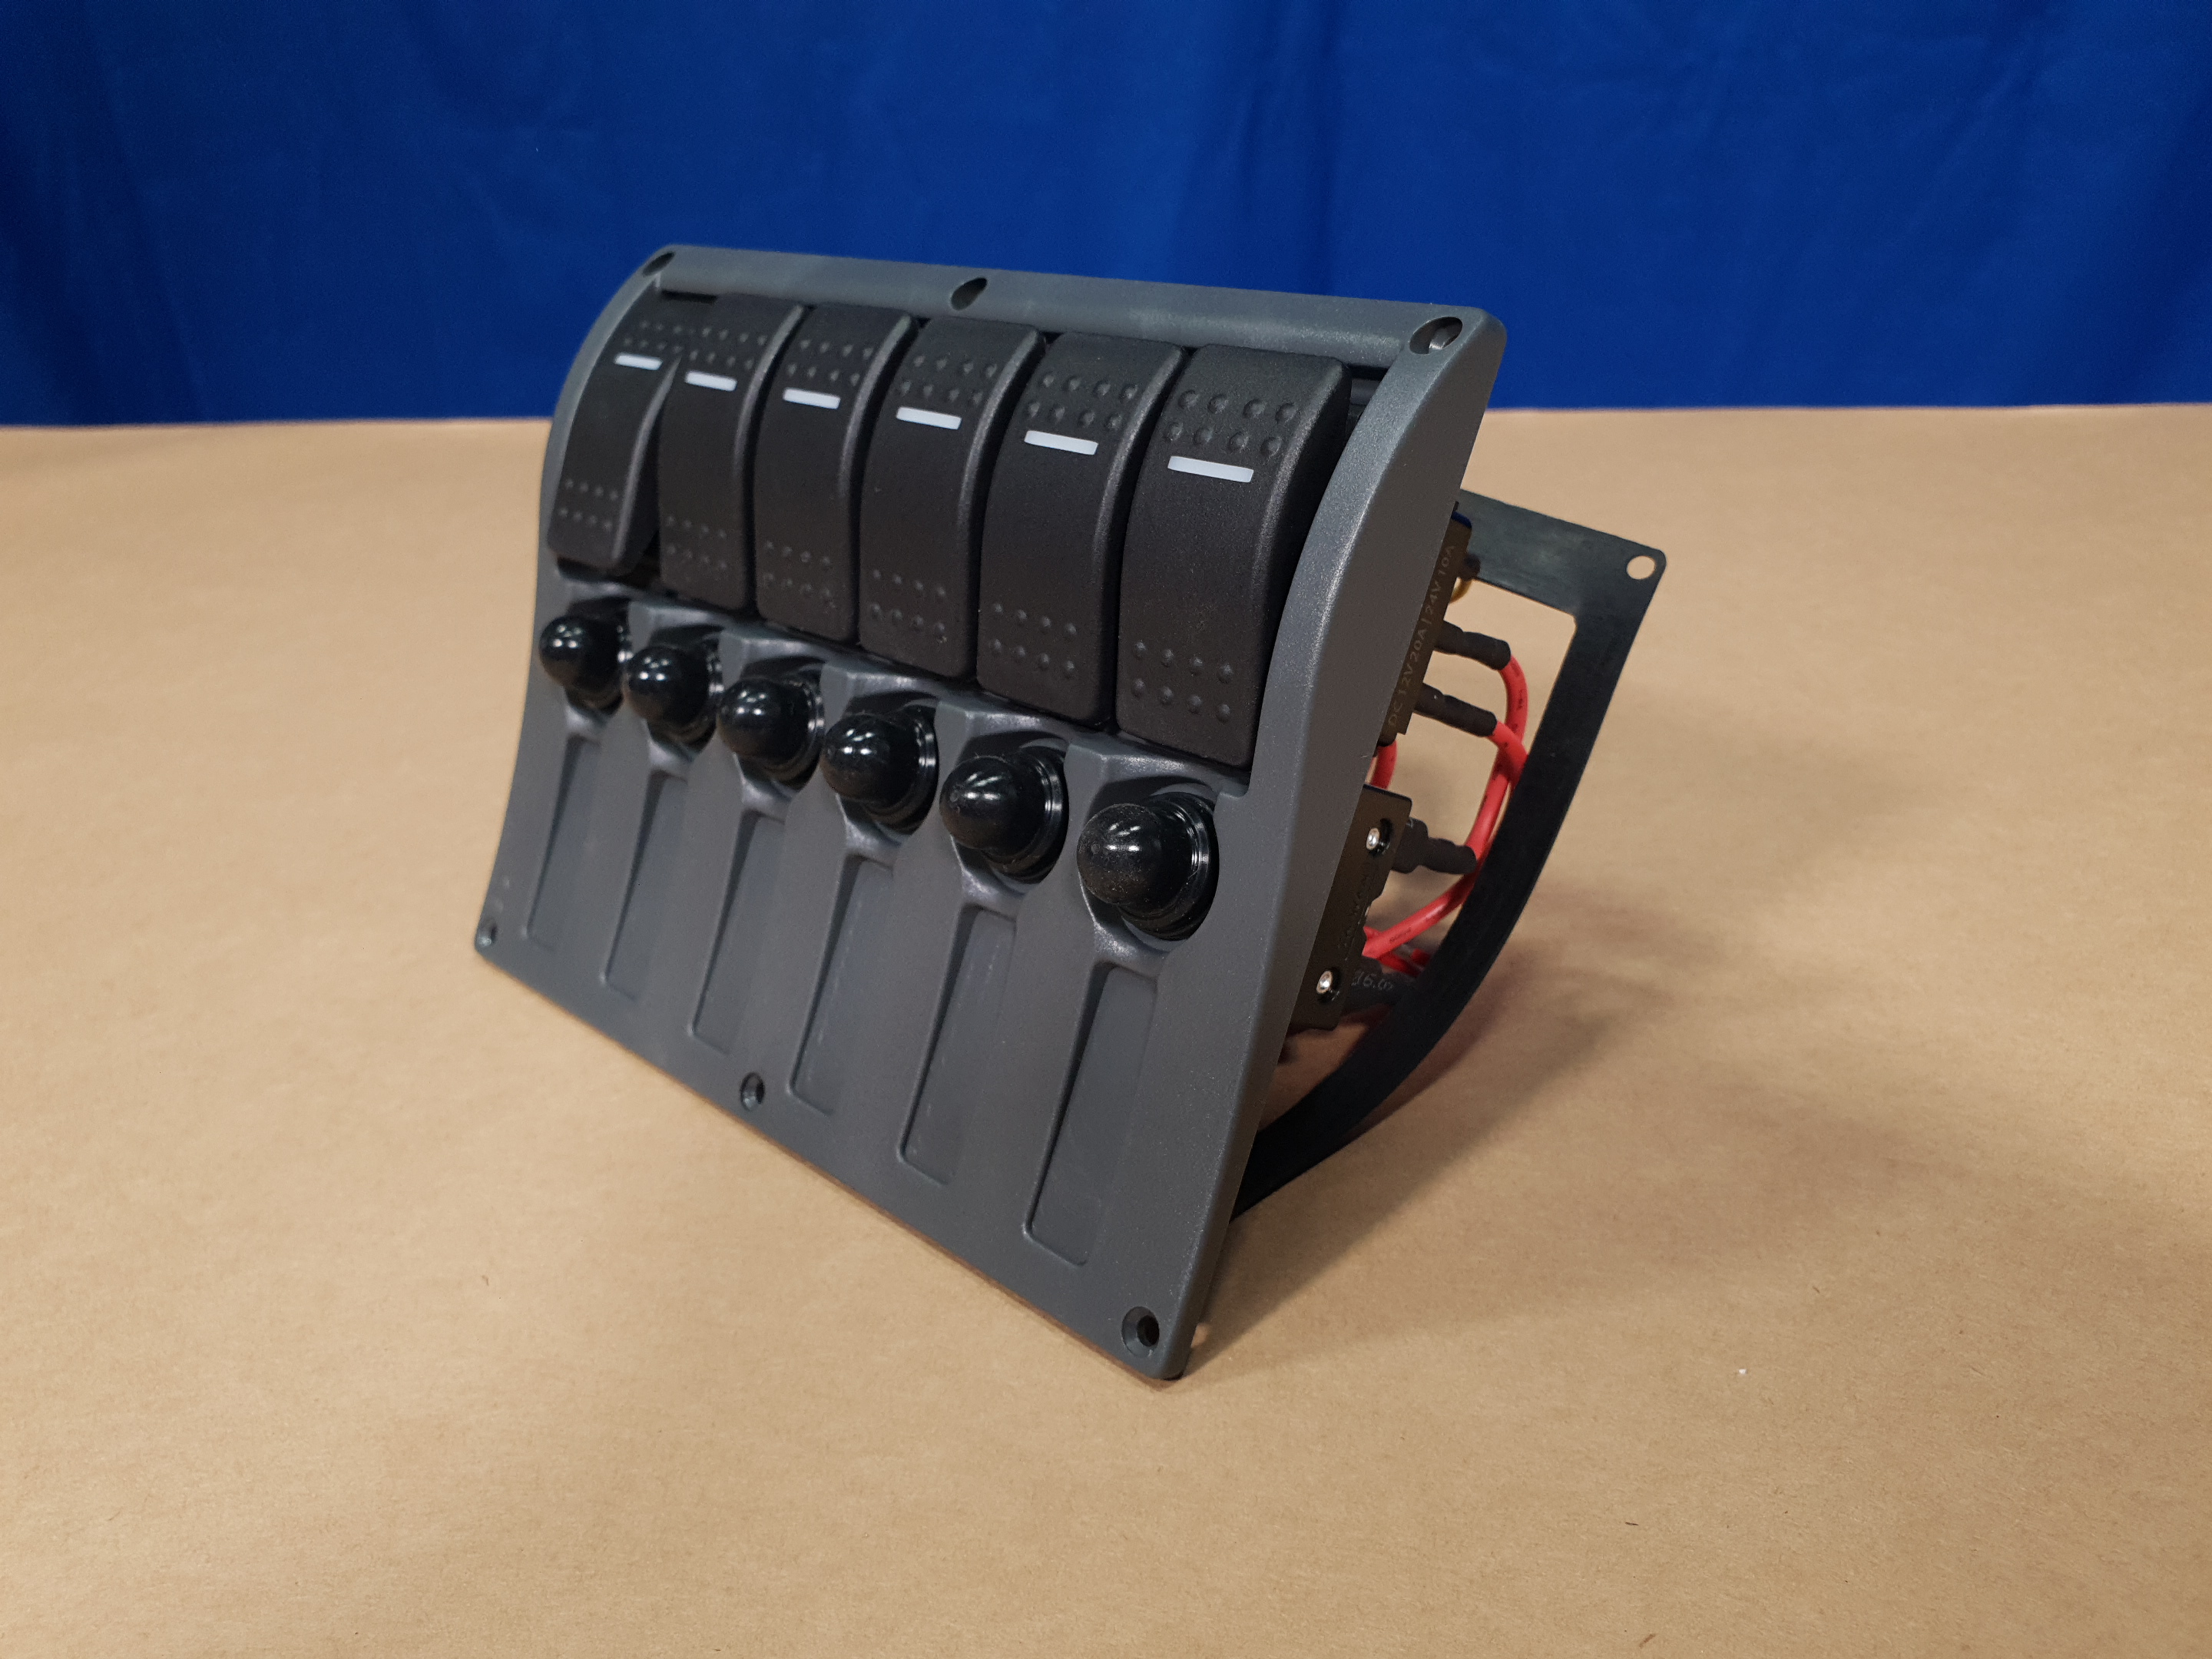
Further add-ons are things like voltmeters to monitor the battery voltage, and a battery isolator switch if you want to be able to easily disconnect the battery from all loads. Be aware that battery voltage alone is not an indicator of battery capacity, as all batteries show a higher voltage unloaded than when a load current is being drawn. The voltmeter will be a great indicator while loads are connected and drawing current.
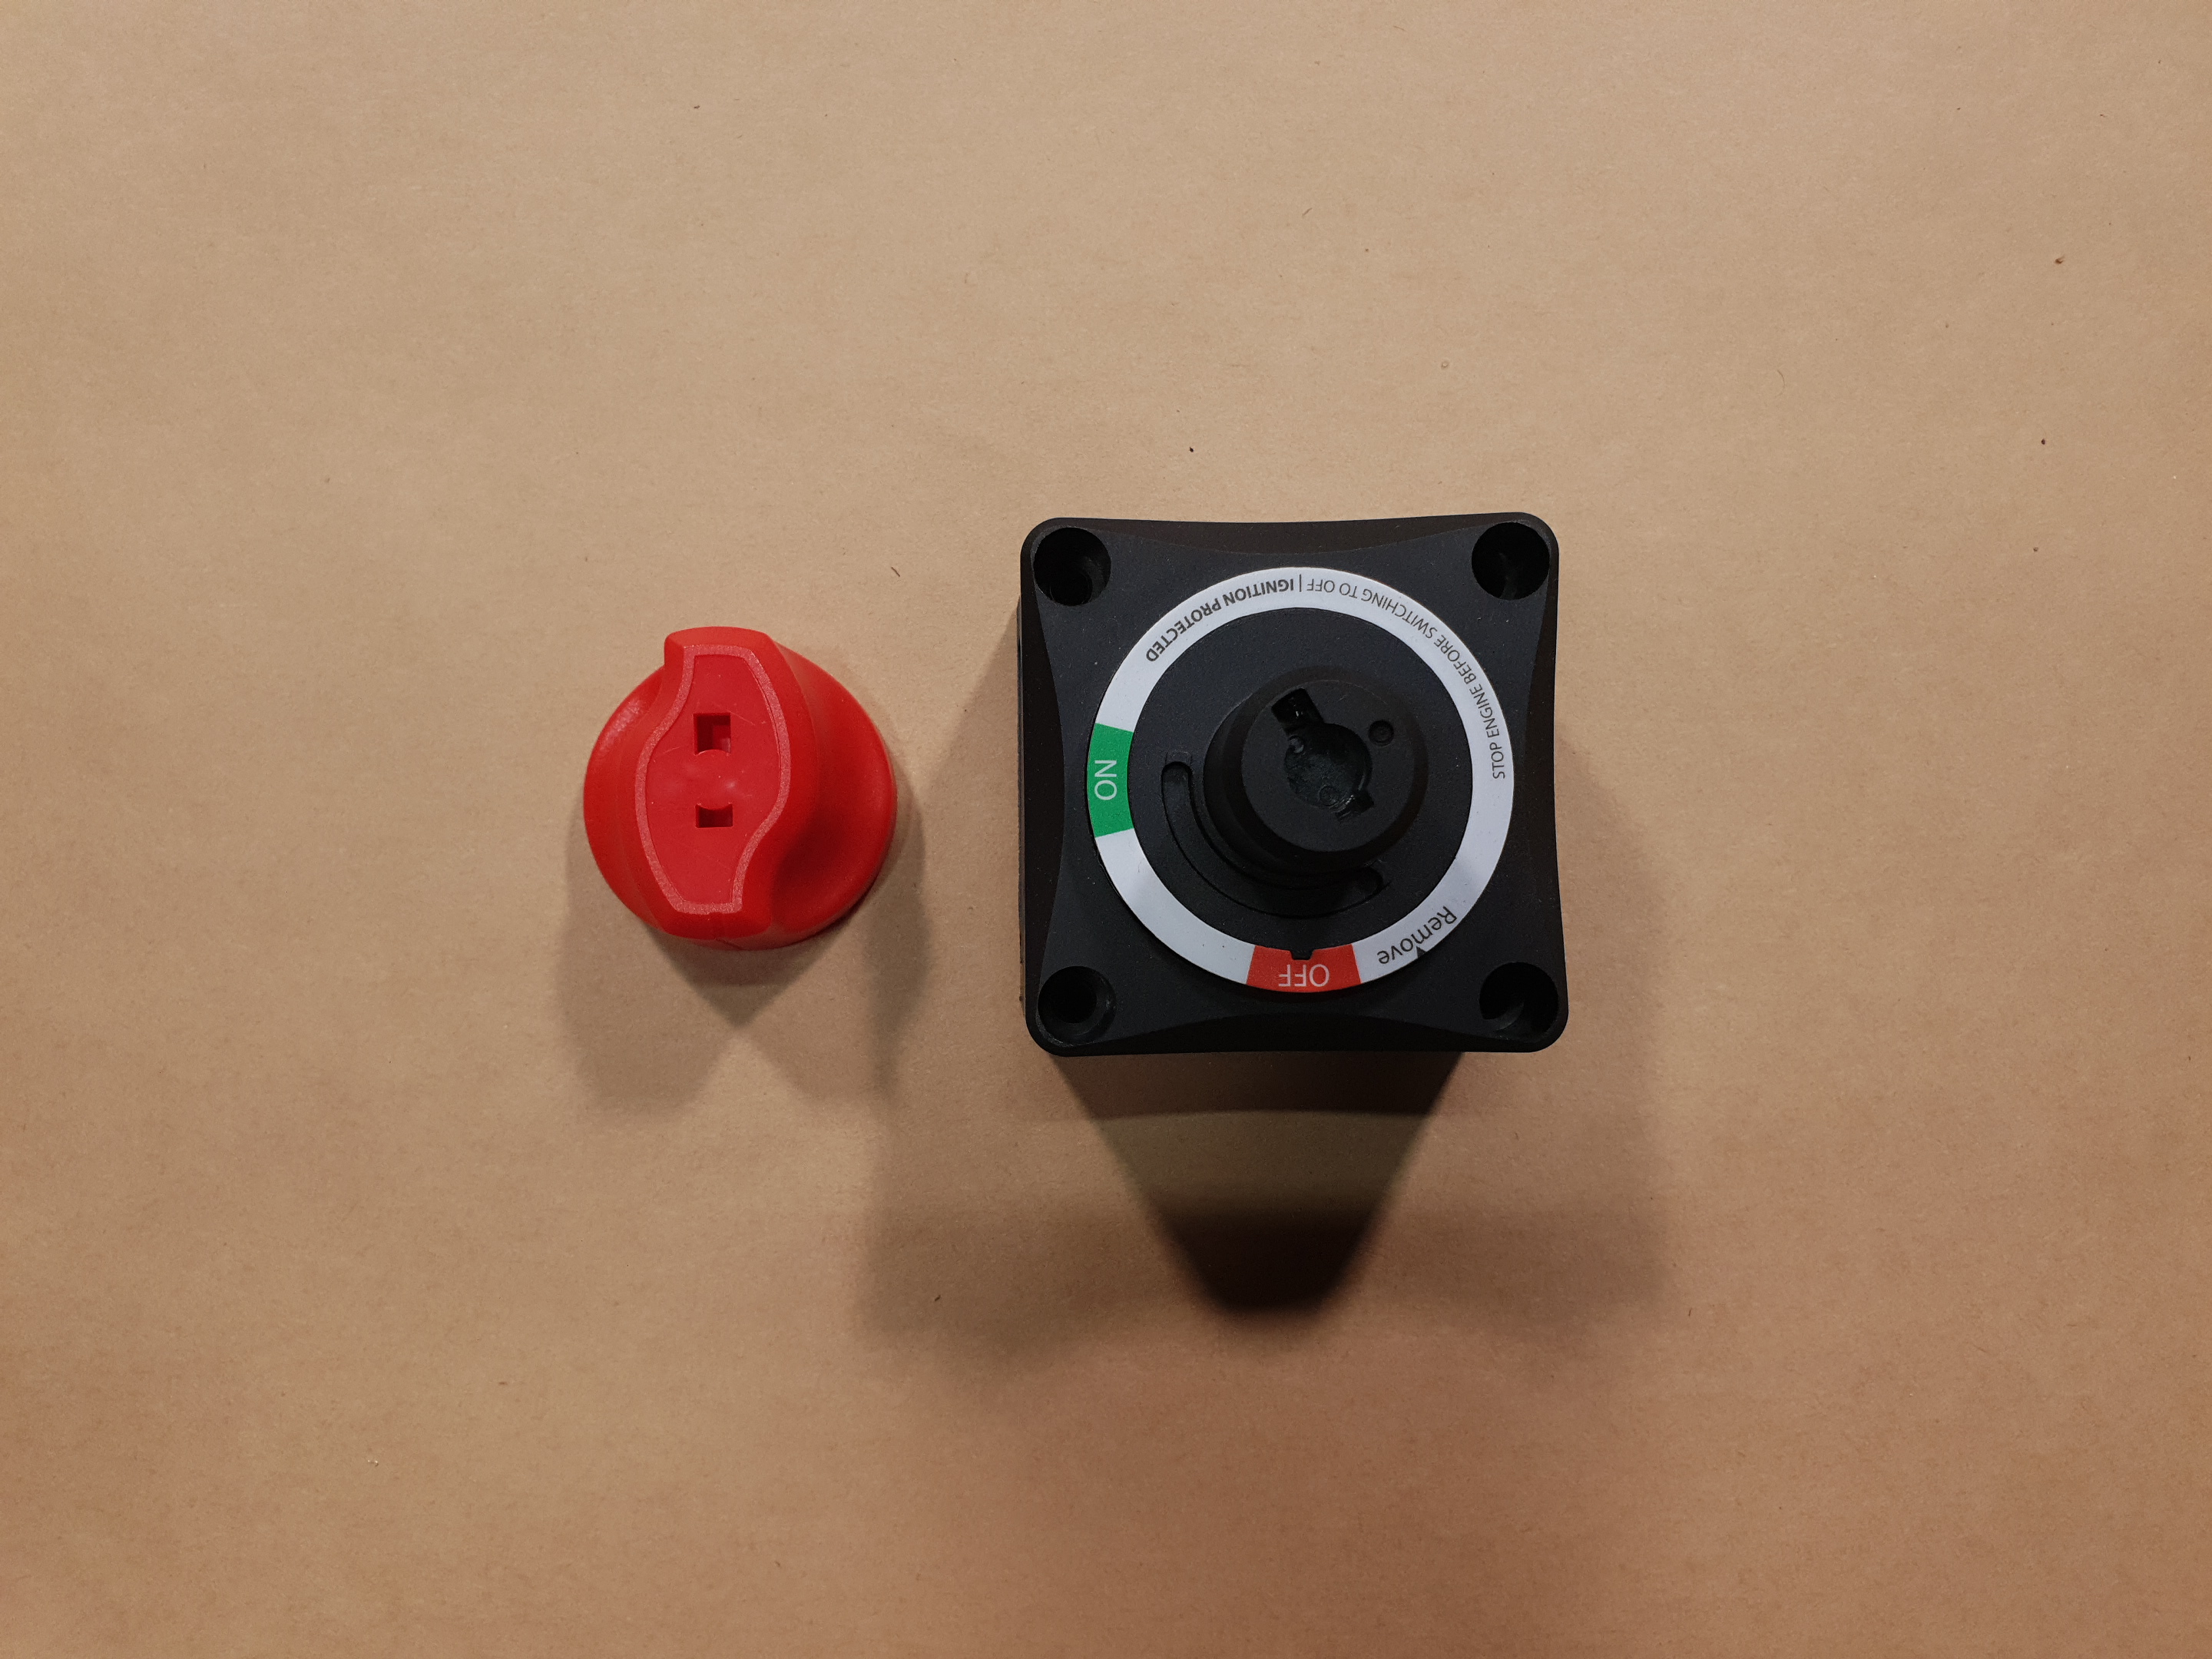
SOME ADDITIONAL OPTIONS:
The current range of add-ons includes but is not limited to:
- SZ2092 Twin M8 Battery Posts
PT4479 Twin 50A High-current connector, panel mount
PT4492 Twin high-current connector, surface mount
HB8520 DC control and distribution box with outlets
PS2020 Cigarette lighter panel, surface, and underdash kit
PS2026 Cigarette lighter and dual USB panel, surface, and underdash kit
You will need:
After considering the points above, you will need to choose:
1. A battery. We are using a 100Ah Lithium deep cycle battery
2. A battery mounting system. We are using a battery box with outputs
3. Outputs, if not using a battery box. Things like high-current connectors, cigarette lighter sockets.
4. Fusing, as needed. We have a 5AG Inline holder and an 50A fuse from the battery to the DC-DC charger.
5. A DC-DC charger. We are using the Victron Orion-Tr Smart 360W model
6. Wire to suit. We have 50A 8 AWG twin-core wire
7. Any battery terminals and tools you will need, to make connections along the way
8. Any additional fittings you will be using for your application.
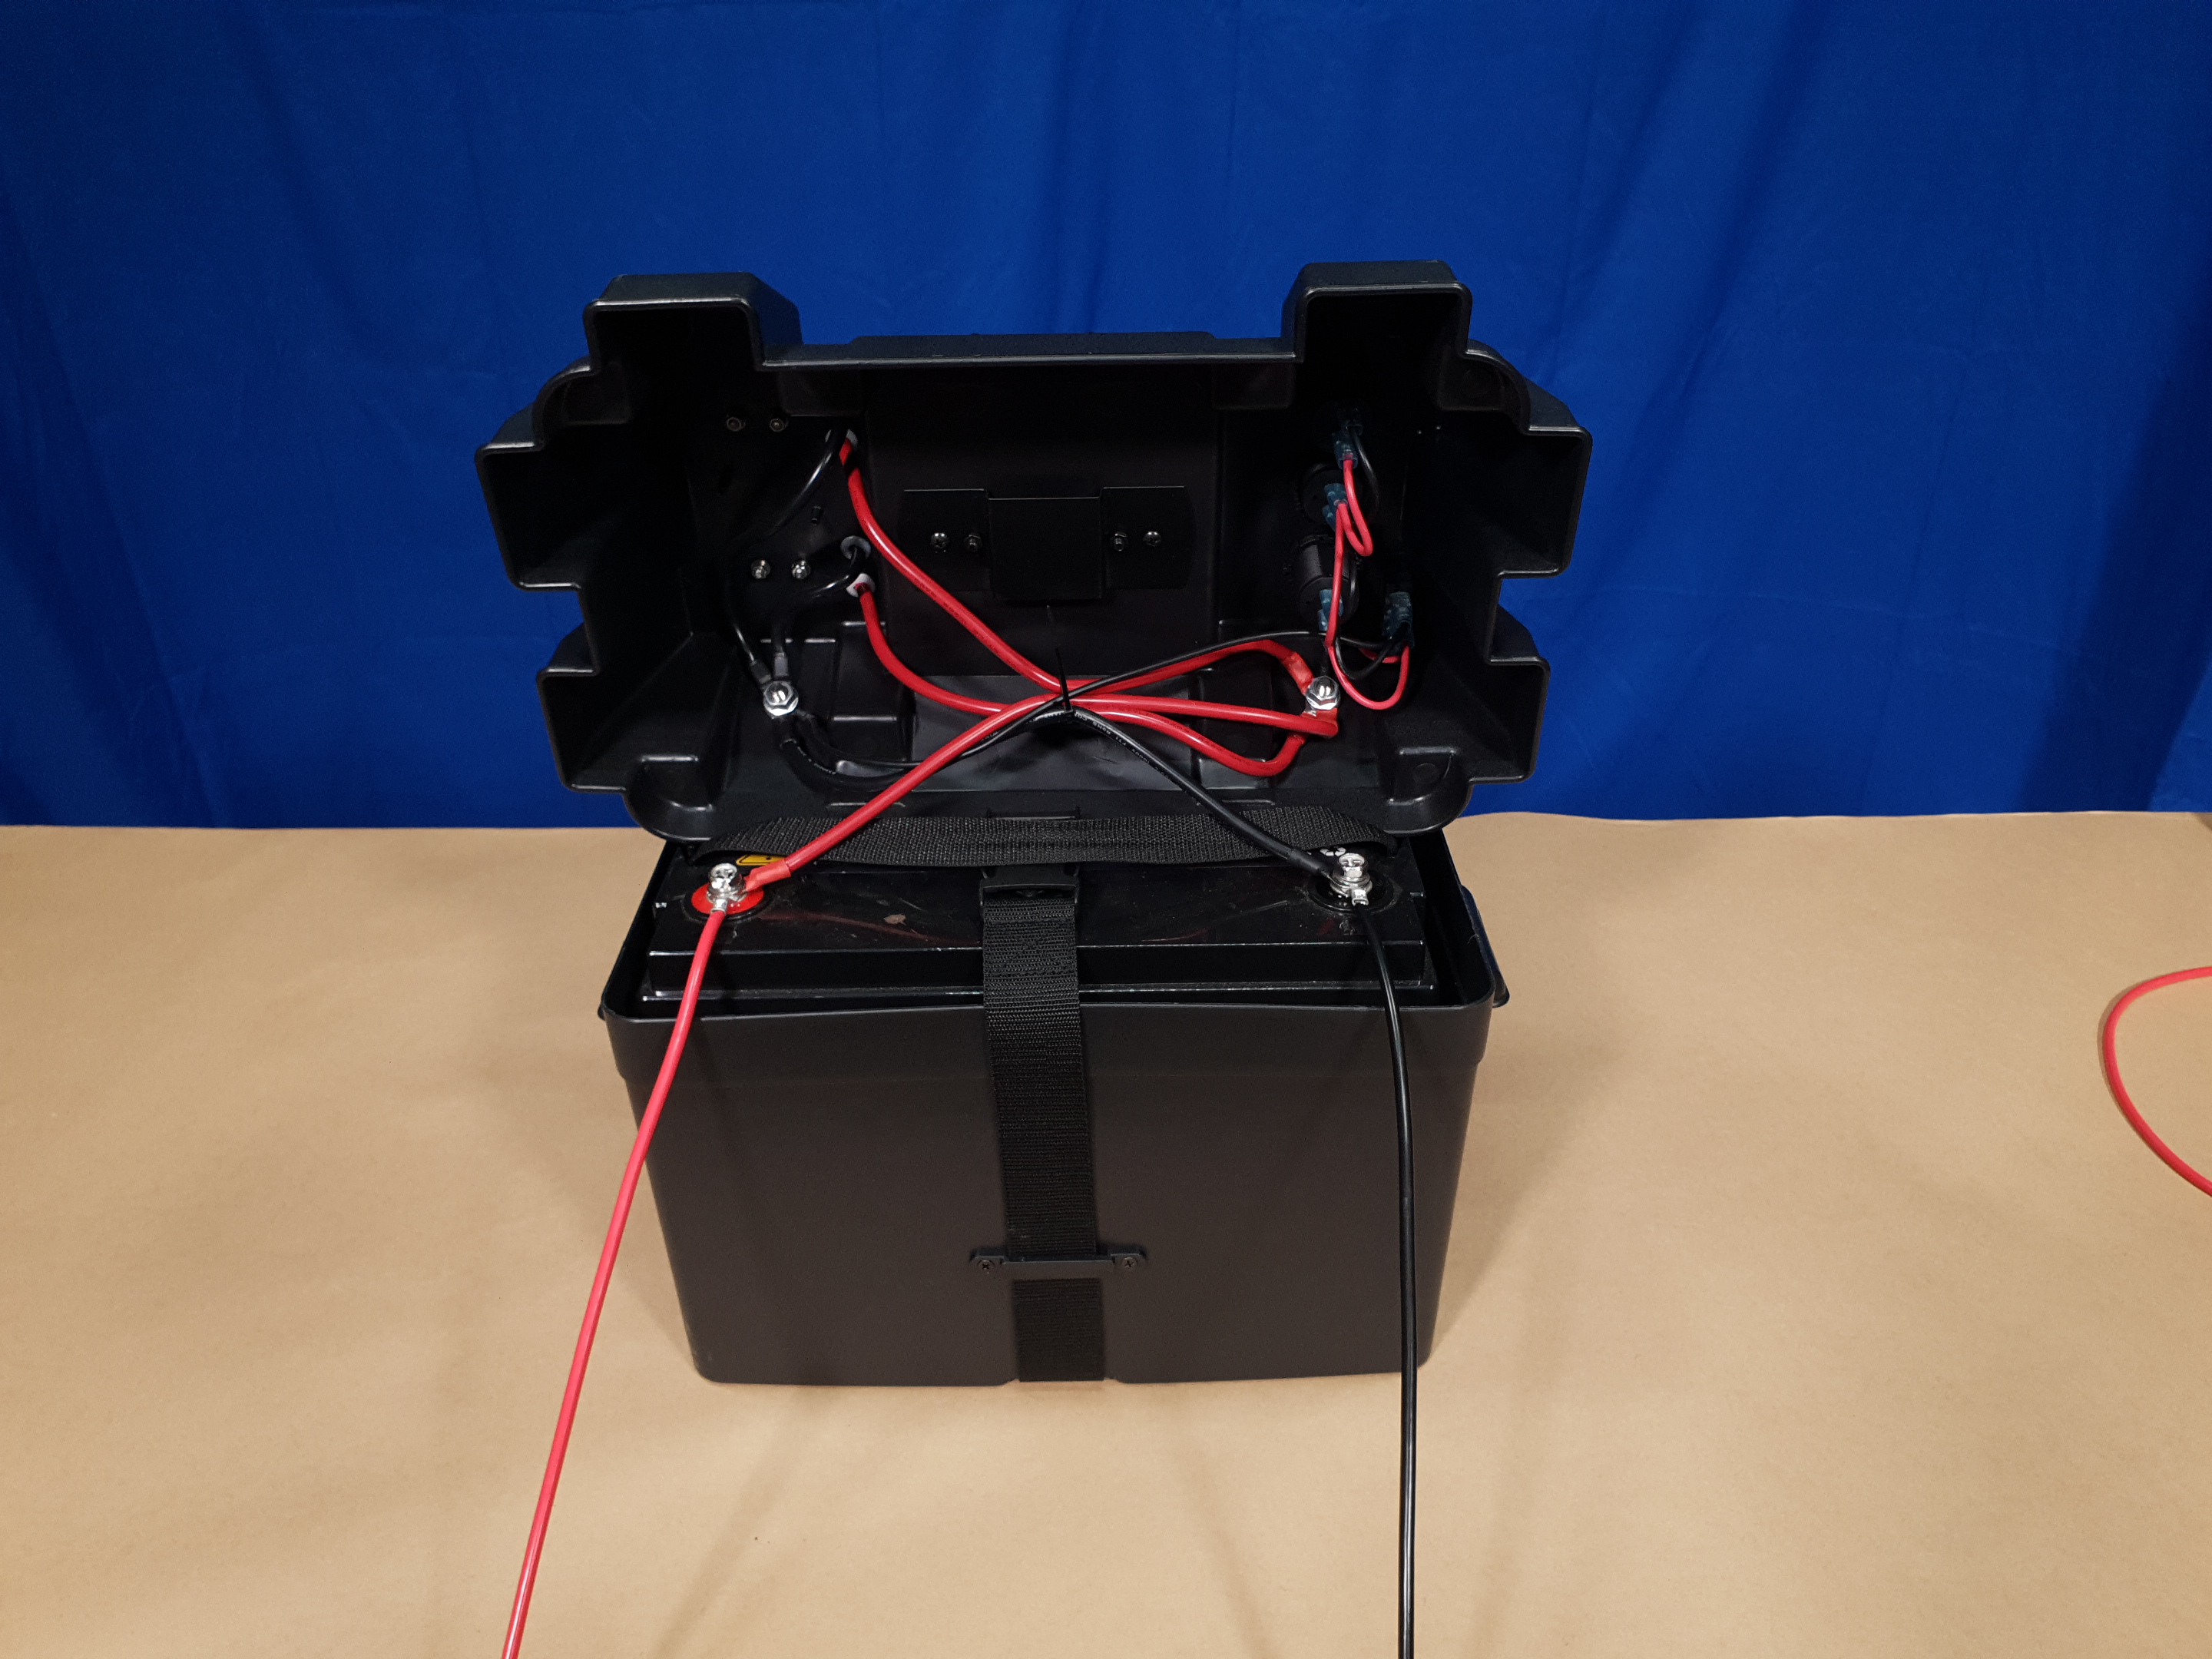
We started by installing the battery in the battery box. This model includes a strap, with brackets that screw down inside the box, with the strap running over the battery to secure it. Then, we undid the battery terminals, and added the wires from the lid which connect to the circuit breaker and all the sockets and voltmeter. Note that this box wiring goes against what we discussed with fusing because it is meant for portable power setups. As the wiring is short, only external overload is a real issue and it will do the job safely if used with care.
We did not do up the terminals firmly yet. Instead, added the wires for the DC-DC converter output, and routed them under the outlet port on the battery box. We crimped on eyelets to achieve this. Note that the DC-DC charger would need to be attached somewhere. Use its screw mounting holes to attach it to the vehicle trim or to the battery box, but be careful of screws damaging the battery. You can't see this in the image, but after figuring out cable length, we undid the positive wire from its bolt, and wrapped the eye terminal in tape. We don't want accidental short circuits while working elsewhere!
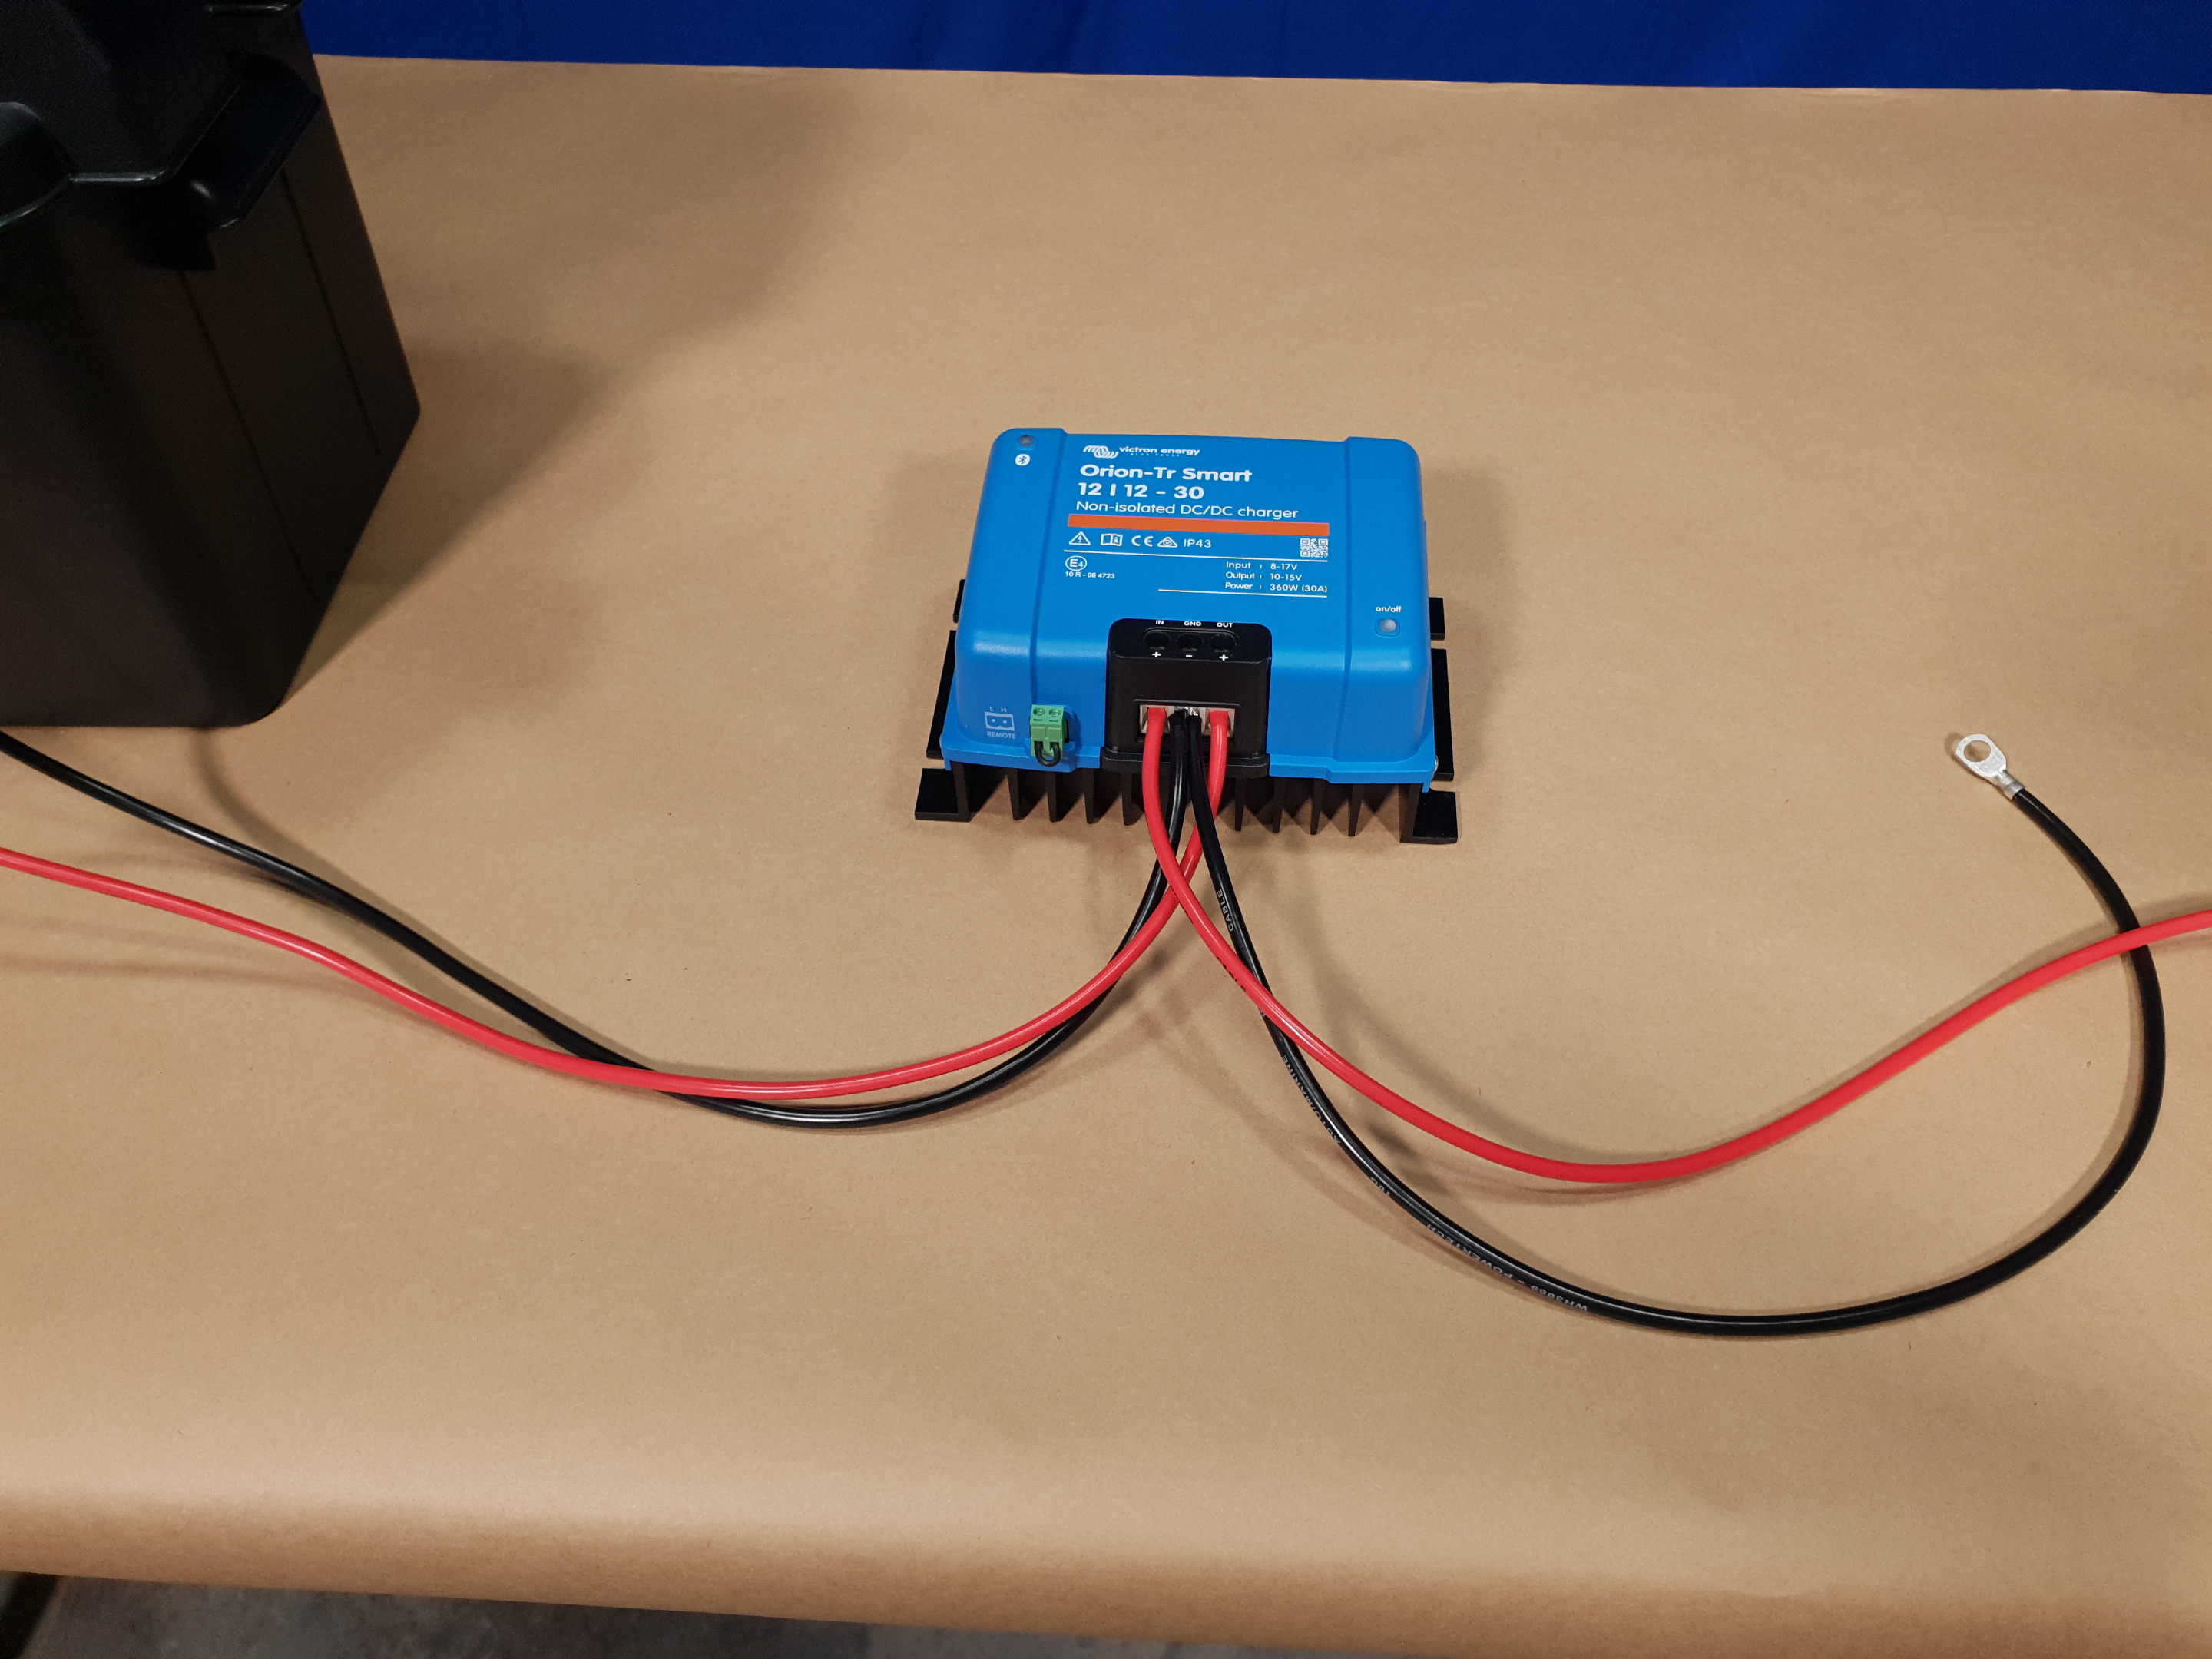
Next, the DC-DC charger was wired to both batteries. We used the screw terminals on the charger unit to attach some 10 AWG 40A single-core wire, the same as we had used for the auxiliary side. This will run the length of your vehicle so it will be longer than ours. We had to use 10 AWG wire because the DC-DC charger we chose can charge up to 30A and at lower input voltages, the input current can get up to 35A. At the other end, we cut back the positive wire and added an inline fuse holder, a 60A-rated 5AG glass fuse holder with a 40A rated fuse to match the wire. Then, we added the cut wire to the other side of the holder, and added 8mm eyelet terminals to both the negative and positive wires for attachment to the battery. Note the fuse is not fitted until after wiring is complete.
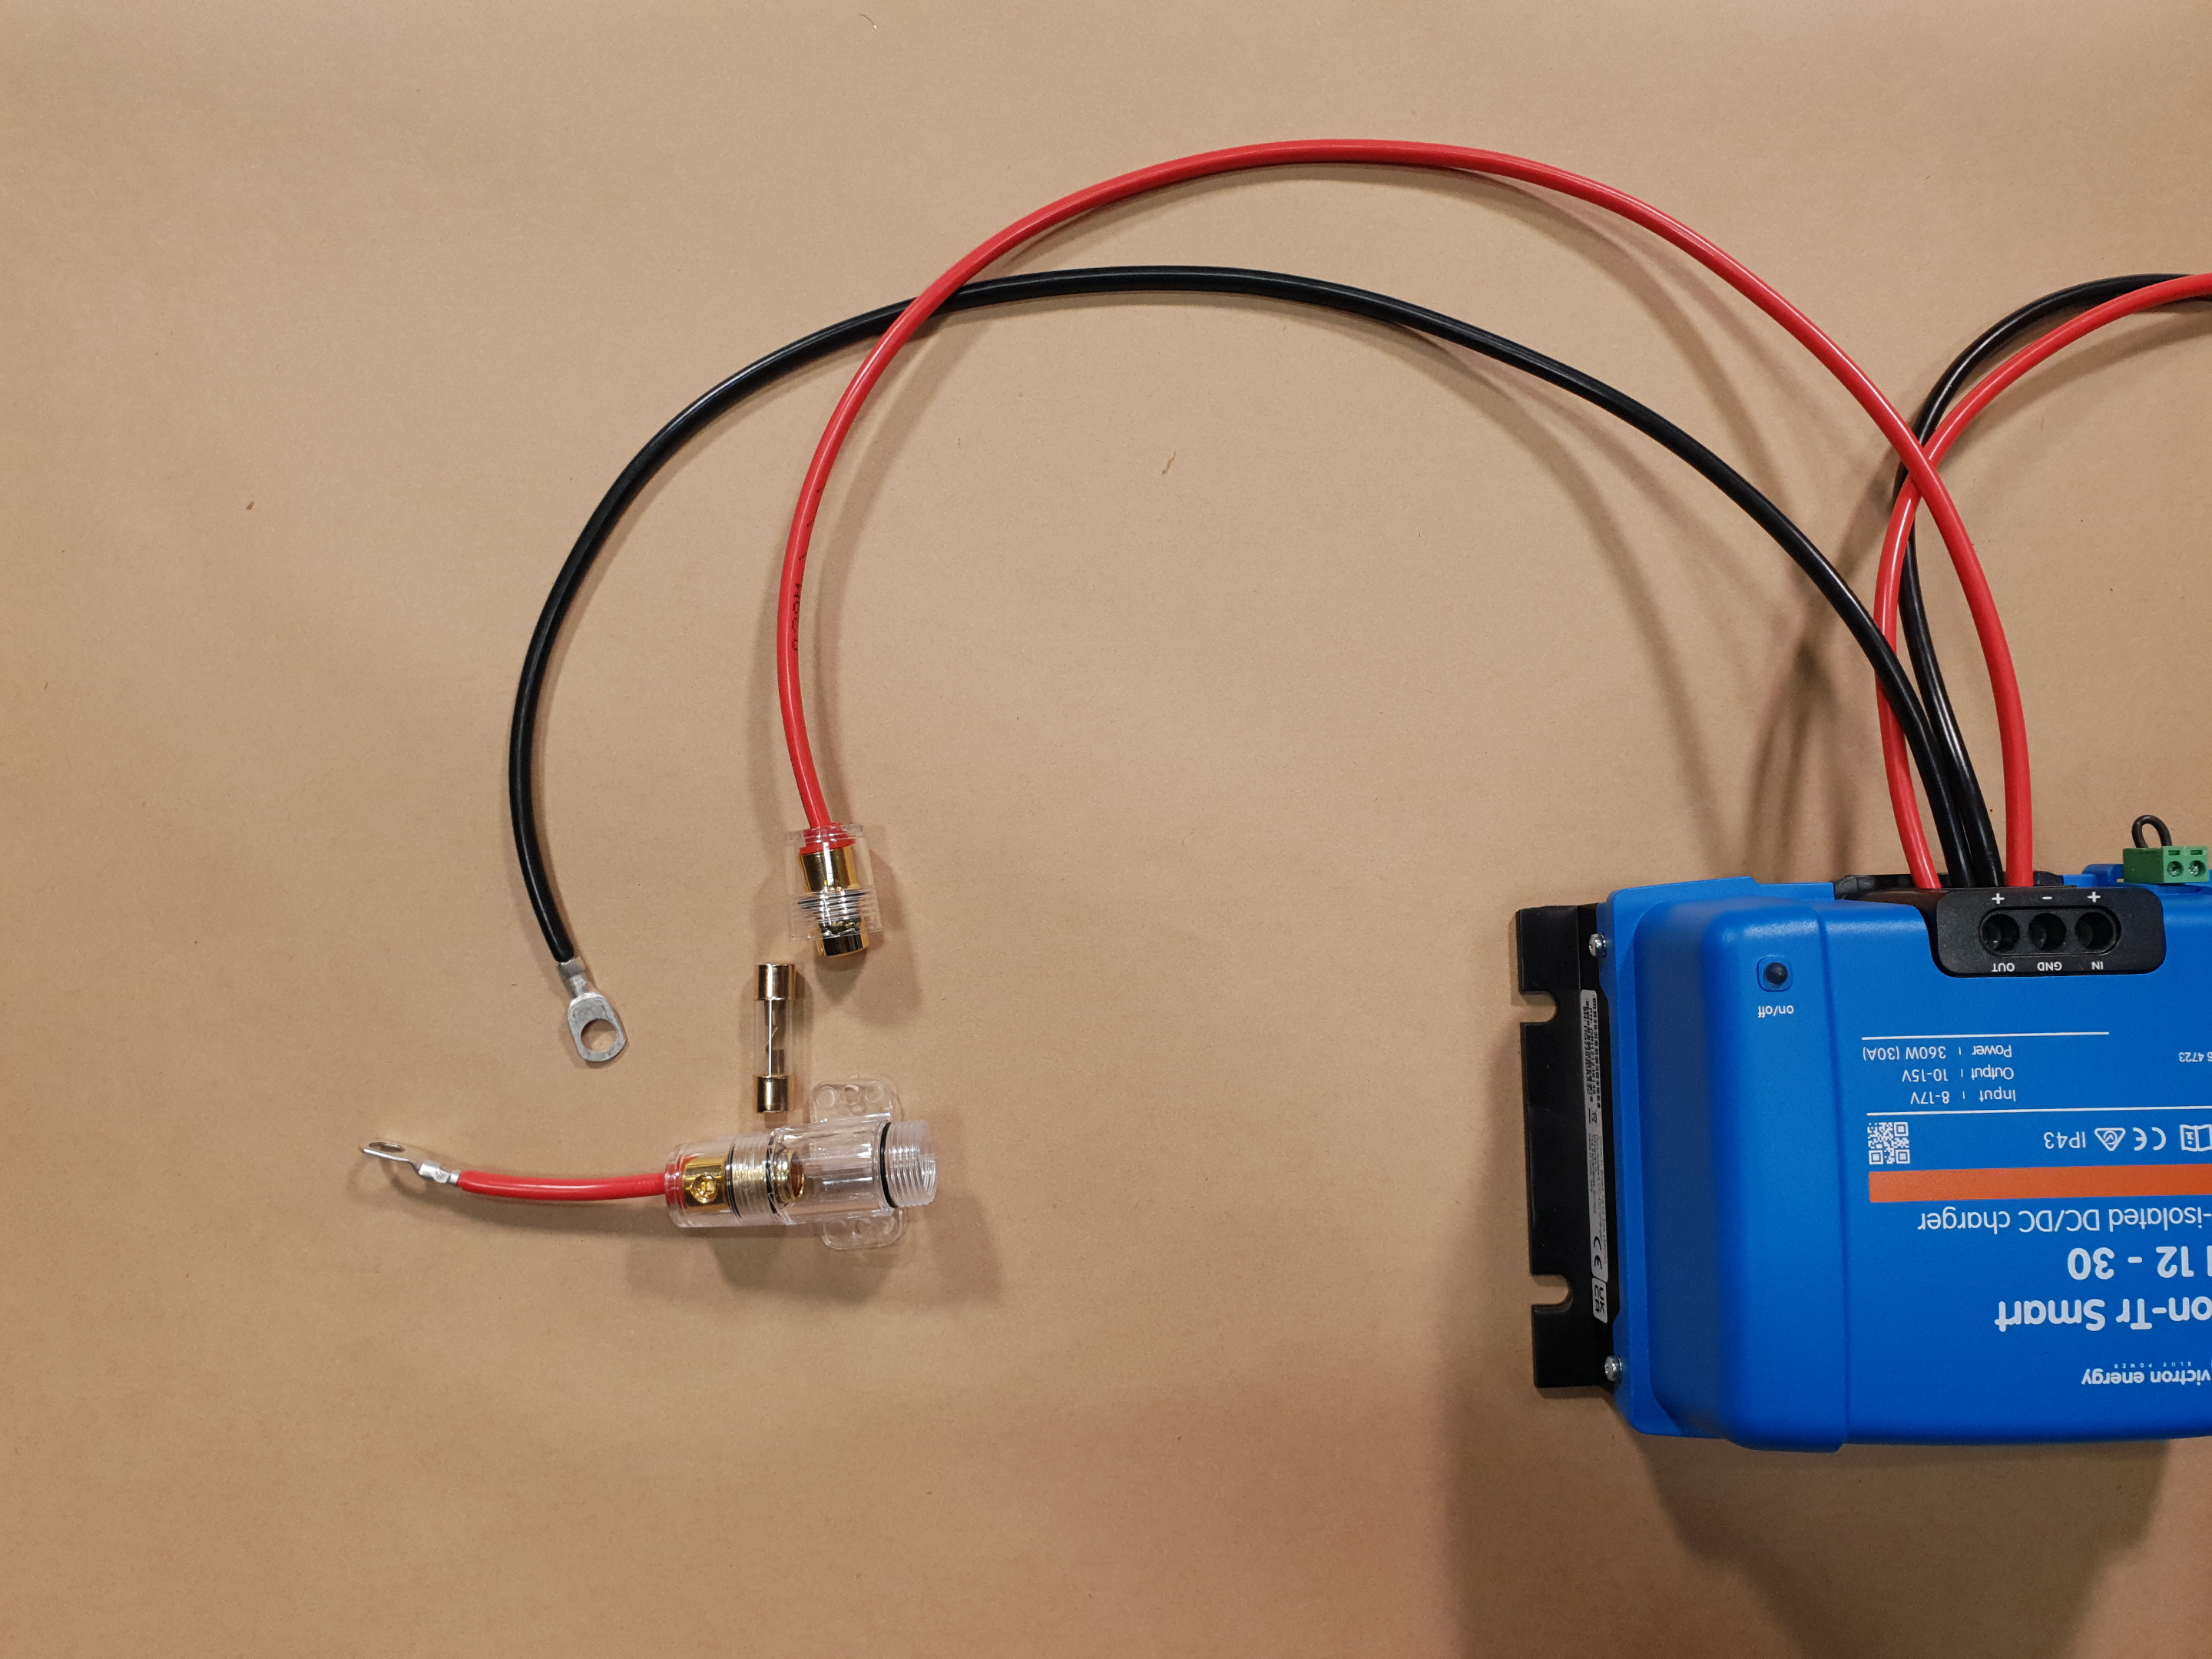
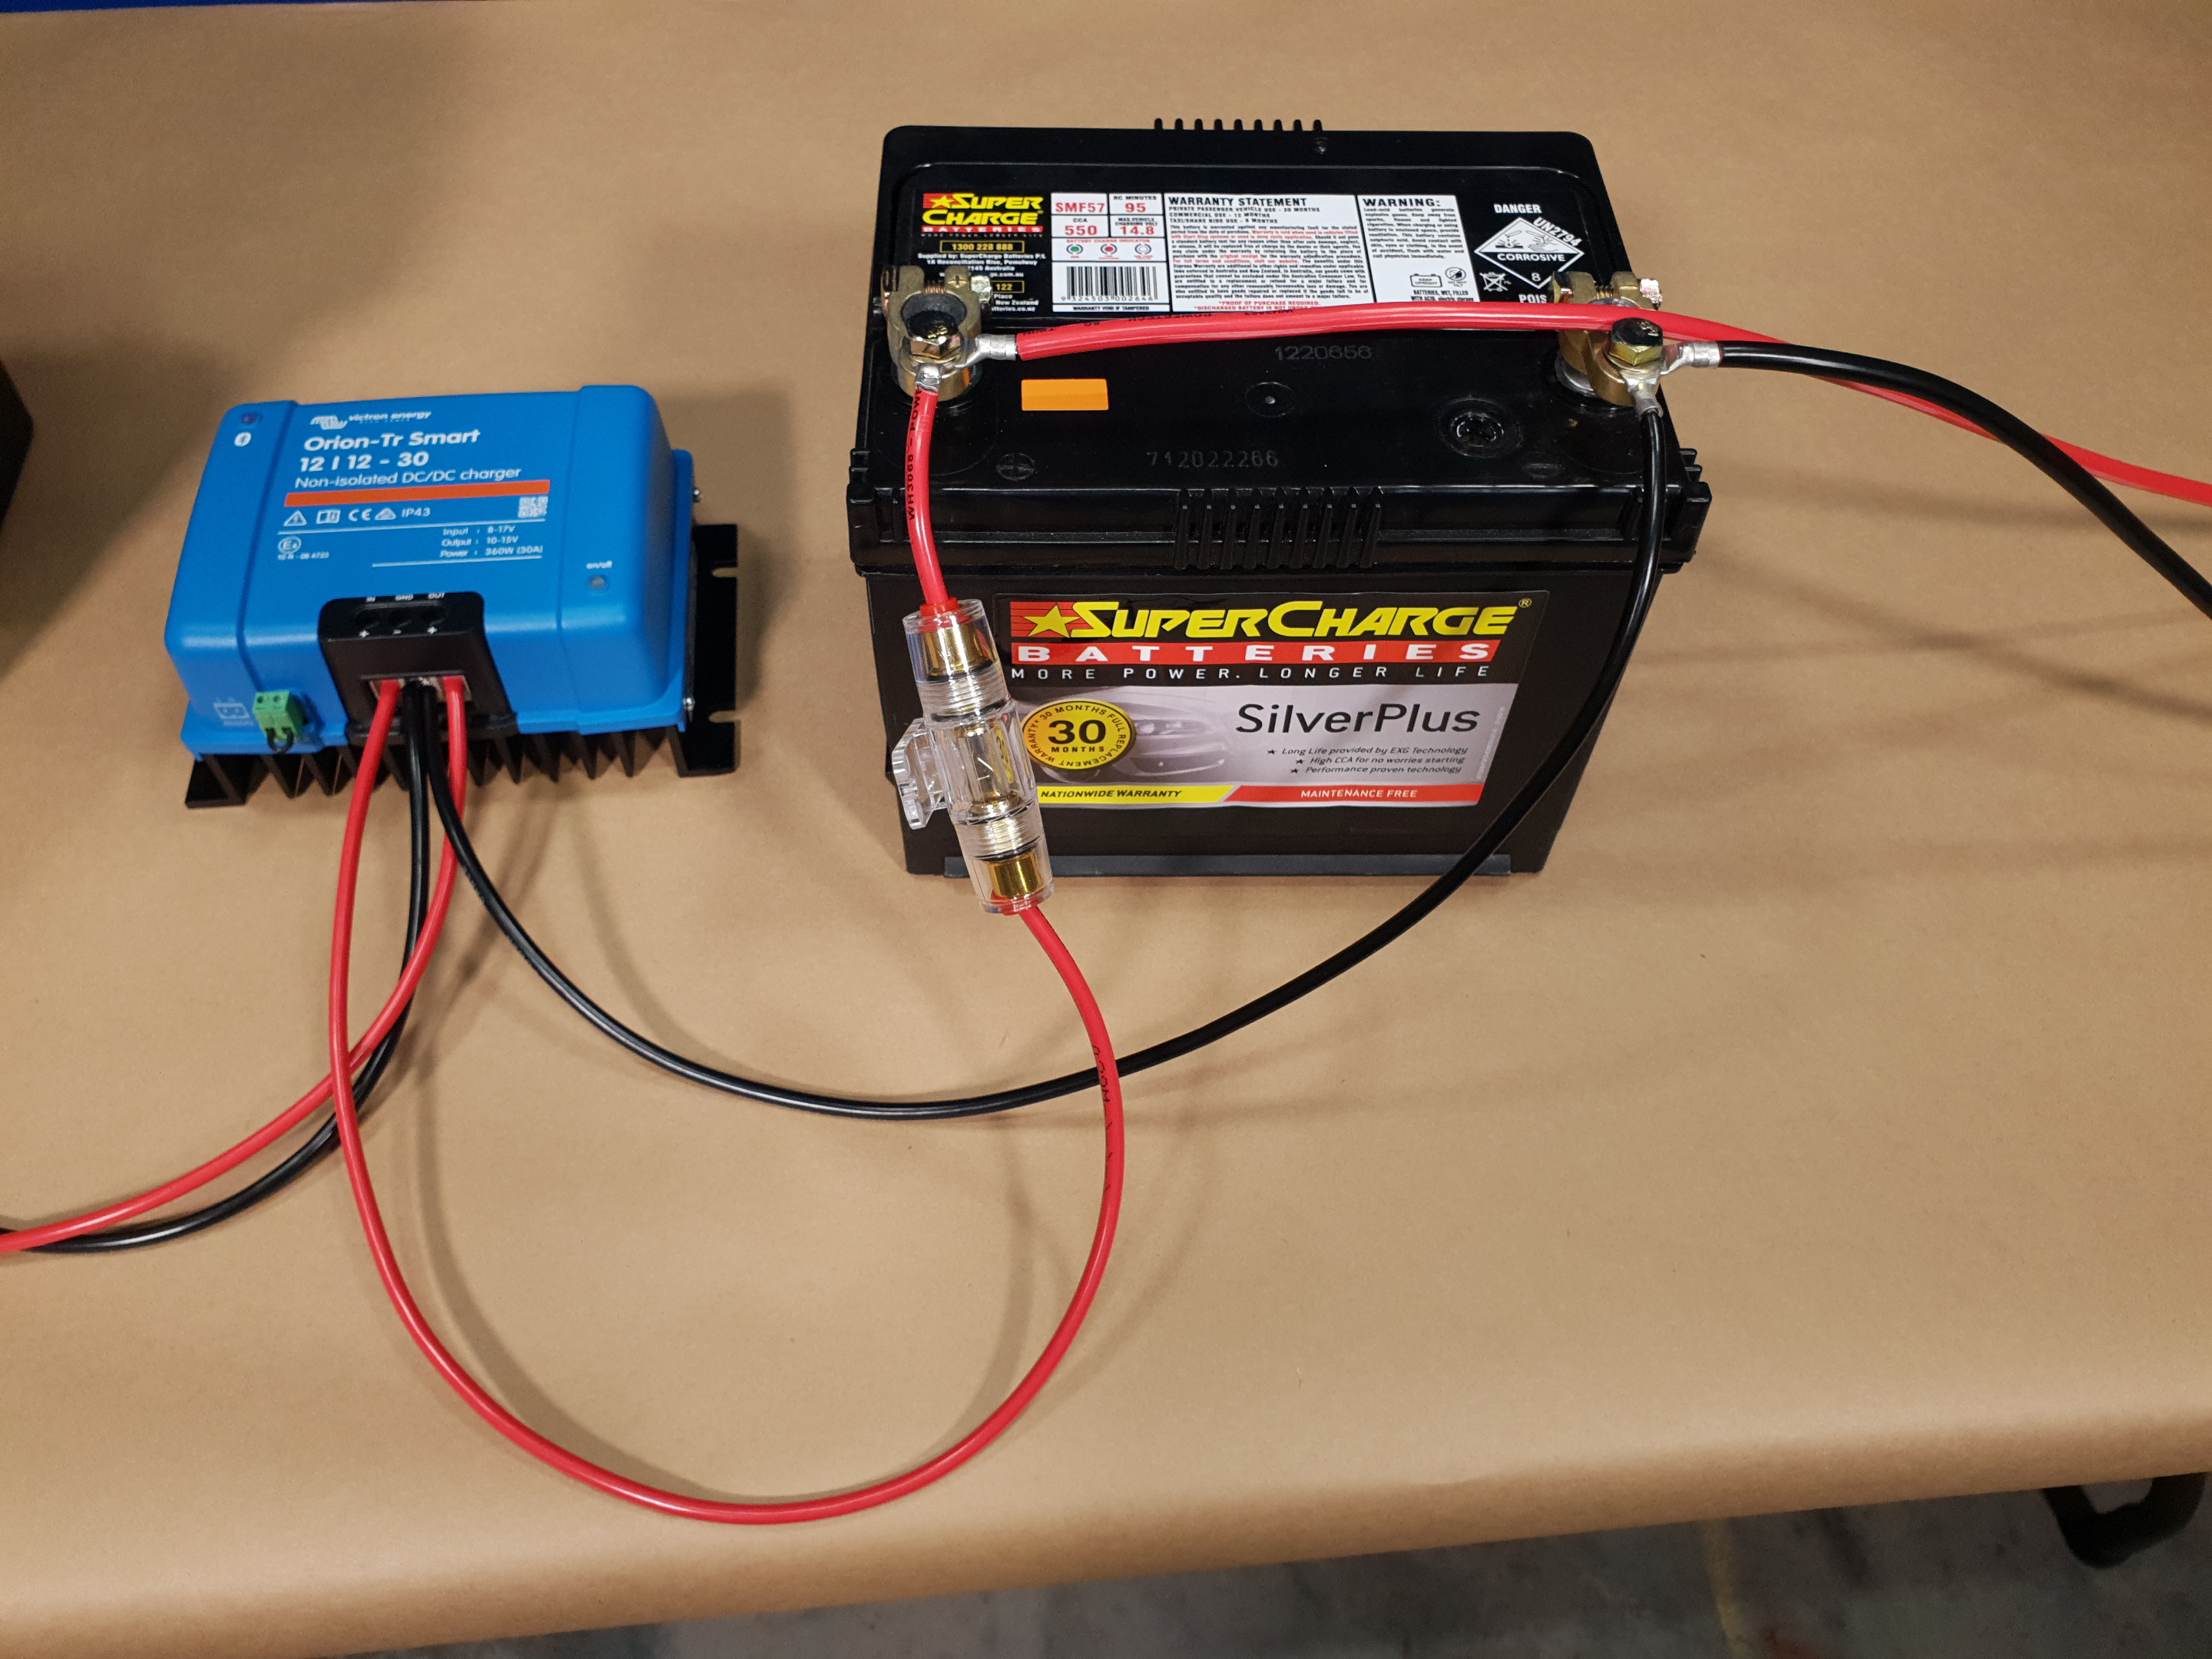
The last step was to attach the charger wire to the battery. We chose 8mm crimp-on eyelets because they suit the battery terminals we have, but not all batteries are the same. Many battery terminals factory-fitted to cars are not designed for extra wiring. You may need to replace yours with ones similar to these.
We undid the nut on the negative terminal first, and added the negative wire, before securing it tightly again. Then, we added the short wire with the fuse holder end cap, and eye terminal, to the positive battery terminal. Keep the cover over the fuse holder terminal! It can easily short. Finally, we added the fuse into the holder, and slid it into the end cap to complete the circuit.
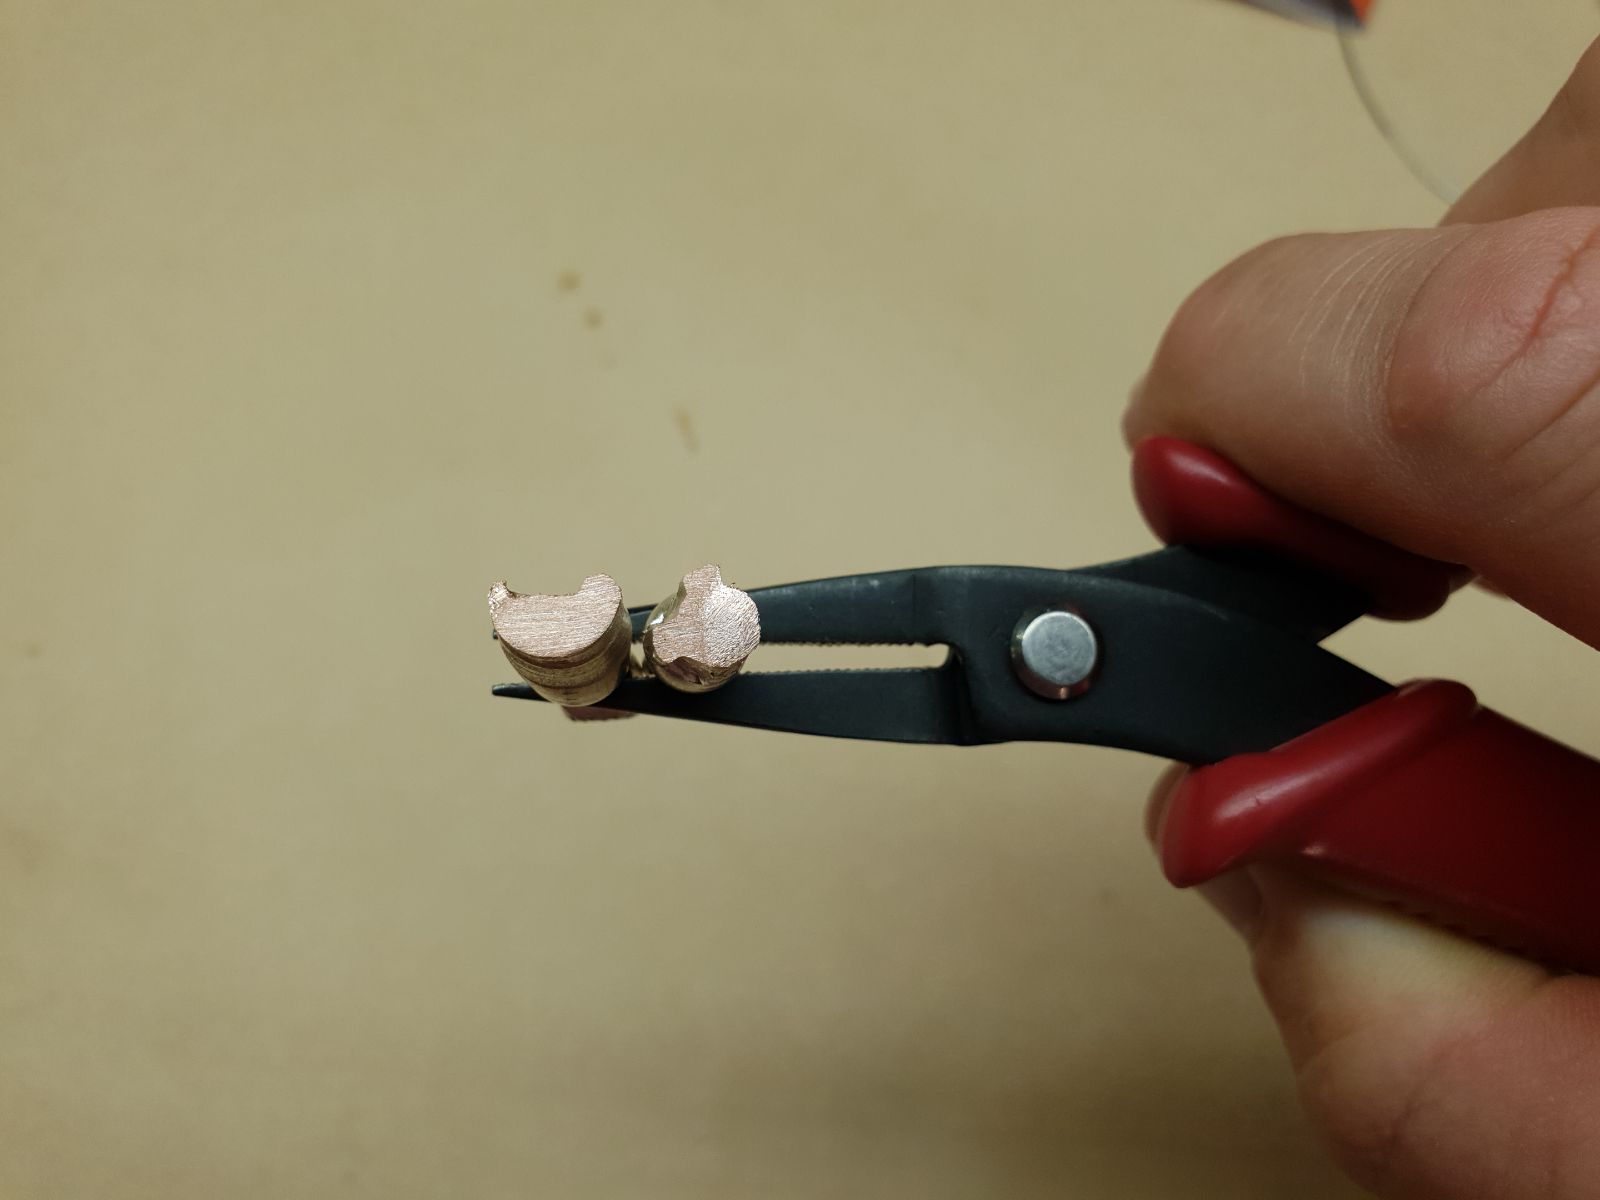
Some people say crimp connections are never as good as solder, but that is not true. If you use the correct tool, correct crimp connector, and correct technique, crimp connectors are more than adequate. The photo below shows an 8 AWG high current (Anderson style) connector contact crimped with the correct tool, with the correct sized wire in it. It was then cut in the middle of the crimp, filed, and sanded down so it was smooth. We cannot even see the strands in it, it is such a firm crimp!
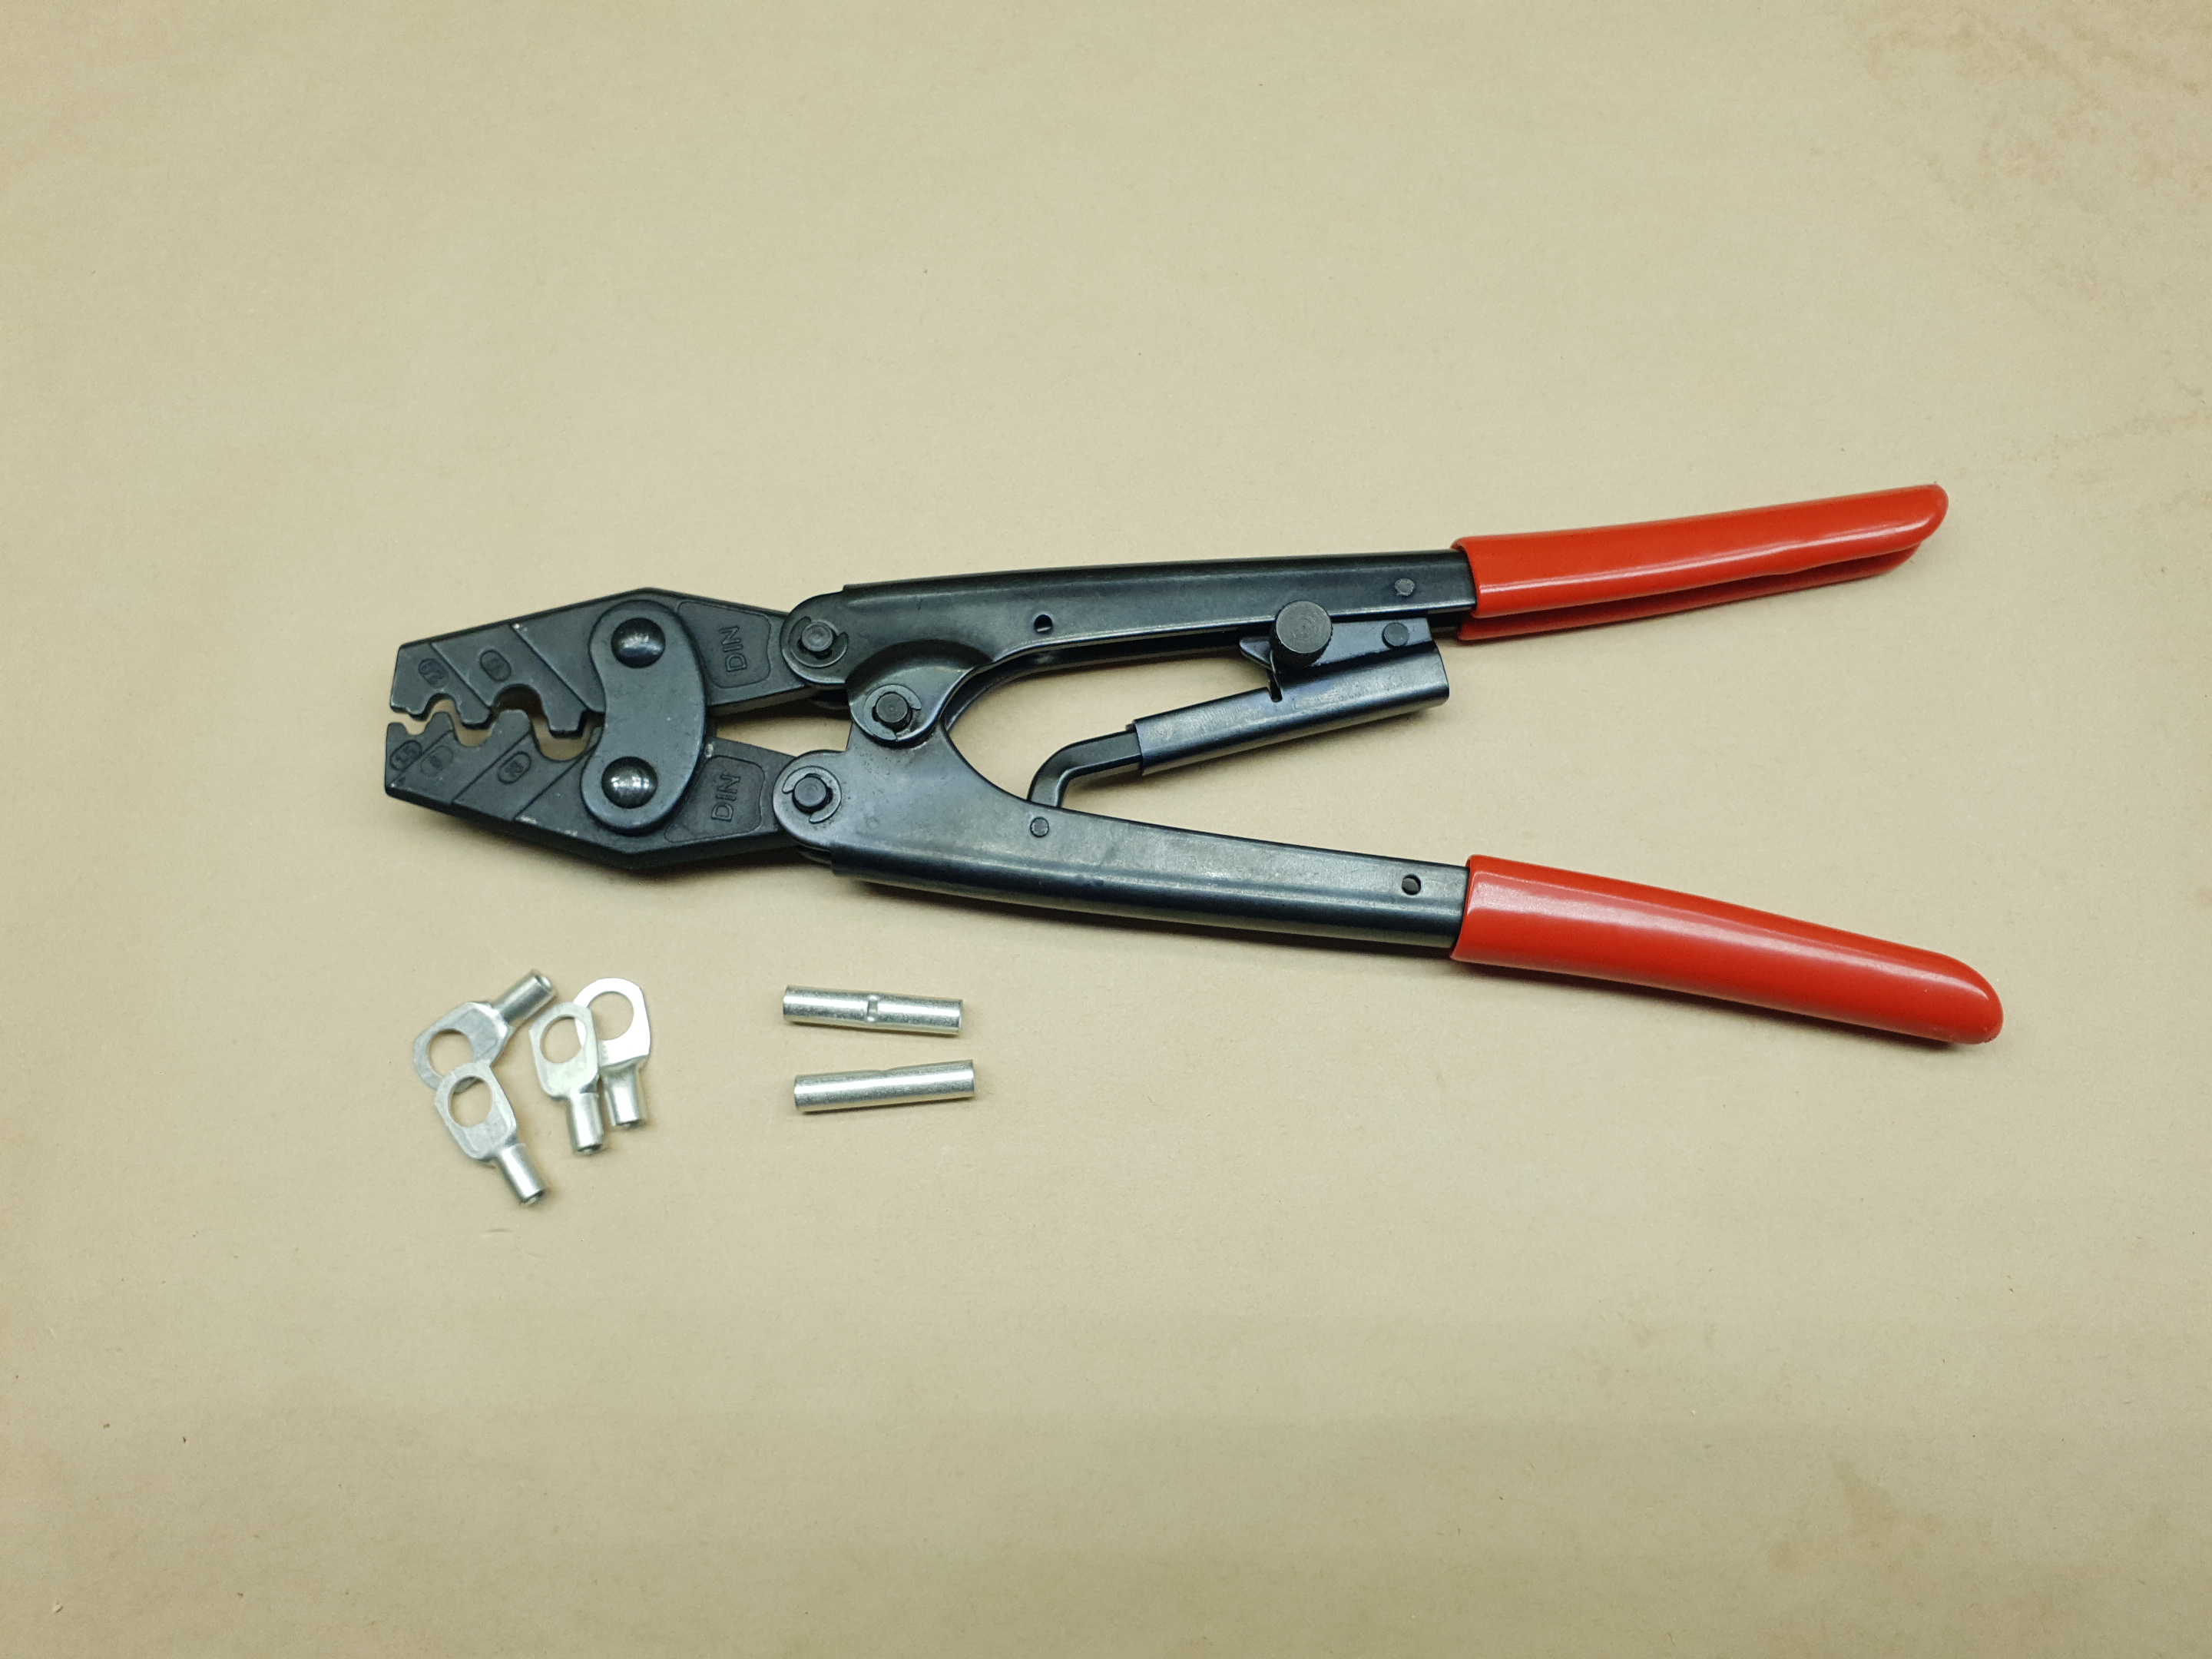
The correct tool for the job is important. It must apply enough pressure over enough area. Currently, the best option is the TH1847, which is a u-shaped die crimper with ratcheting handle and several die sizes. This will suit the uninsulated barrel connectors, and the eyelet terminals, that we used in this build. If in doubt, as the expert staff in store.
SOME OPTIONS:
- TH1847 Crimping Tool
TH1849 Crimping Tool
PT4936 10mm2 (8 AWG) wire 8mm tab hole eye terminals
PT4935 6mm2 (10 AWG) wire 8mm tab hole eye terminals
PT4962 10-12 AWG Crimp Joiner
PT4963 8 AWG Crimp Joiner
TH1829 Insulated connector crimping tool
PT4530 Insulated Crimp Connector Pack
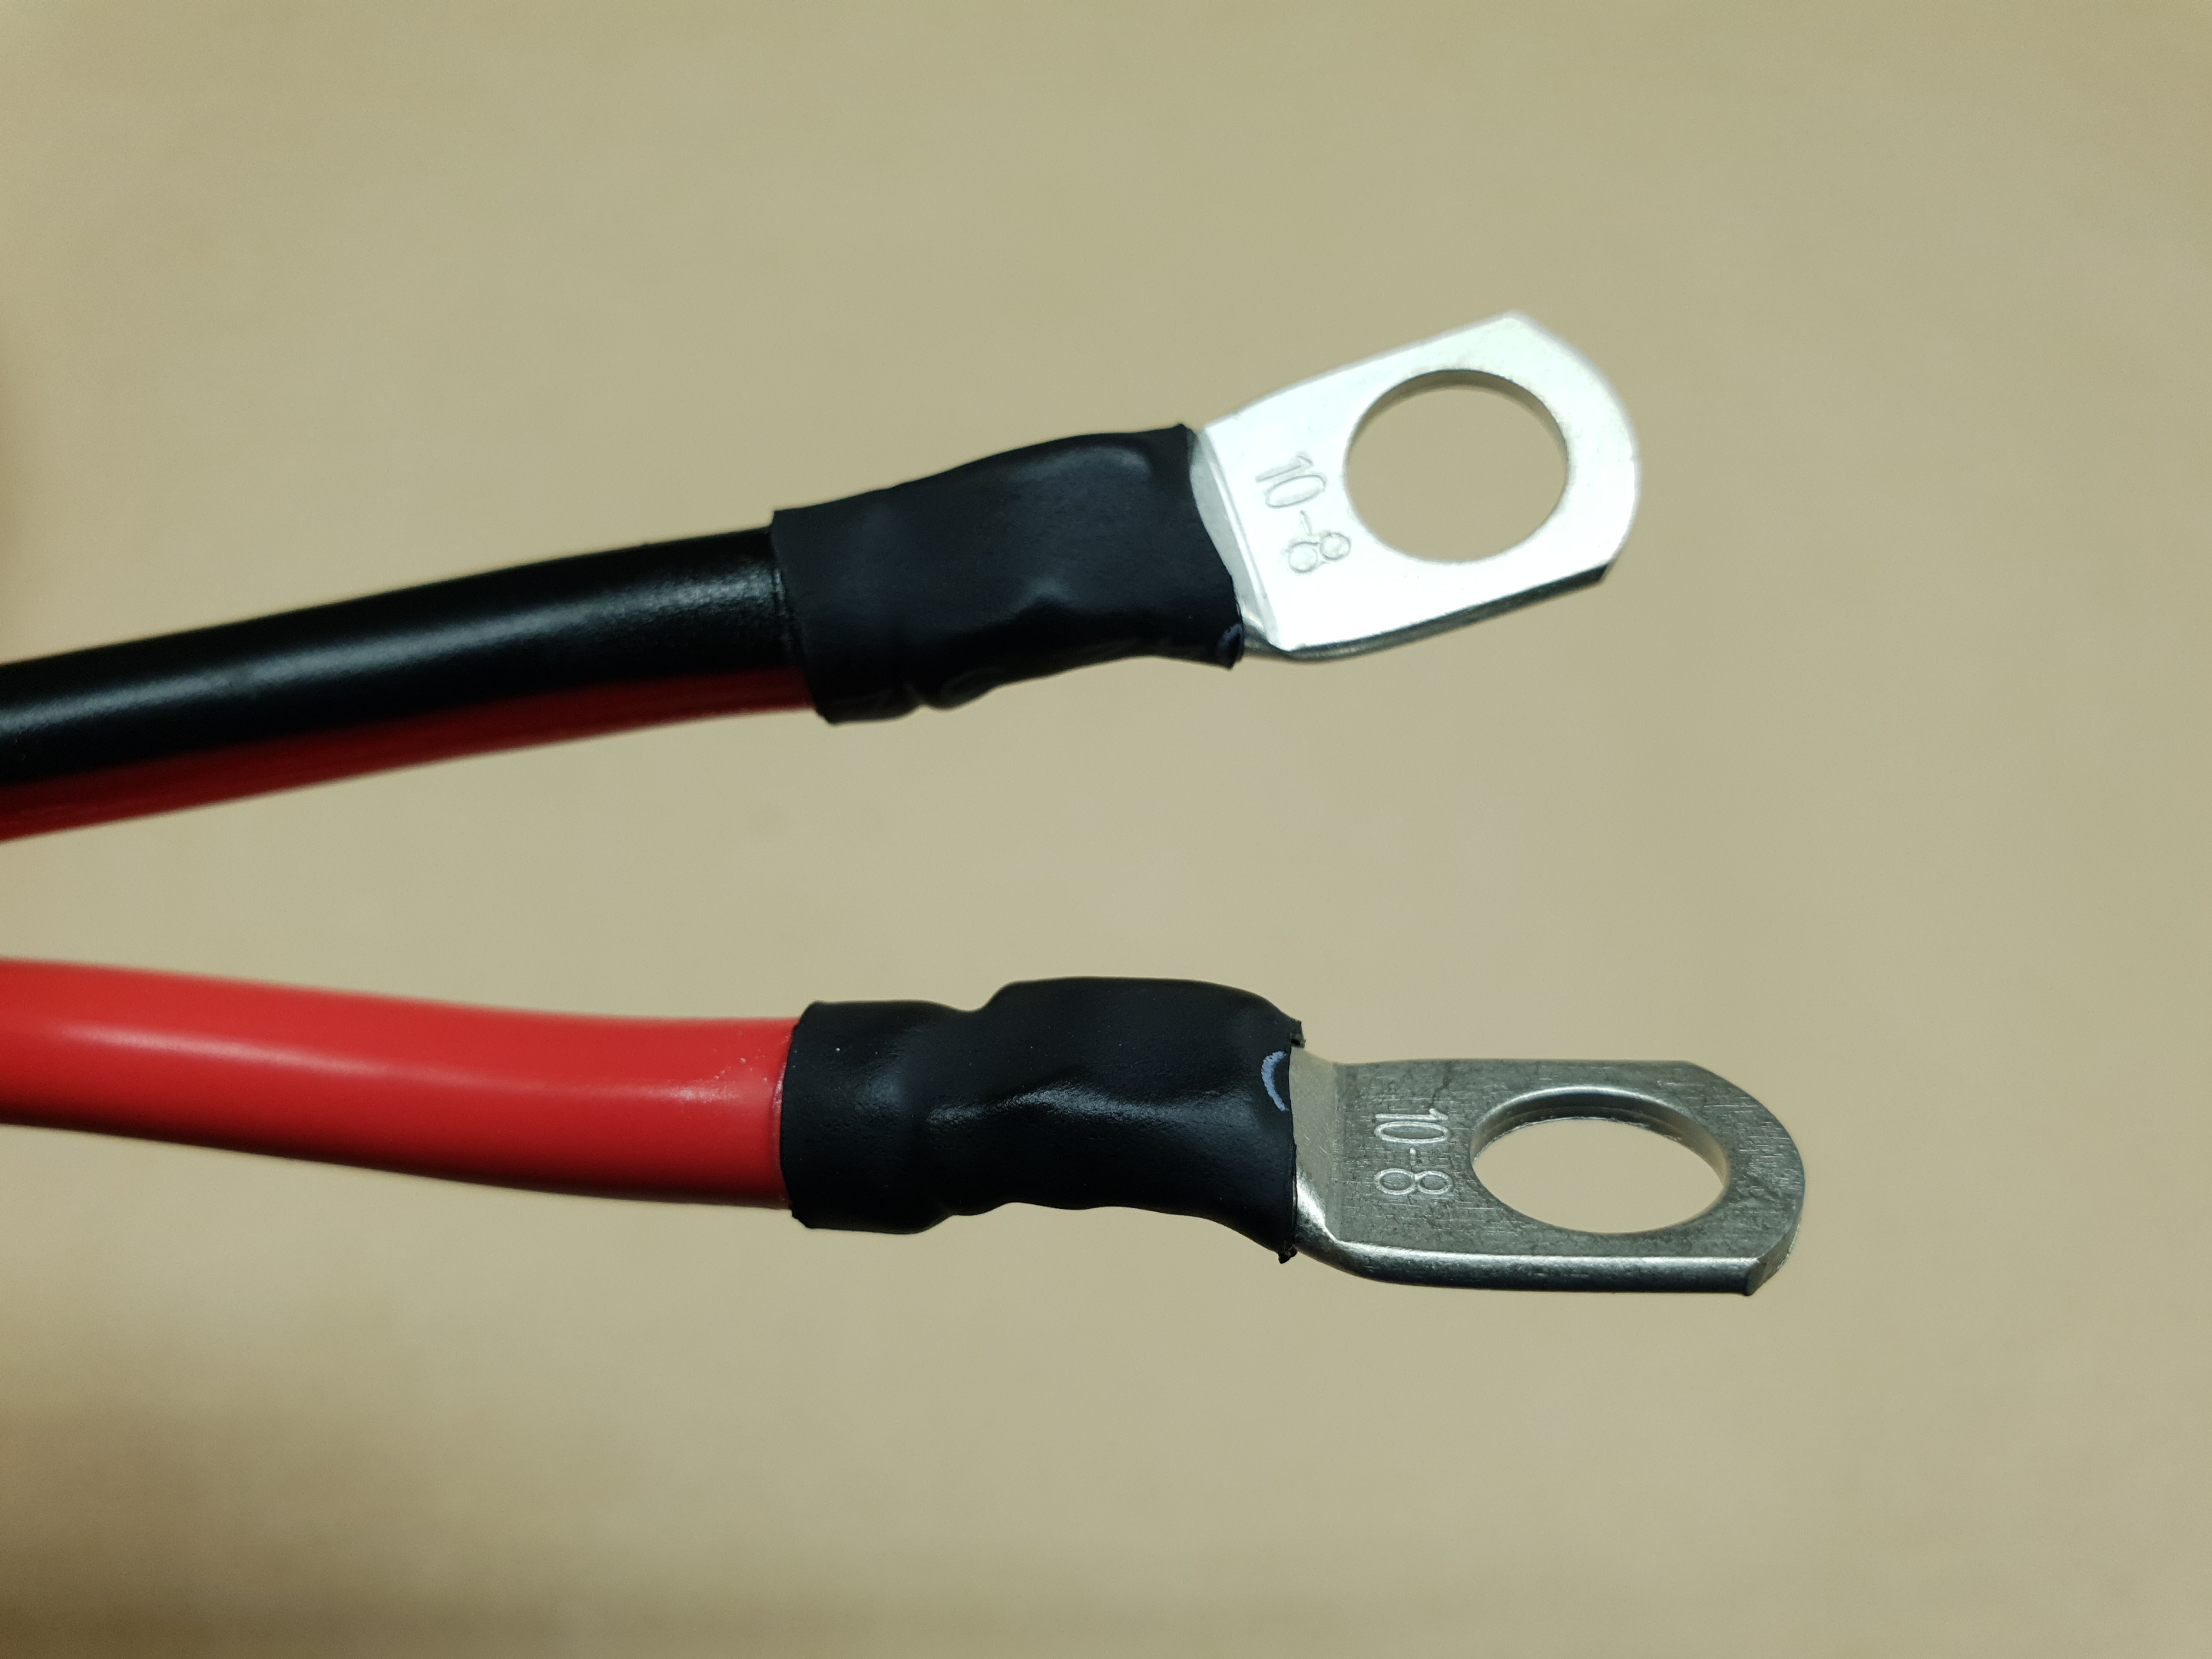
One of the best ways in which you can improve your connections to exposed connectors like eyelets is to use heatshrink. This is a special plastic tubing which shrinks when heated above 125°C. There are two types: Basic heatshrink is a 2:1 shrink, which means it shrinks to half of whatever it starts at. So, 5mm heatshrink in 2:1 will shrink to 2.5mm. This kind of heatshrink comes in the most sizes and a choice of colours.
The other variety is 4:1 Glue Lined heatshrink, also known as double walled heatshrink. This product shrinks to one quarter (¼) of whatever it started at. So, 12mm 4:1 dual wall heatshrink will shrink to 3mm. Better still, the lining (the second wall) is a heat-sensitive glue. When heated to shrink temperature, it melts and floods the join with glue. This seals it against moisture and bonds the heatshrink to it, too. It is very strong and mostly waterproof, although water can wick up into it if there are crevices in the surface that are not sealed well. We added 4:1 shrink after making our eyelet lead above, to cover the connection and help add strength. Being 4:1, we can fit it over the eyelets and still have it shrink well onto the wire.
We mentioned the word 'power' a lot in this article, but did you know, power is actually an electrical unit? Knowing it is useful in determining what battery size you need. Power is measured in Watts, whether mechanical or electrical power (and sometimes even thermal), shown with the symbol 'W'. for Direct Current electricity (DC, which all battery and automotive systems are), power is the voltage multiplied by the current. This is useful if the data plate on your appliance has a rating in power, but does not give either the voltage or the current. Most data or compliance plates (the label that shows the electrical standards compliance, model number, and other information including power needs) include two of the three parameters. If they show voltage and current, figuring out the battery size is easy. However, if it's a 12V appliance where the voltage doesn't need to be stated (anything that has a cigarette lighter plug in it, for example, is a 12V appliance), the power may be stated in W.
So...
- To find the current from the power and voltage, divide Watts by Volts.
- To find Voltage from power and current, divide Watts by Amps
If the voltage and current are both stated, or if you know it's a 12V thing and the current is stated, you don't need to do anything! You have all you need to figure out your battery load.
Similar projects you may be interested in


