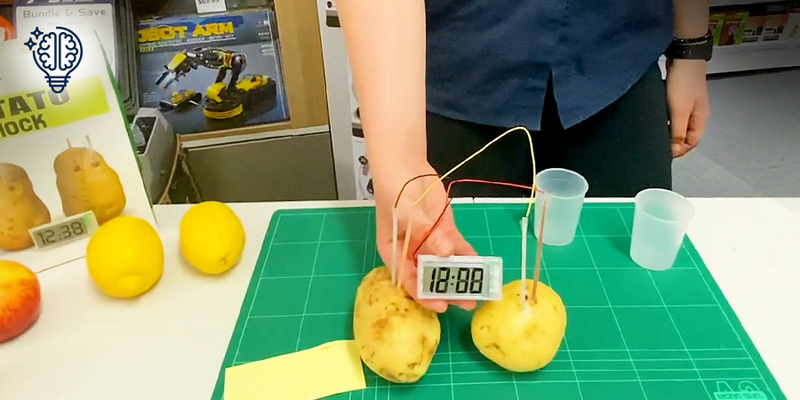
Making a potato clock is a great way to discover the energy that's hiding in plain sight – and also ensure your kids are never late for school again!
Making a potato clock is fun, easy and shows you that there's hidden energy stored in all sorts of things in your home.
What you need
‣ 2 potatoes
‣ 1 potato clock kit
‣ A clean workspace
What your potato kit includes
‣ 2 copper strips with small holes at one end
‣ 2 zinc strips with small holes at one end
‣ 1 yellow connecting wire
‣ A digital clock, with 1 red (positive) and 1 black (negative) wire trailing out of one side
‣ Tape
Getting started on your potato clock
Step 1
Lay out all the pieces from the kit, as well as your potatoes, on a clear workspace.
Step 2
Look at your clock. You will notice two wires – one red and one black – emerging from the side. Pick up the red (positive) wire and one of your copper strips – these are the orange-coloured strips from your kit. Thread the red wire through the hole on the end of your copper strip, twisting to make sure it's secure. Then use a piece of tape to make sure it doesn't slip out.
Step 3
Next, pick up the black (negative) wire emerging from the side of your clock. Take one of the zinc strips – they're the silvery ones. Thread the black wire through the hole at the end of the zinc strip. Twist it a few times to make sure it's secure and then hold it in place with tape.
Step 4
Pick up your remaining zinc and copper strips and thread one onto each end of the yellow connecting wire. Twist and secure with tape.
Step 5
Place your two potatoes alongside each other. Take the yellow connecting wire with the zinc and copper strips you secured in step 4. Push the copper strip gently into one potato and the zinc strip gently into the other potato.
Step 6
Because your zinc is your negative and your copper is your positive, you need one of each in both potatoes. Pick up the red (positive) wire trailing from the clock with the copper strip you attached in step 2. Push this into the potato with the zinc strip.
Step 7
Finally, pick up the black (negative) wire trailing from the clock with the zinc strip you attached in step 3 and push that into the potato with a copper strip poking out of it. As soon as the zinc end is inserted into the potato, the clock will turn on – and you can set the correct time!
Why does it work?
The potato clock works because of a chemical reaction. Like almost everything we eat, potatoes contain acid. That acid reacts with the metal on the zinc we inserted into the potatoes resulting in electrical energy being released. It flows through the copper strip and wire to the clock – completing a circuit and powering the clock.
If you don't have any potatoes handy, you can do the same thing with two lemons or two apples. In fact, you can try this with other fruits and vegetables in your home to see what else works.

