A HDMI extender is anything that uses some form of transmission other than a straight-up HDMI cable. In other words, we do not count long HDMI leads even if they have powered amplifiers in them. These are ok for some situations but have their issues for others. A HDMI extender is something that converts the HDMI signal to some other form, transmits it over distance, then converts it back. The most common transmission systems in use are network cable (known as Category cable and available in Cat5e, Cat6a, Cat6b, and Cat7), fibre, and wireless.
Wireless HDMI extenders need mention because they are common enough and Jaycar sells a range of them. They are a point-to-point system where one transmitter can send a signal to one or more receivers. They typically operate on the 5.8GHz Wi-Fi band, because the bandwidth (the term used to describe how much data a signal can carry) is not good enough on 2.4GHz for true high definition signals. They have the advantage of being simple to install, as no wires need to be run between the sender and receiver. However, they suffer from a cluttered band and can be interfered with; they have a relatively short range through walls*; and they cannot be placed behind screens because these reduce the signal to the antenna even further.
*One of the quirks of radio is that the higher the frequency, the more data that can be carried but the shorter the range.
Other extenders use some sort of connecting cable between the sender and receiver. While you can buy long HDMI cables, they have some issues. Even those with amplifiers in them (HDMI has power as part of its make-up and so external power is not needed) have some signal quality loss, and decent quality cable with good bandwidth is both big and expensive. Some novel options have a HDMI to fibre converter on each end and use optical transmission between the two. These are expensive compared to regular cables but they get around many of the issues.
If you want to go more than the length of these cables, or between one sender and multiple receivers, then a HDMI over cable extender is the best option. Besides the type mentioned earlier that use optical fibre cables, the other main option is the type using Category network cable and normal 8-pin, RJ45 network connectors like the type on the back of most modem/routers. We are not covering the fibre type here because as yet, they are a commercial or trade product and need some skill and knowledge to install.
Some HDMI extender systems are point-to-point, while others are one-to-many. There are even some matrix systems where there can be multiple senders and multiple receivers but again, these are usually for commercial installations so we'll steer clear of them except to say that some HDMI over IP products are capable of this if you need it.
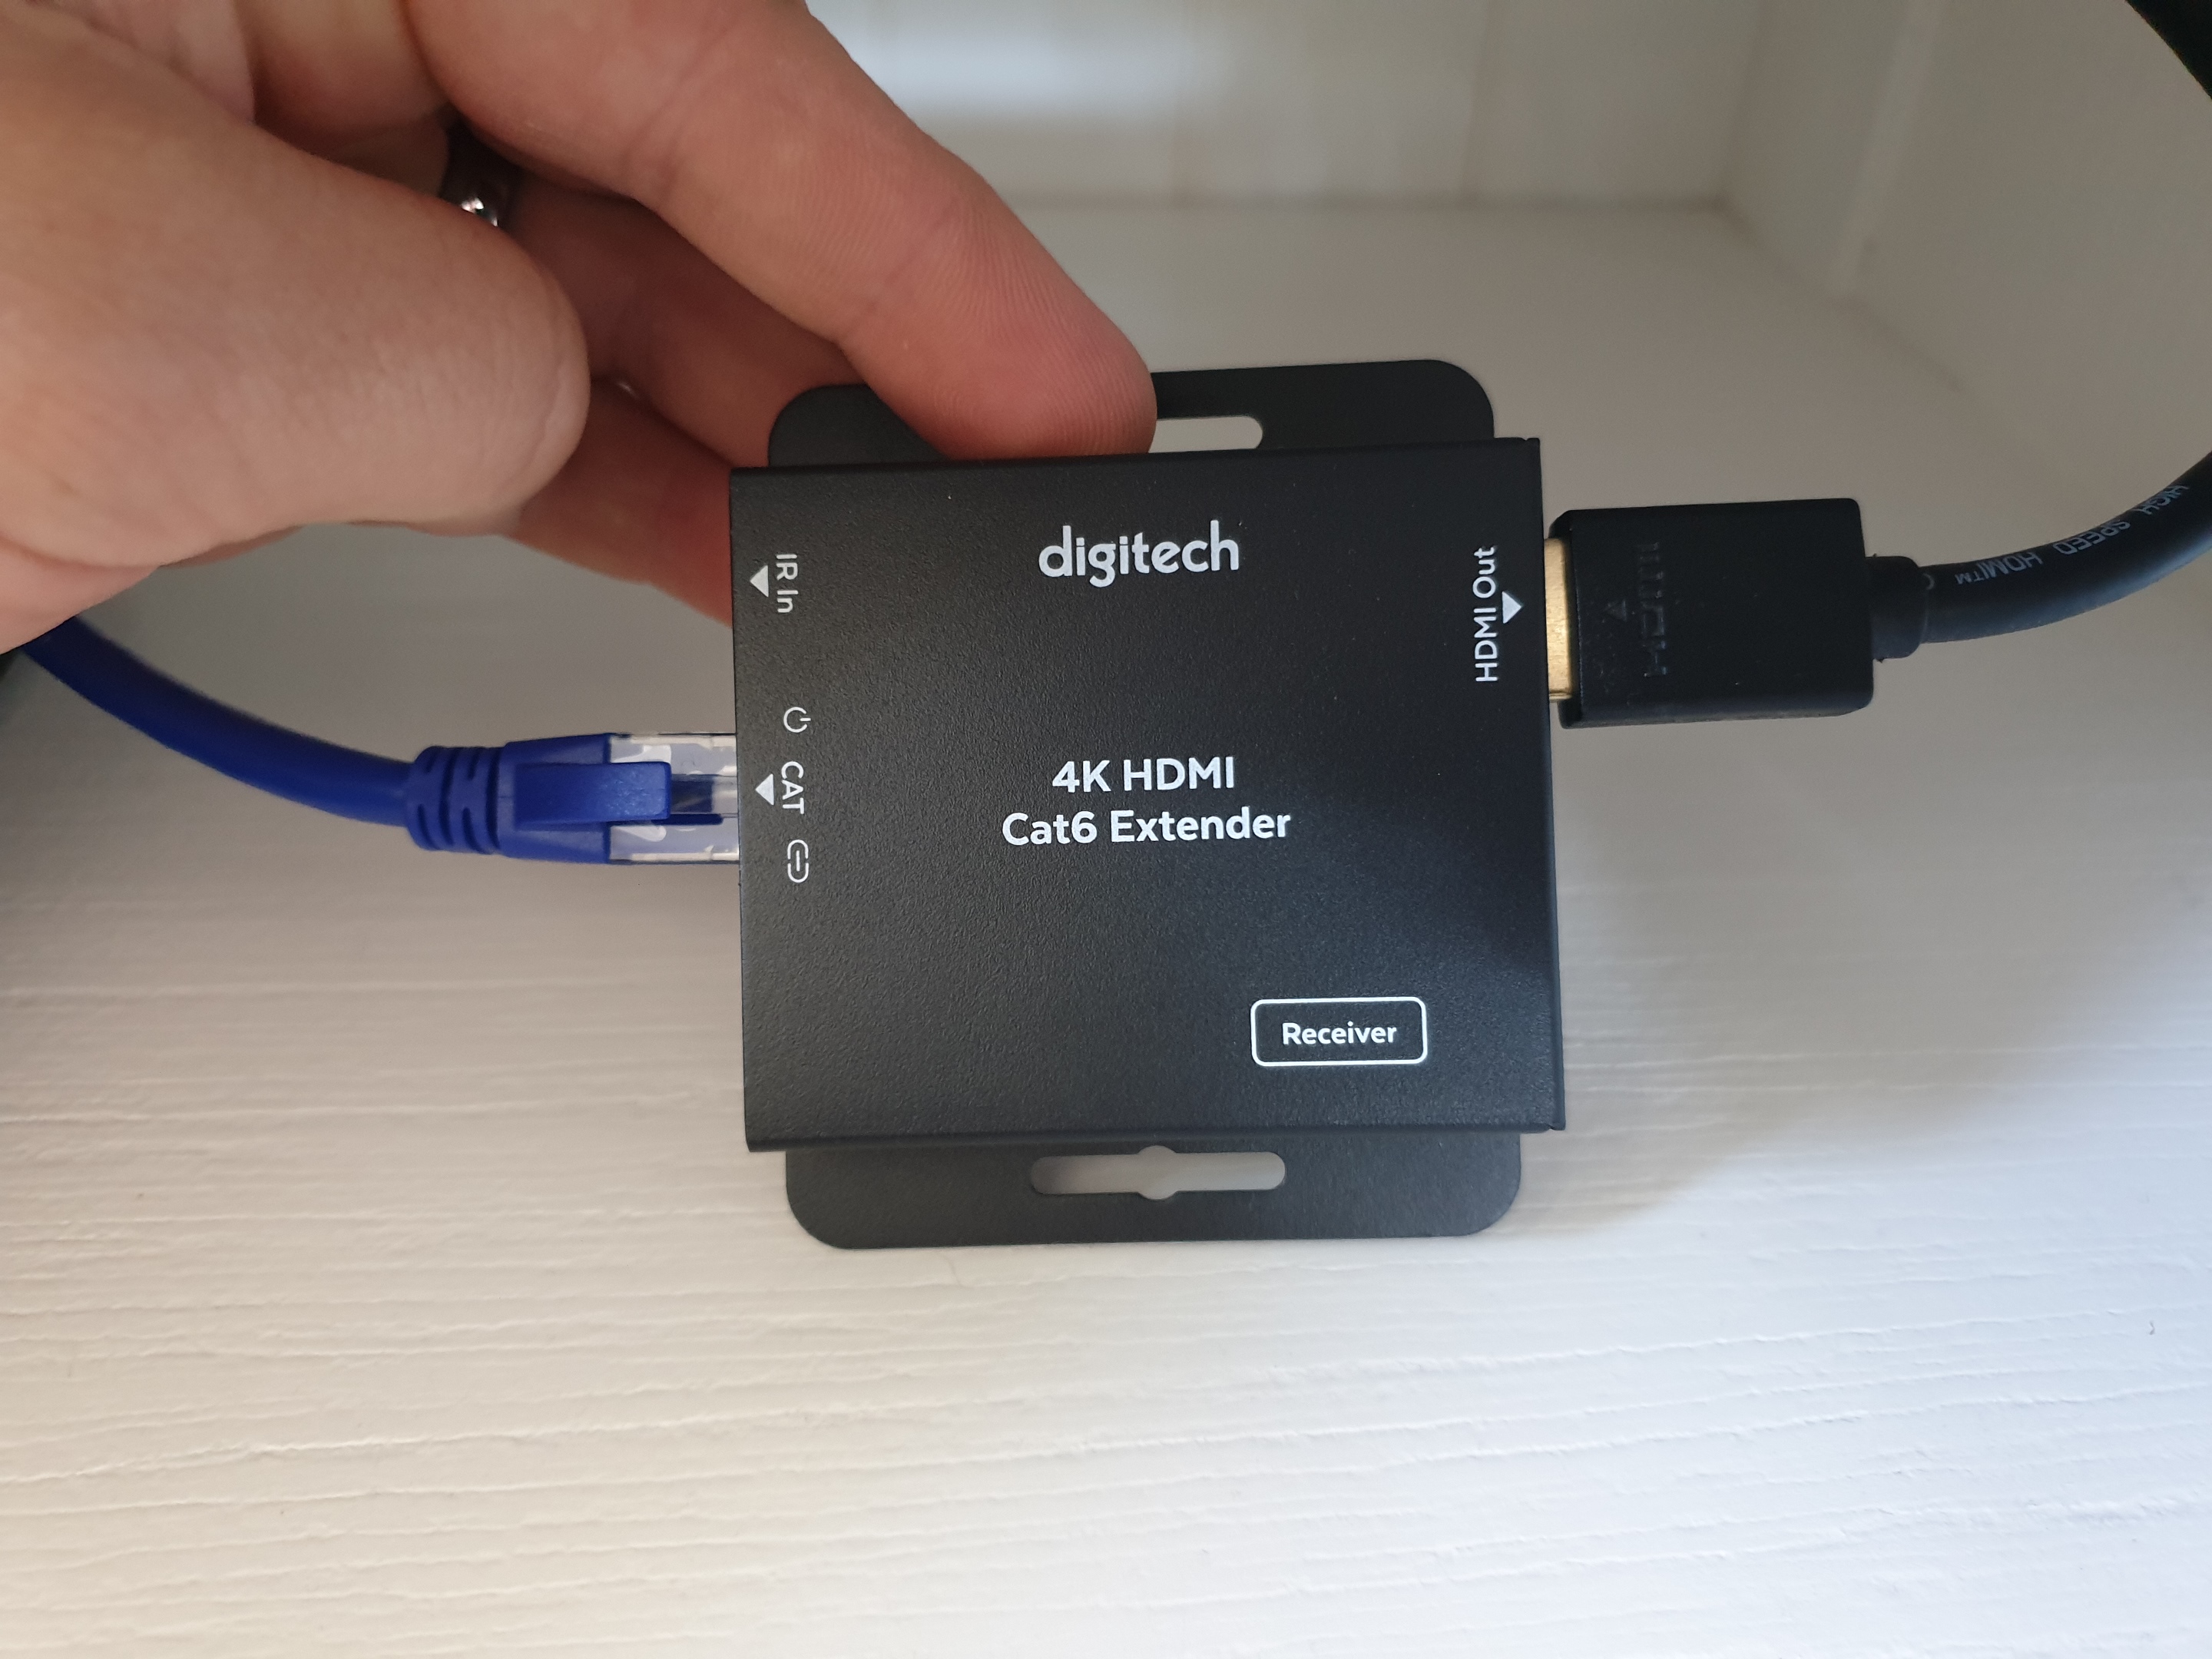
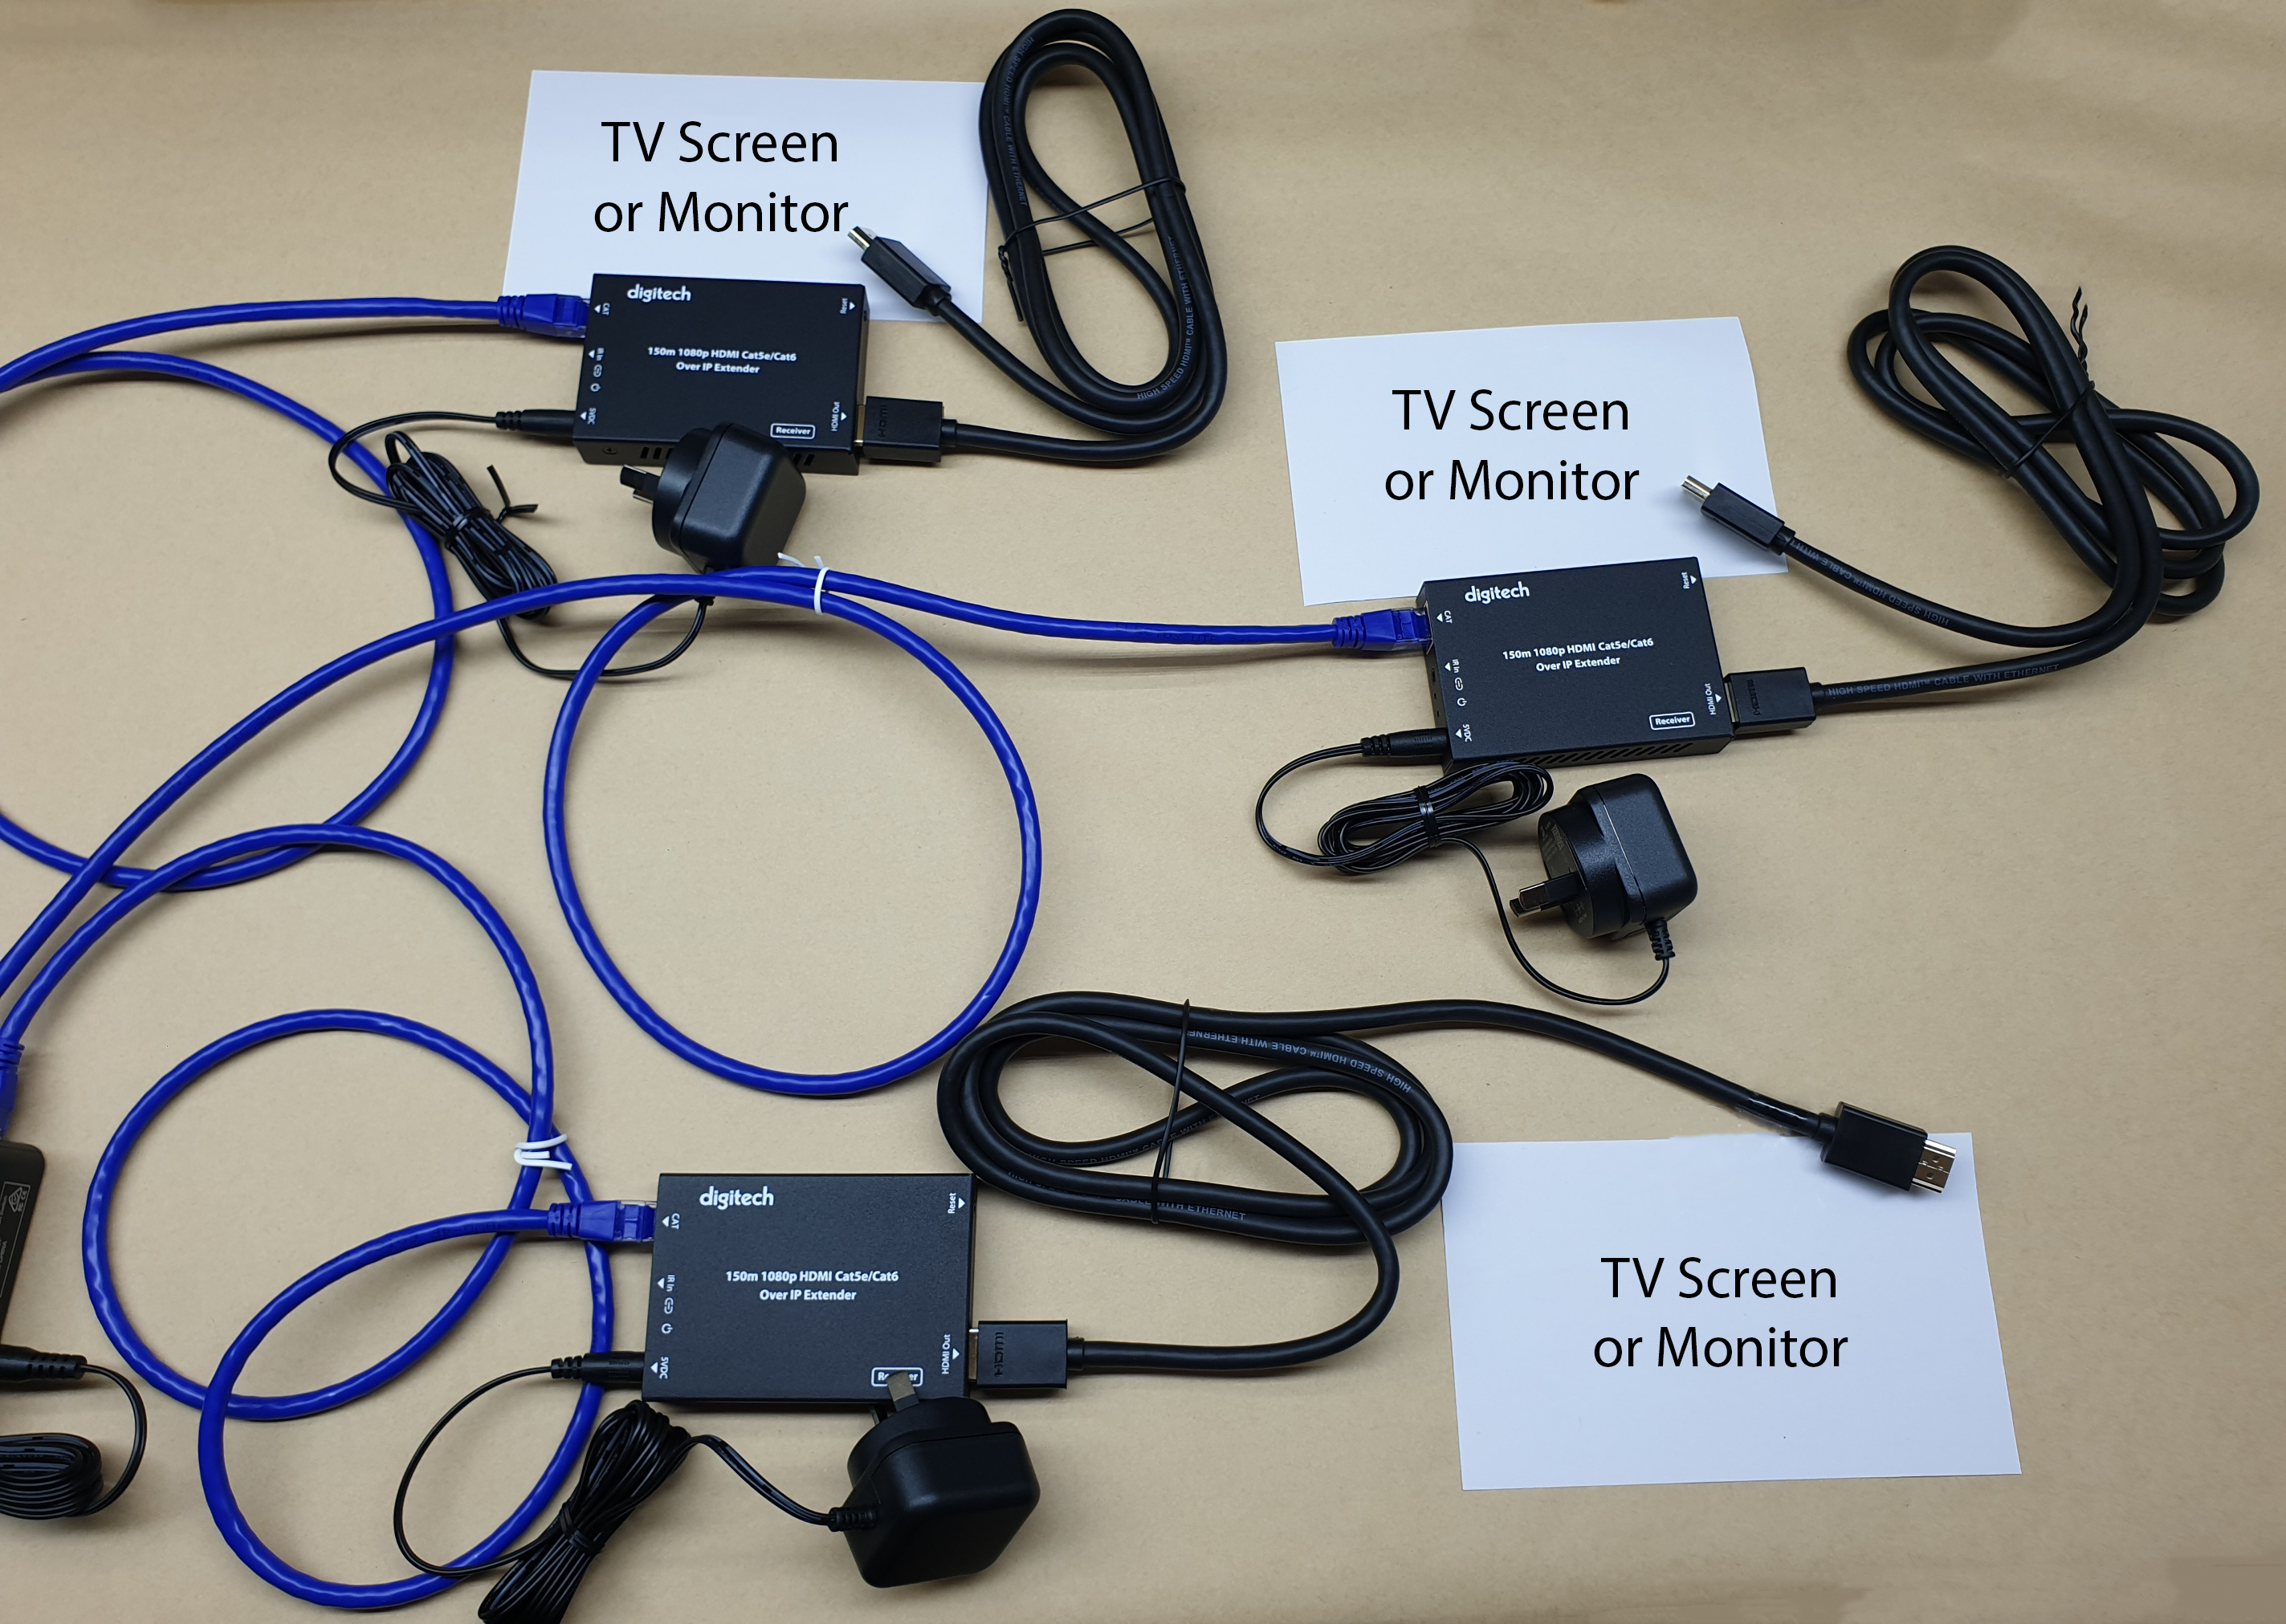
In its most basic form, a HDMI over cable extender works by taking the HDMI signal, processing it with an on-board microcomputer, and turning it into a serial signal that can be sent with no loss (for practical purposes; there is always some loss but if it is too small to notice, it is not a problem); then, that signal is sent over a smaller cable than would normally be used for straight unprocessed HDMI, and over much longer distances; then decoded at the other end and outputted as a HDMI signal again.
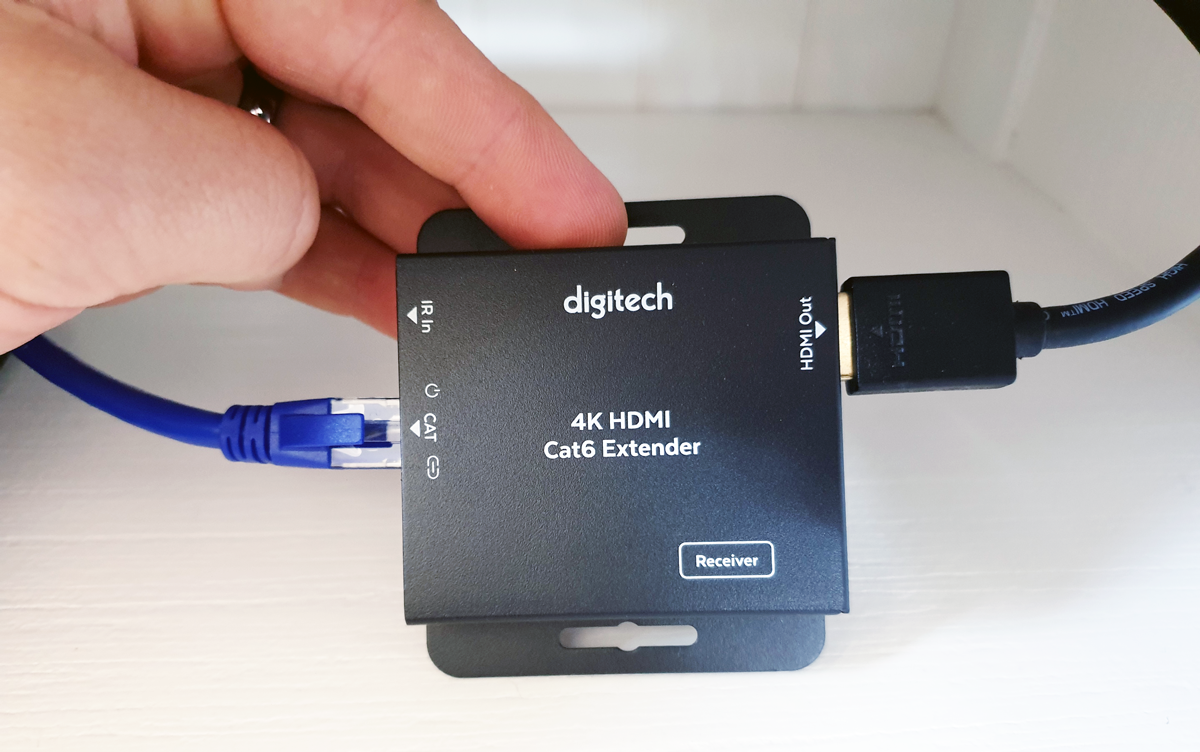
For a point to point system, that's all there is to it. These items are sold as a pair and even if they use a network cable, are usually a matched pair that has a sender/transmitter, and a receiver. These are sometimes called 'baluns', although that is an analog term when small 'balun' transformers were used to match signals in different kinds of wire and is not technically correct. However, these pairs cannot have extra receivers added: they are a pair and that's it. For many uses, this is fine.
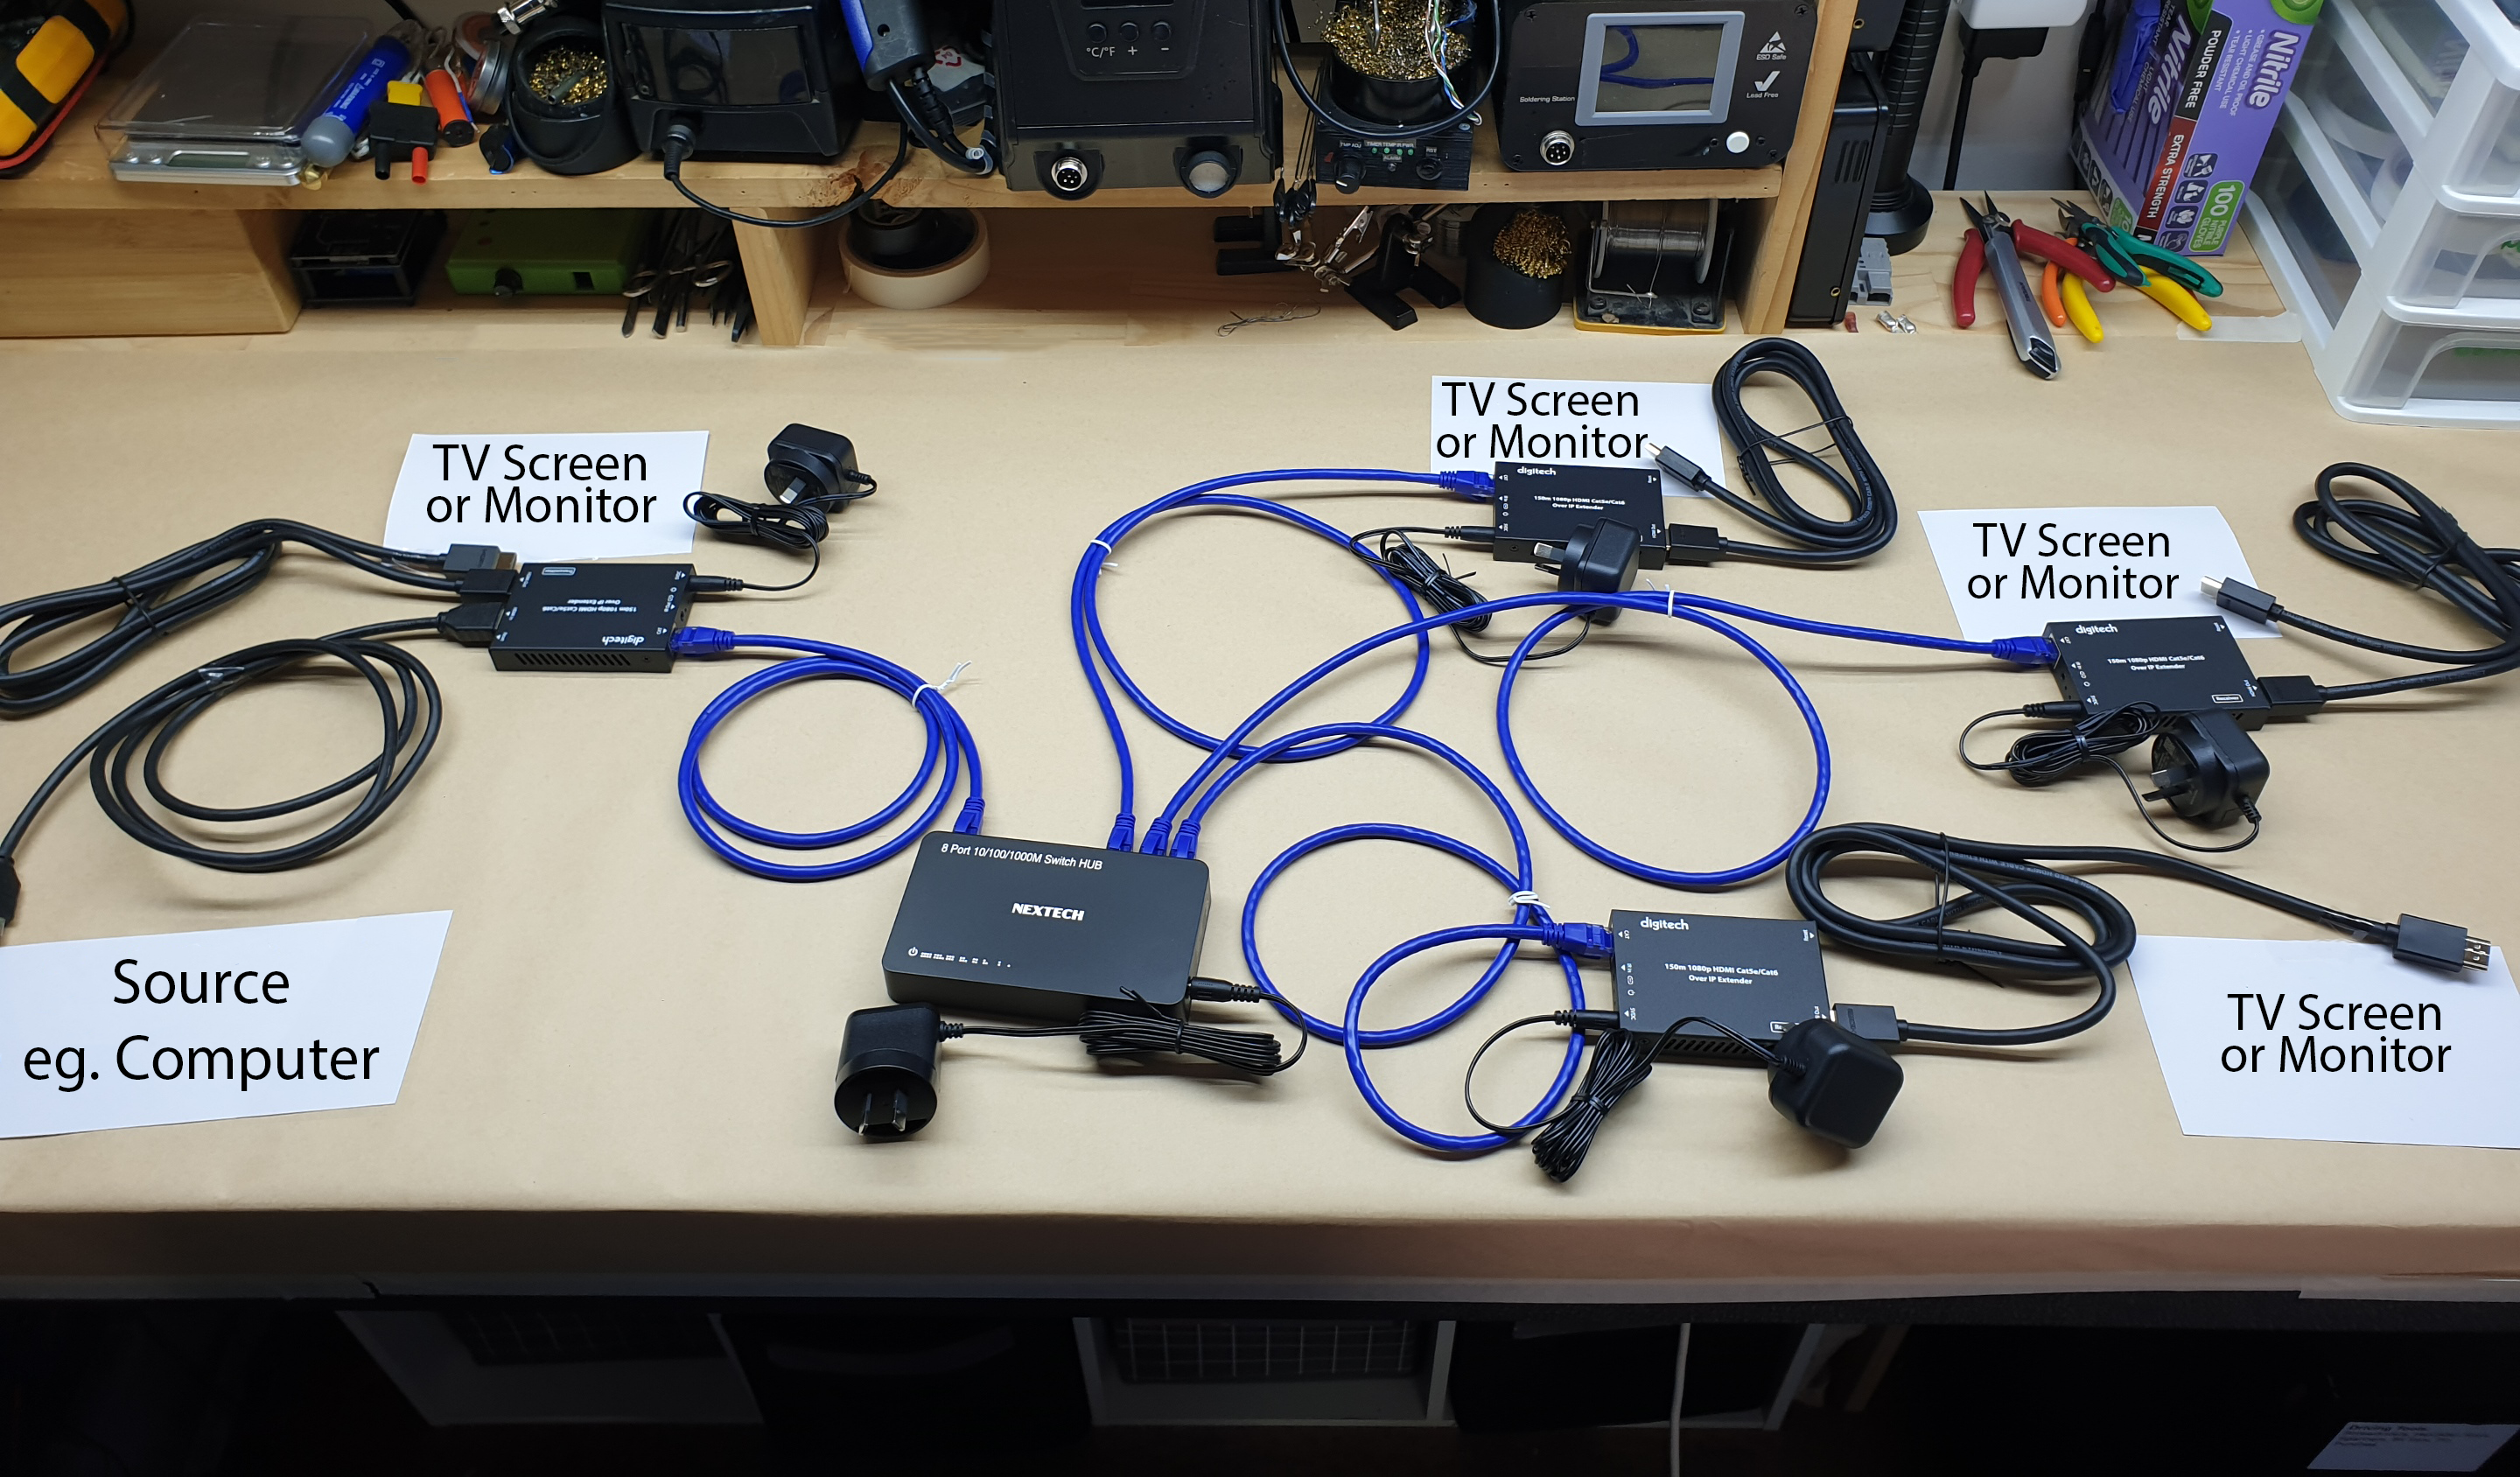
For other systems, extra information such as addressing is added. This enables one-to-many systems where the data can be sent to multiple screens or even specific screens only. Even basic IP-based systems that use regular data network infrastructure (that's a switch or router, and those blue network cables) are capable of at least one-to-many use. Most one-to-many systems are IP systems.
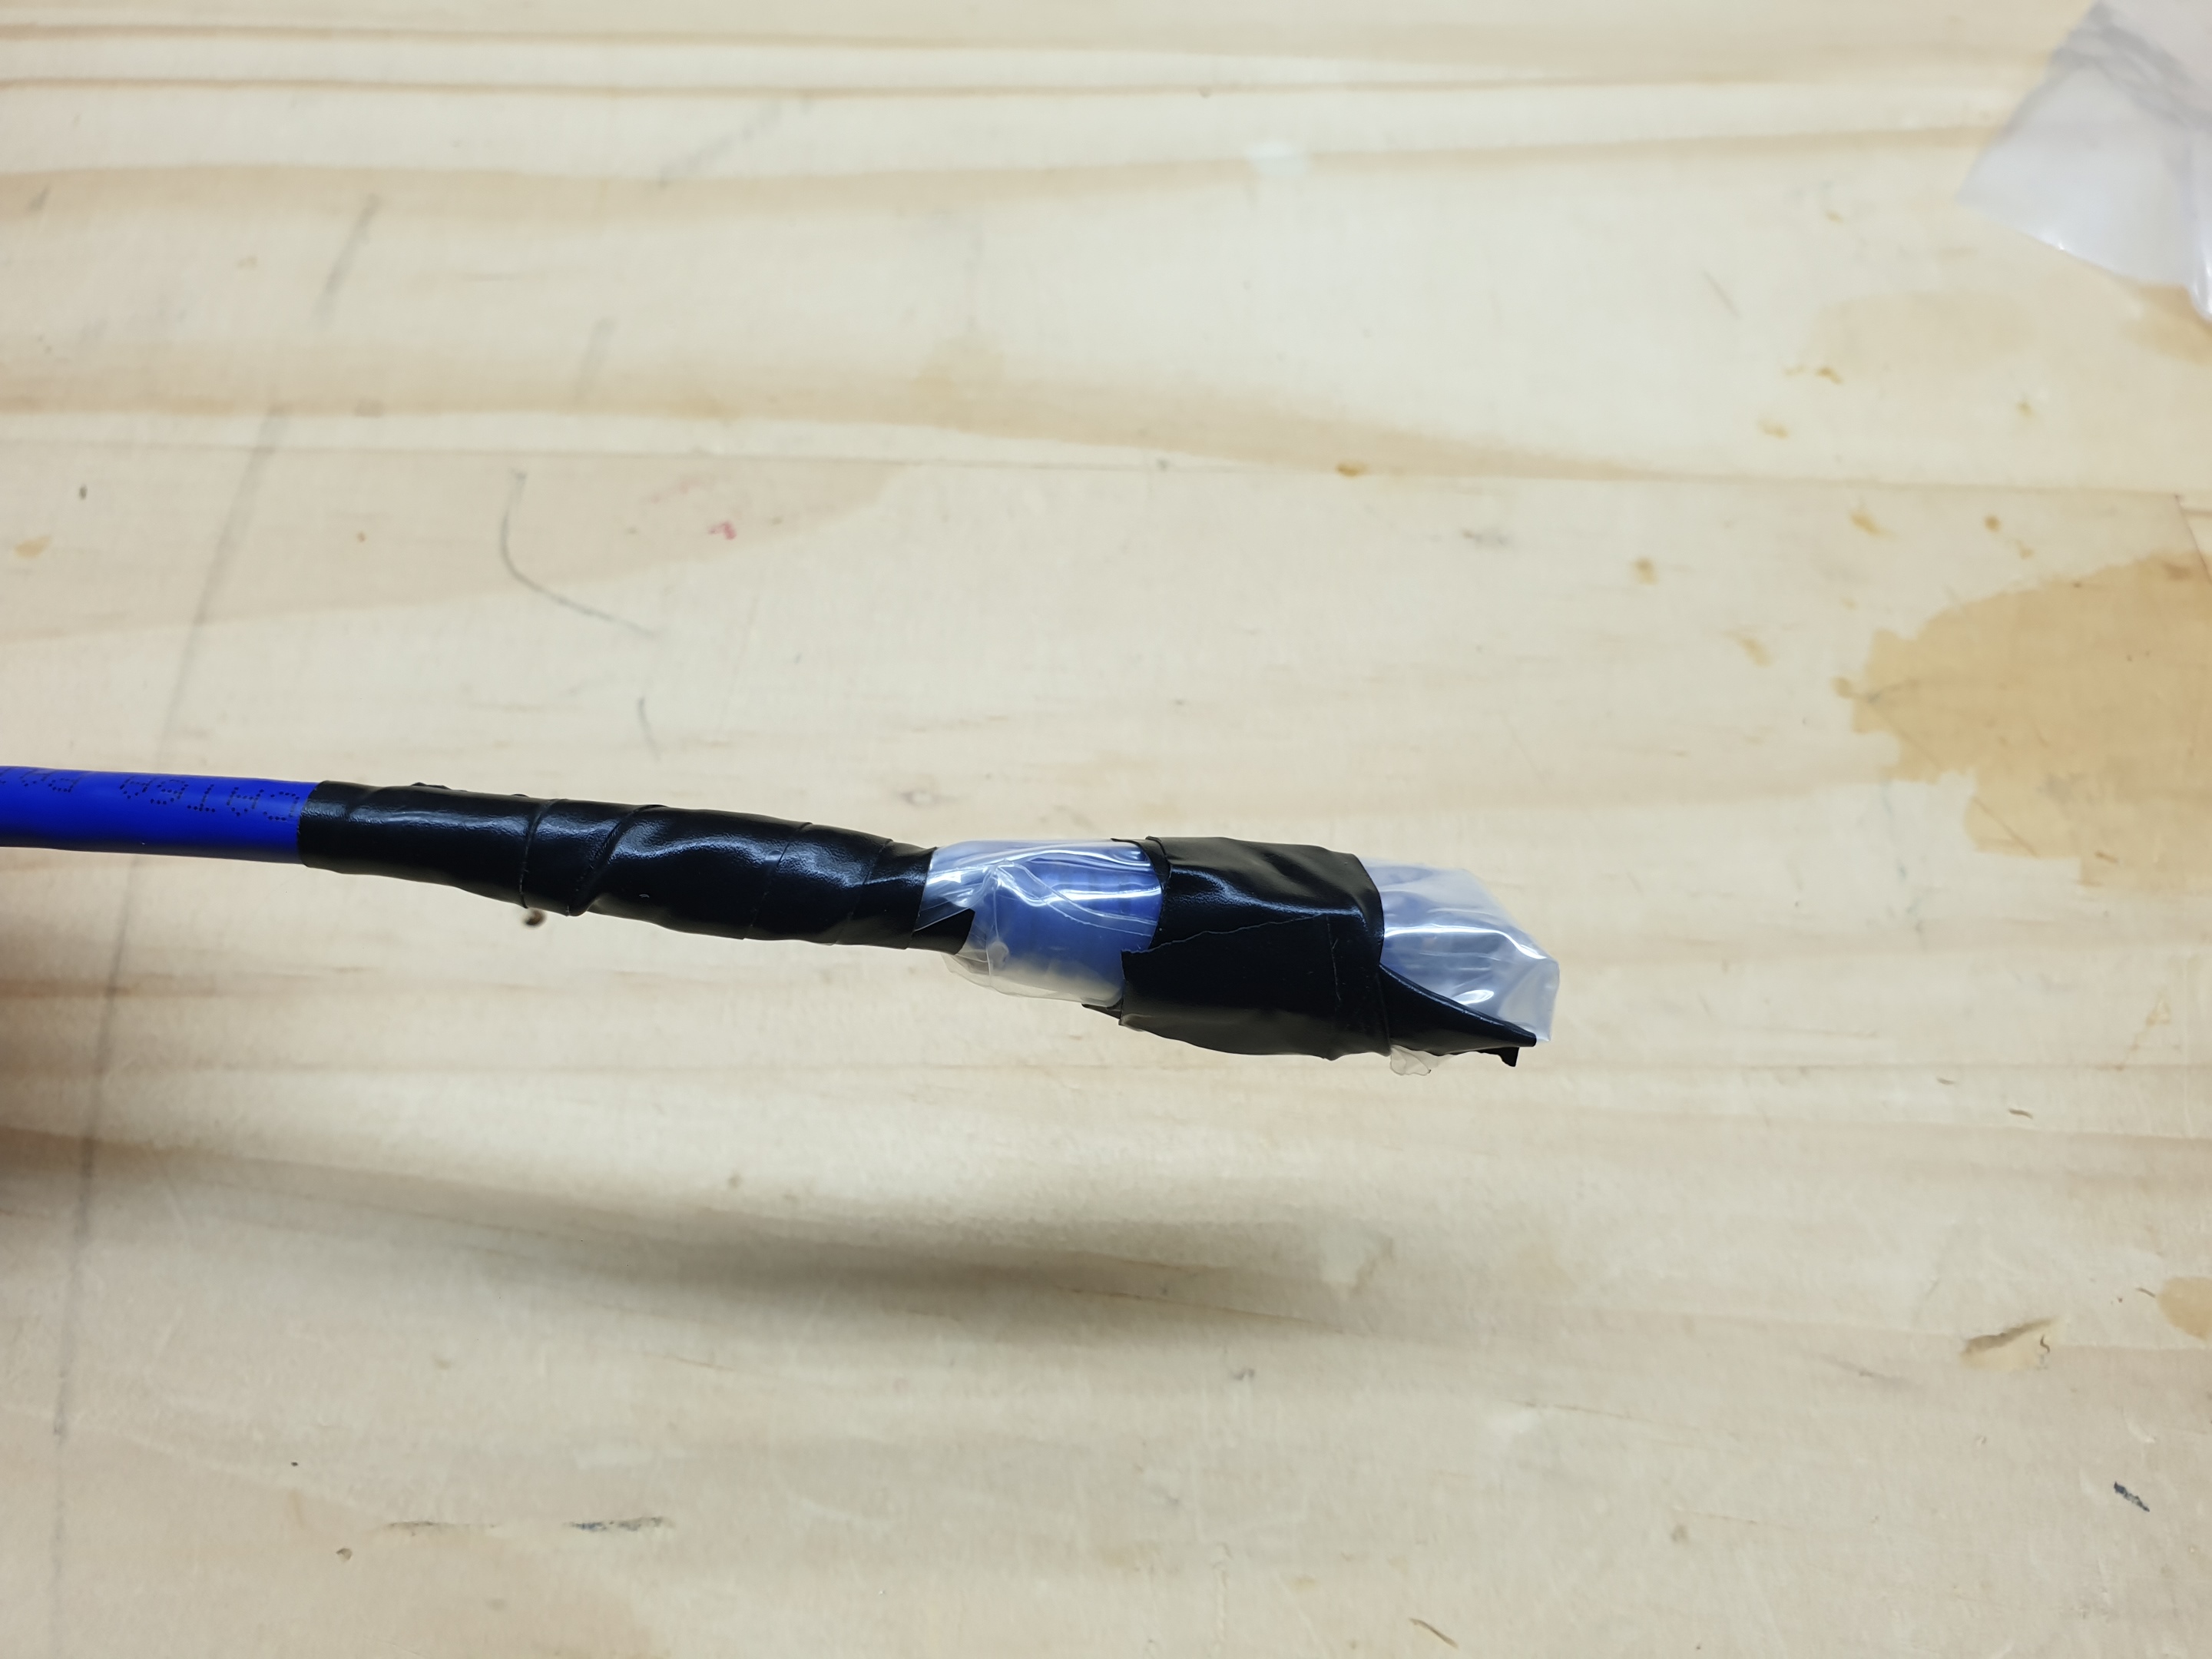
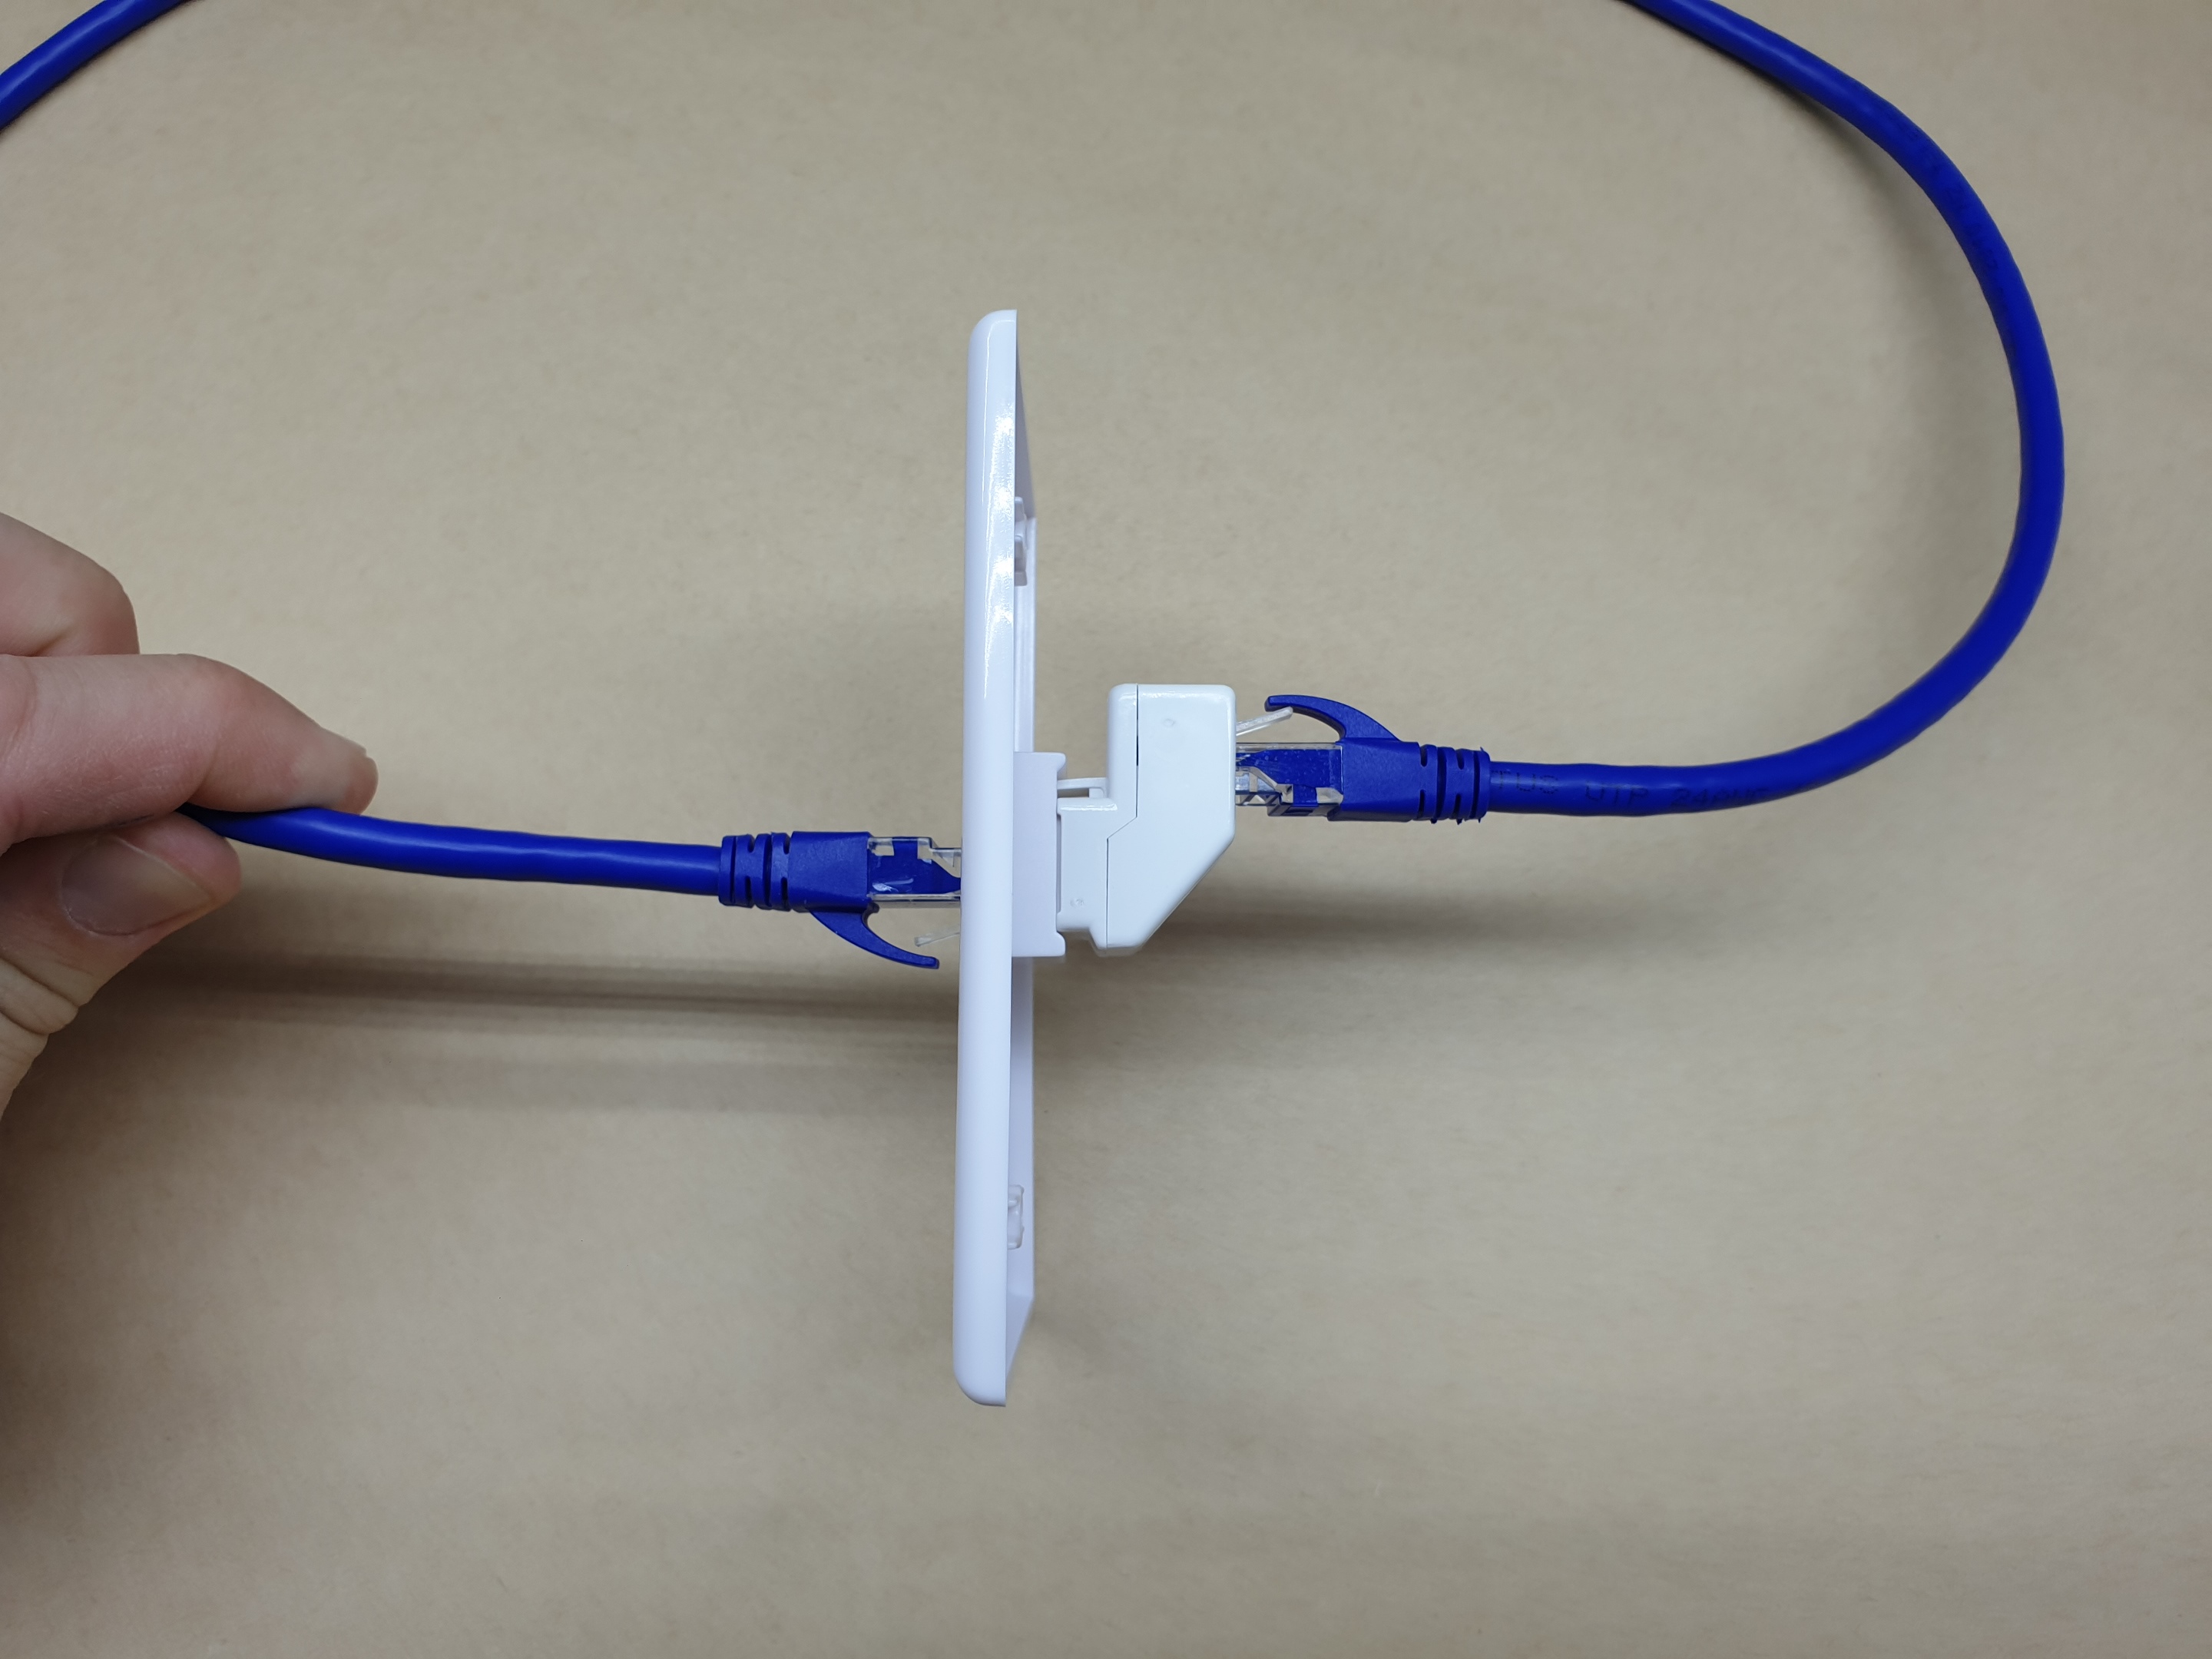
It is important to define and explain some terms here. Regular household networks, the ones that use the (usually) blue cable with the 8-pin clear plastic rectangular RJ45 connectors, use Category 5e, Category 6a, Category 6b, or Category 7 cable. This all looks the same to the casual observer. The size of the copper wire inside the cable is the main thing that changes, with each higher number having bigger copper cores than the one below it to carry more data. All types have eight cores twisted into four matched pairs which allows noise to self-cancel. This is one reason why these cables can work across big distances.
The terms used are either 'Cat5e’, ‘Cat6' and so on (Cat is just short for Category), 'Ethernet', or 'Network' cable. This is important to understand because these terms refer to a type of cable. However, networks themselves, the ones computers plug into and that are often built into your modem/Wi-Fi router combination, are not defined this way. They are defined by the language that they use, called TCP/IP, often shortened to IP. This stands for Transmission Control Protocol/Internet Protocol, and is a way of packaging and addressing information to send it around a network. The important point is that it is addressed, and so can be controlled.
So, be very careful with products which use the terms Cat6, Ethernet, and so on. Some of them just use the Cat6 (or whatever) cable, and have their own information system. Just because they use network cable does not mean they work on a network! If the system you are looking at uses addressed data, can work on a network, and has one-to-many capability using that network, then it will be labelled 'IP' or 'TCP/IP'.
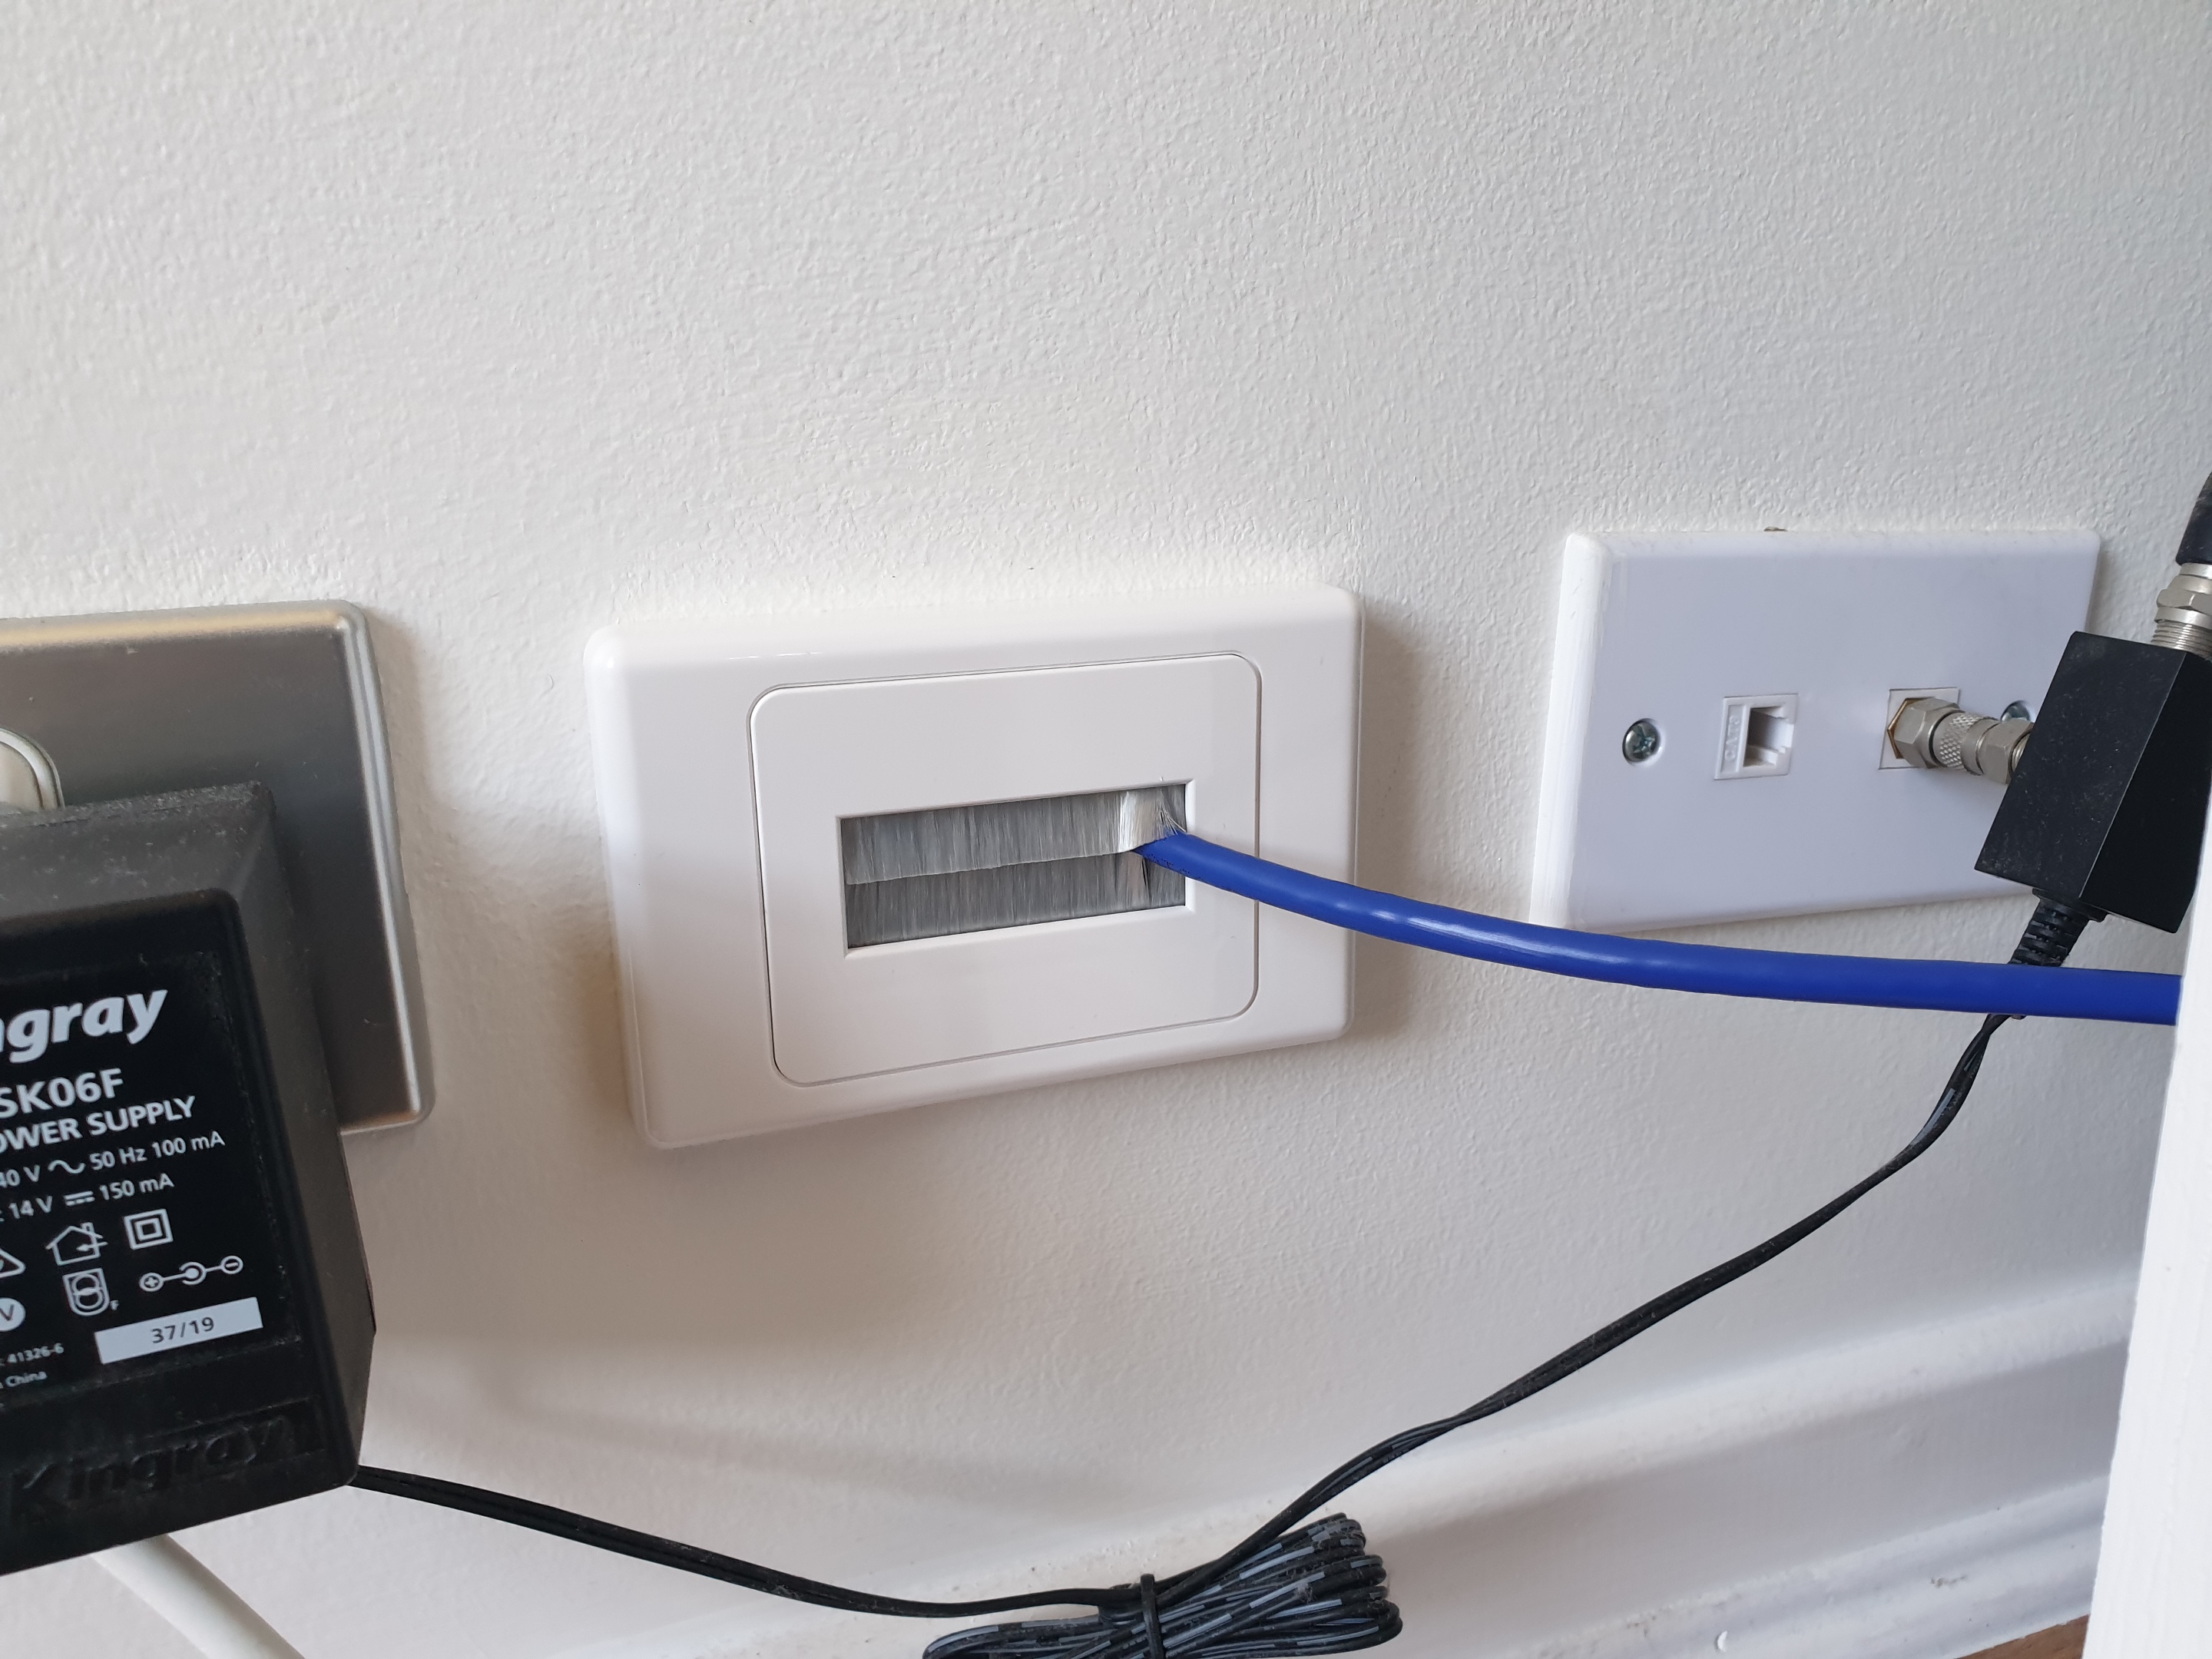
We covered some reasons to use a HDMI extender above, but not necessarily in detail. If you are going to run cable more than ten metres or so, HDMI over Category systems are often cheaper. If you want one-to-many capability, they are almost essential (you can use a HDMI splitter and long cables, but this gets pricey and often lossy). Category/network/ethernet cable is cheaper and much easier to run. HDMI cables need to be factory-terminated (have the ends put on), whereas network cable can be terminated by a data-qualified electrician, or even yourself with the right tools.
This means you can run the cable through walls, roof cavities, and under floors or even underground through conduits and put the ends on later. Not only does this prevent damage to the connectors, but HDMI connectors would not even fit through many of the holes involved in a house frame.
While wireless networks have largely taken over for internet and network use in most homes, many businesses still have a cabled system in addition to a mesh, and if your home does not have one, it can be installed relatively easily. Note that keyword: Relatively. That's compared to other options and other cable types, and other electrical installations, not to a stroll in the park.
The reason you may want to do this is because of the benefits of using a HDMI over IP extender. If you want a display on more than one screen, IP systems are the way to go. This might be as simple as enabling display of your security camera system on displays around the home or business. It might be as complex as making your own video wall in the games room, or a semi-commercial situation where you want information displayed on multiple screens in different places, like at your local football club where you're helping to install a game information display.
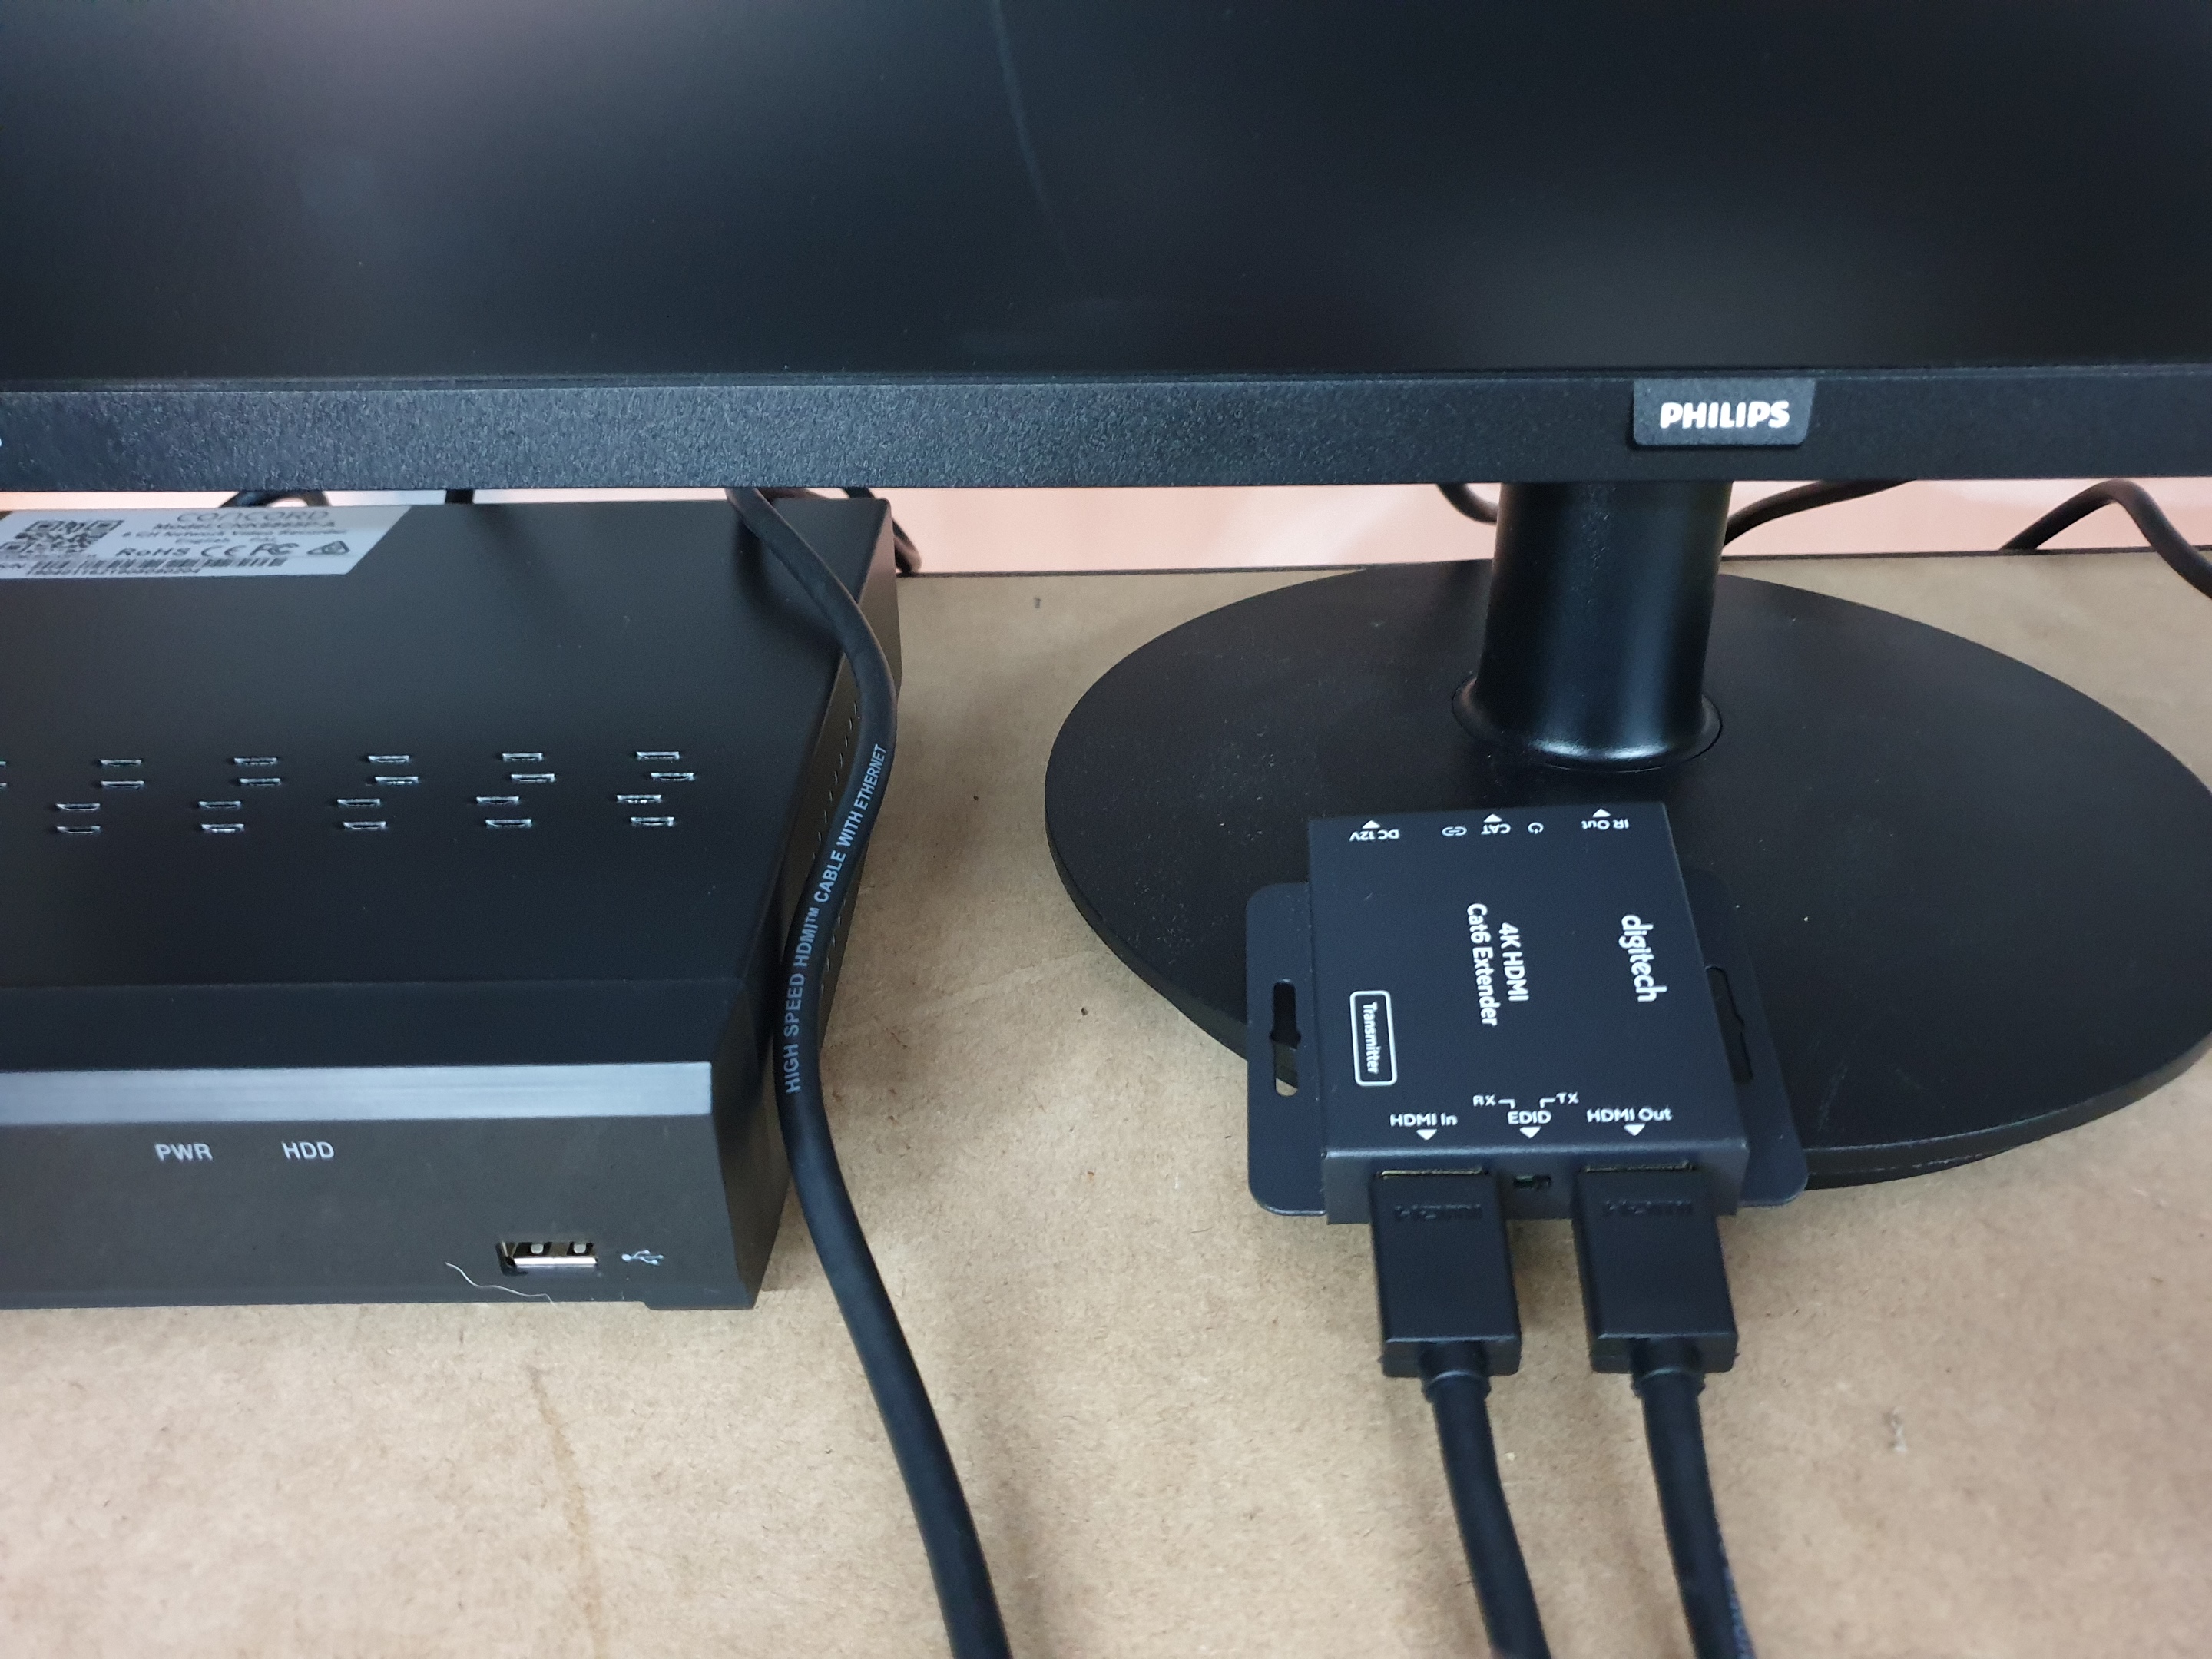
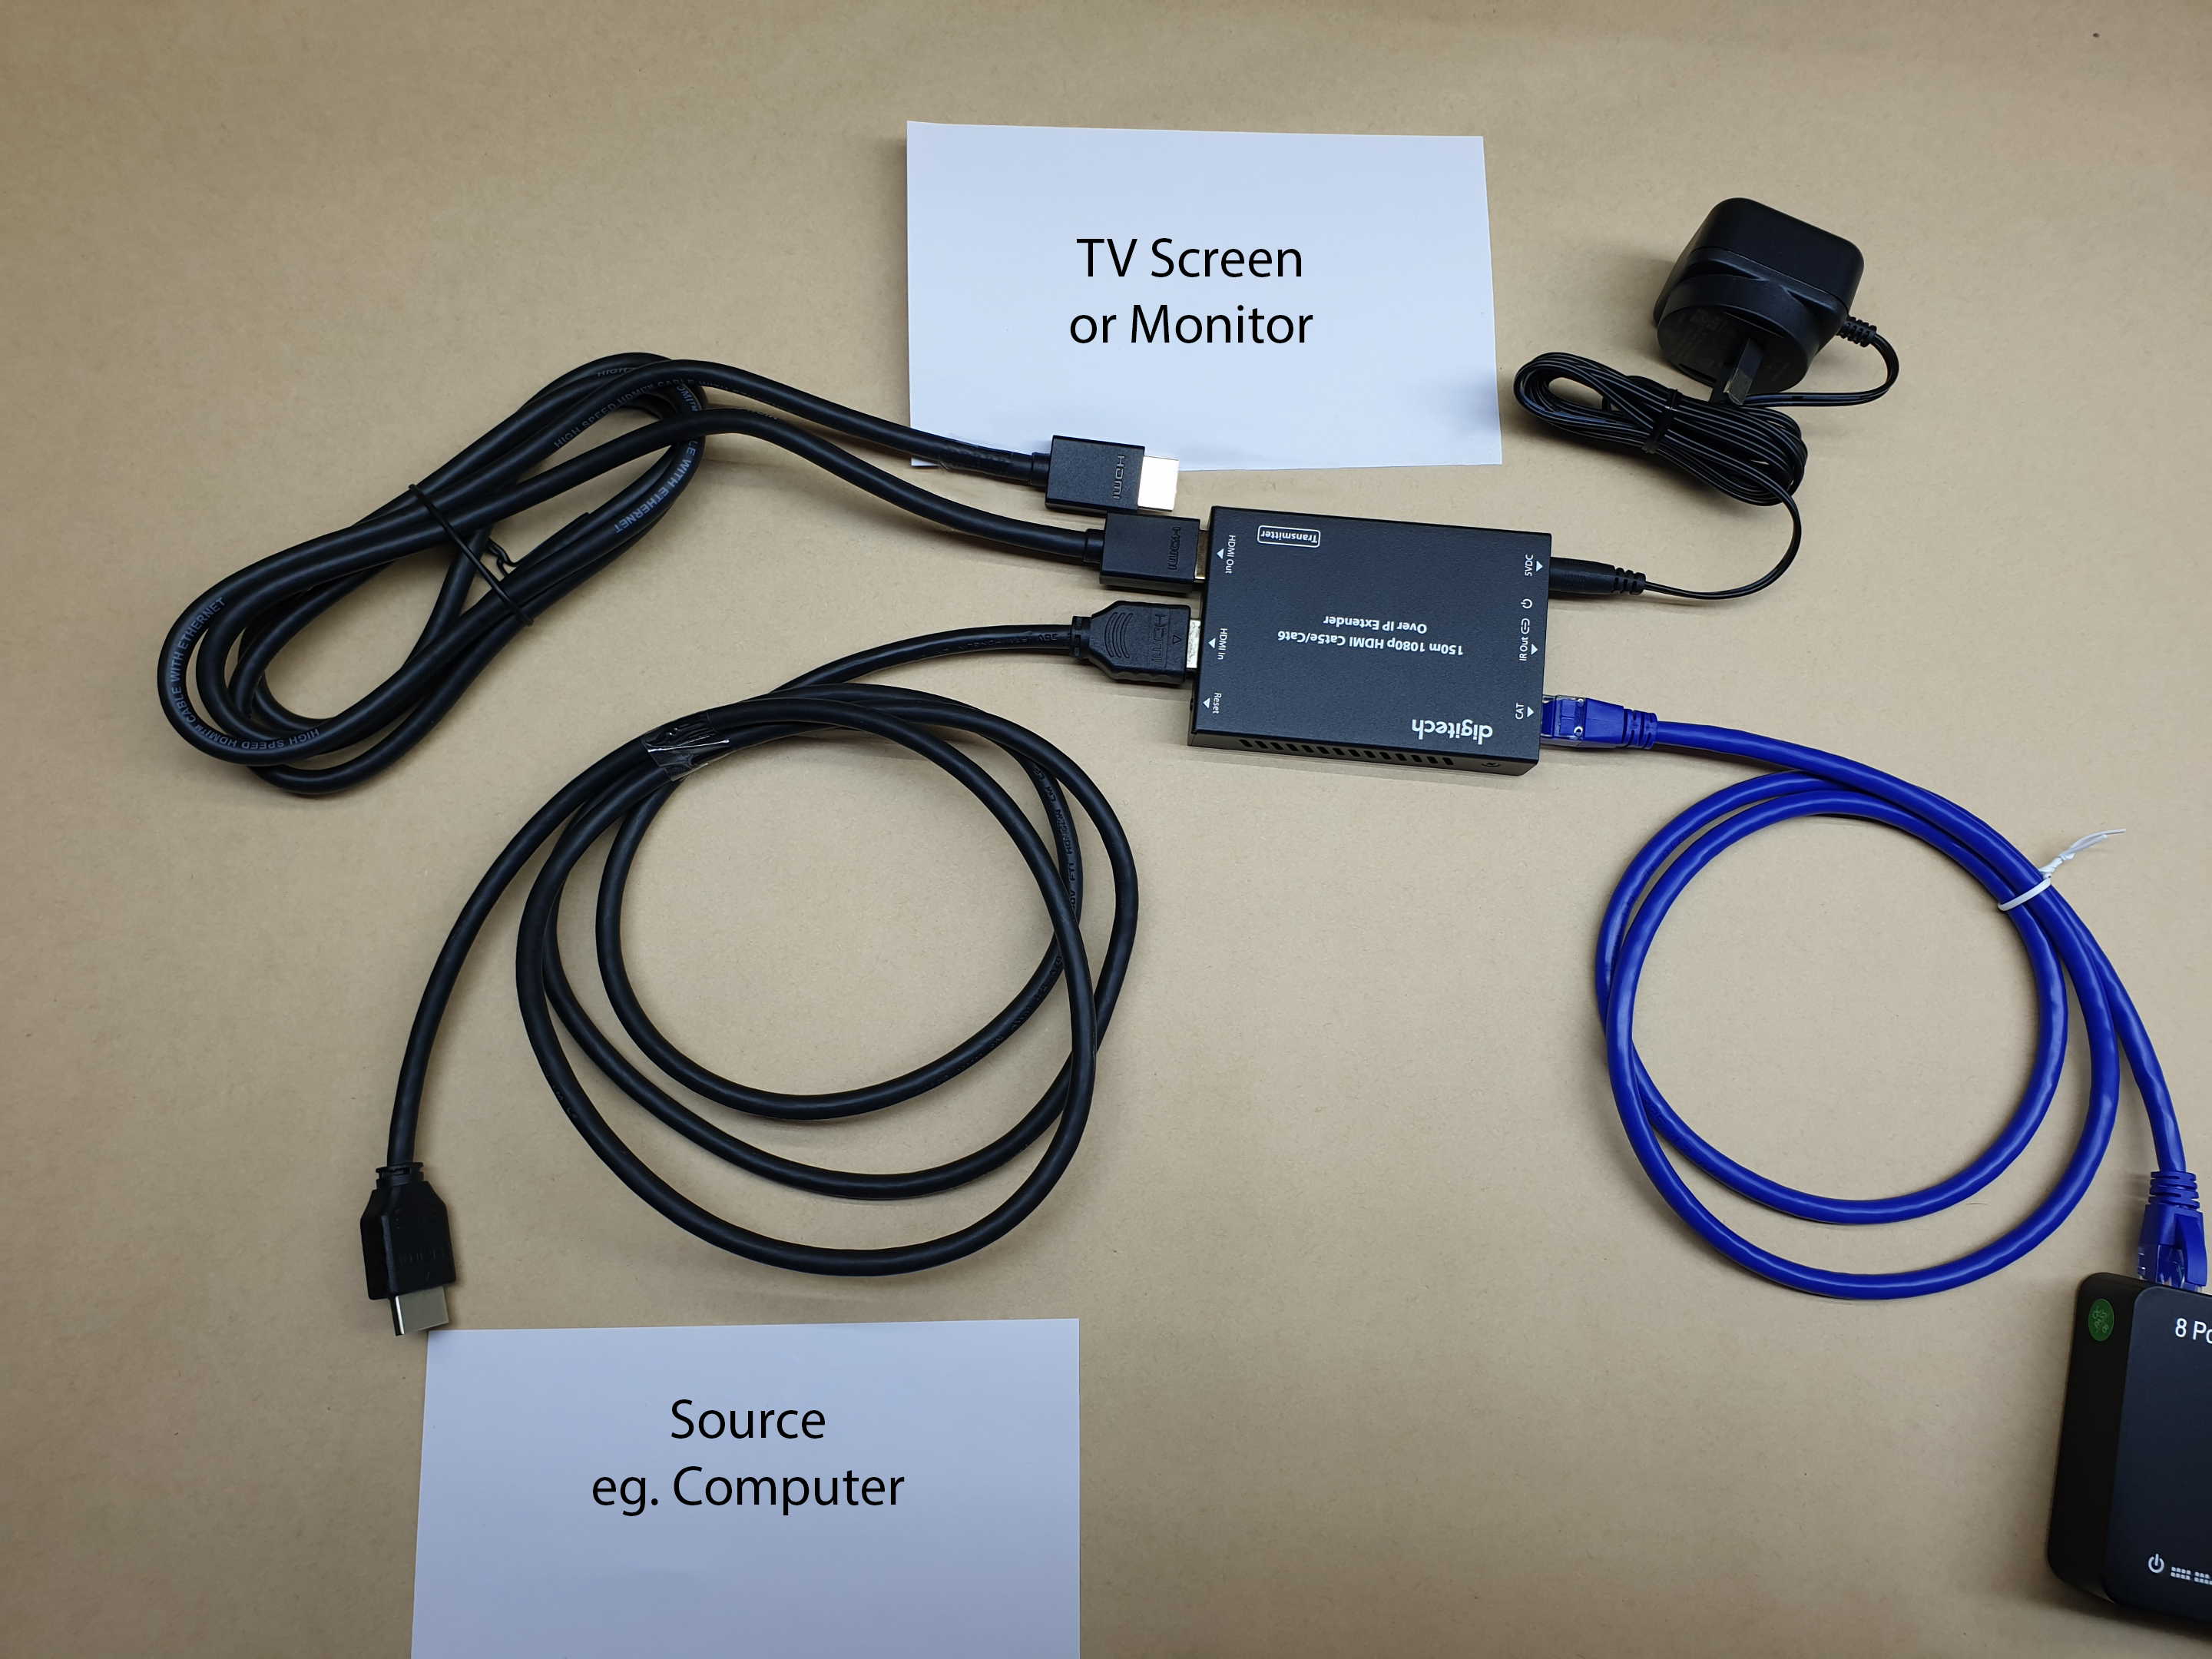
If you just want a point-to-point display, like sending a signal from a Pay TV box or some similar service to another room that has a screen without smart capability, then the non-IP systems are fine. It is still much easier to run Category/ethernet cable, either premade or terminated yourself, than other cable types. In the example that we cover later, we use one of these to send display from a surveillance system recorder in the garage of a home, to one of the inputs on the TV in the lounge room.
Most HDMI extenders that feature converters need external power: the power available on the HDMI signal is not enough. Some use extra plugpacks, while some use USB connections. The latter can be powered off most screens via a suitable USB port, while the plugpack will need somewhere to plug in. This is an important consideration for some wall-mount situations but as it is generally the transmitter that is powered, and most signal sources are not wall-mounted, it won't be a problem often. However, you may need to check if you have a spare power socket.
Resolution is an important point to consider. Some cheaper extenders are limited to 1080p or even 720p! Others can handle high definition 4K, and there are some inbetween. The size and length of the cable can also change the operable resolution, with the higher resolution only working at shorter distances. For example, one 4K unit might say '70 metres' on the box, but only transmit 1080p to this distance, with 4K limited to less distance.
Compatibility with protocol is important. There are different HDMI standards around, and newer, more capable encryptions are invented regularly. Most are backwards-compatible but be aware that an older extender may not transmit all of the features of the latest and greatest source like a streaming box, instead reverting to the older standard of the extender. It is rare to find systems to not work at all, as most sources and screens have older standards programmed in for compatibility. Just make sure that, for example, you are not buying an older HDMI 1.2 system to work with, say, HDMI 1.4 hardware.
Some systems, usually point-to-point systems, include the ability to transmit IR signals the other way. In other words, you can take the remote for something like a Blu Ray player or a Pay TV type streaming box with you to the other screen, say in the games room, and use the remote to control the device displayed on the other screen, despite the distance and lack of line of sight.
One final point is HDMI pass-through. On the transmitter end, some units have a pass-through where there is a HDMI in and a HDMI out. This so more equipment can be connected down the line. For example, you can take the output of a streaming box like Pay TV or any of the others, to the HDMI extender input, then the output to the nearby TV. The extender then sends the same signal to the remote TV.
Point to point systems are the easiest to use. As mentioned above, they are isolated systems incompatible with networks or other hardware. Some do have extra receivers available for a one-to-many set-up, however. These all use network cable, but not an actual network. They are generally cheaper than IP systems and only require a single cable. You can buy Cat5e and Cat6 cables up to 30m at retail, and you can make them longer yourself.